


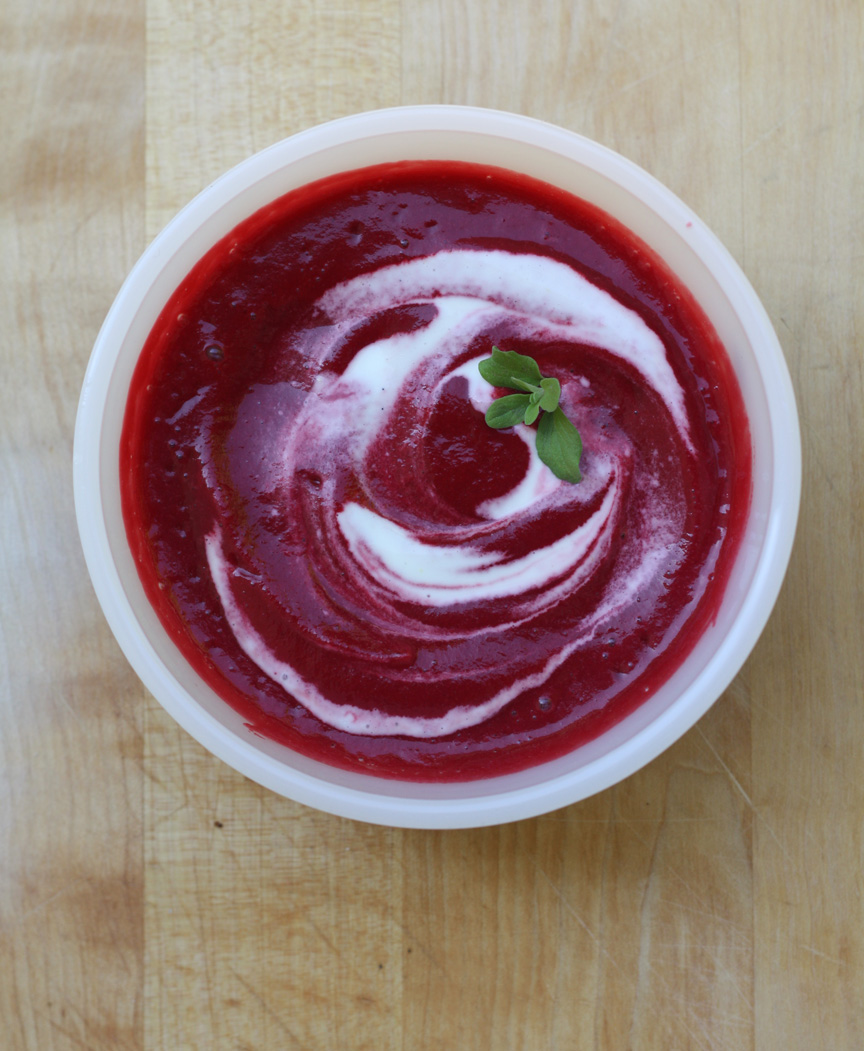
Roasted Beet Soup
On January 19, 2013 by sixtyacrebakerI love borscht. Really i do. Especially on chilly nights when stick to your ribs is a necessity. Sometimes, however, I like my beet soup to be rich and creamy without the meatiness of a borscht. That is when I make this. It is vegetarian vegan if you don’t add the creme fraiche & butter. Light in heft, but not in flavor.
Roasted Beet Soup
1 lb beets-peeled
olive oil
2 leeks–white and light green only–cleaned and cut in half
2 cloves garlic–peeled
2 sprigs fresh thyme
1 bay leaf
4 cups vegetable broth (or water)
juice of 1/2 lemon + 1 tsp finely grated zest
knob of butter (optional)
1/4 tsp white pepper to taste (or more to taste)
salt to taste
serve with creme fraiche
Preheat the oven to 350F. Fill a roasting pan with the beets, leeks and whole garlic cloves. Cover lightly in olive oil and a bit of kosher salt. Toss to make sure the vegetables are all lightly coated in the oil. Roast until fork tender (about 1 hour). Allow the vegetables to cool slightly and then cut into medium size pieces (1 1/2-2″). Toss the vegetables (beets, leeks, garlic), along with any pan juices into a stock pot. Add bay leaf, thyme, lemon juice, lemon zest and cover with broth. Gently simmer for 25-30 minutes or until the vegetables are very tender. Remove the bay leaf and the thyme stalk. Toss in butter (if using) working in batches, whirl the soup in a blender or food processor, until smooth. If it becomes too thick, add a bit more broth (or water). Pour into clean stockpot as your batches reach your desired consistency. If you wish for smooth and silky soup, push the blended soup through a fine sieve. Add pepper and taste for seasoning. Serve hot with a dollop of creme fraiche stirred through.
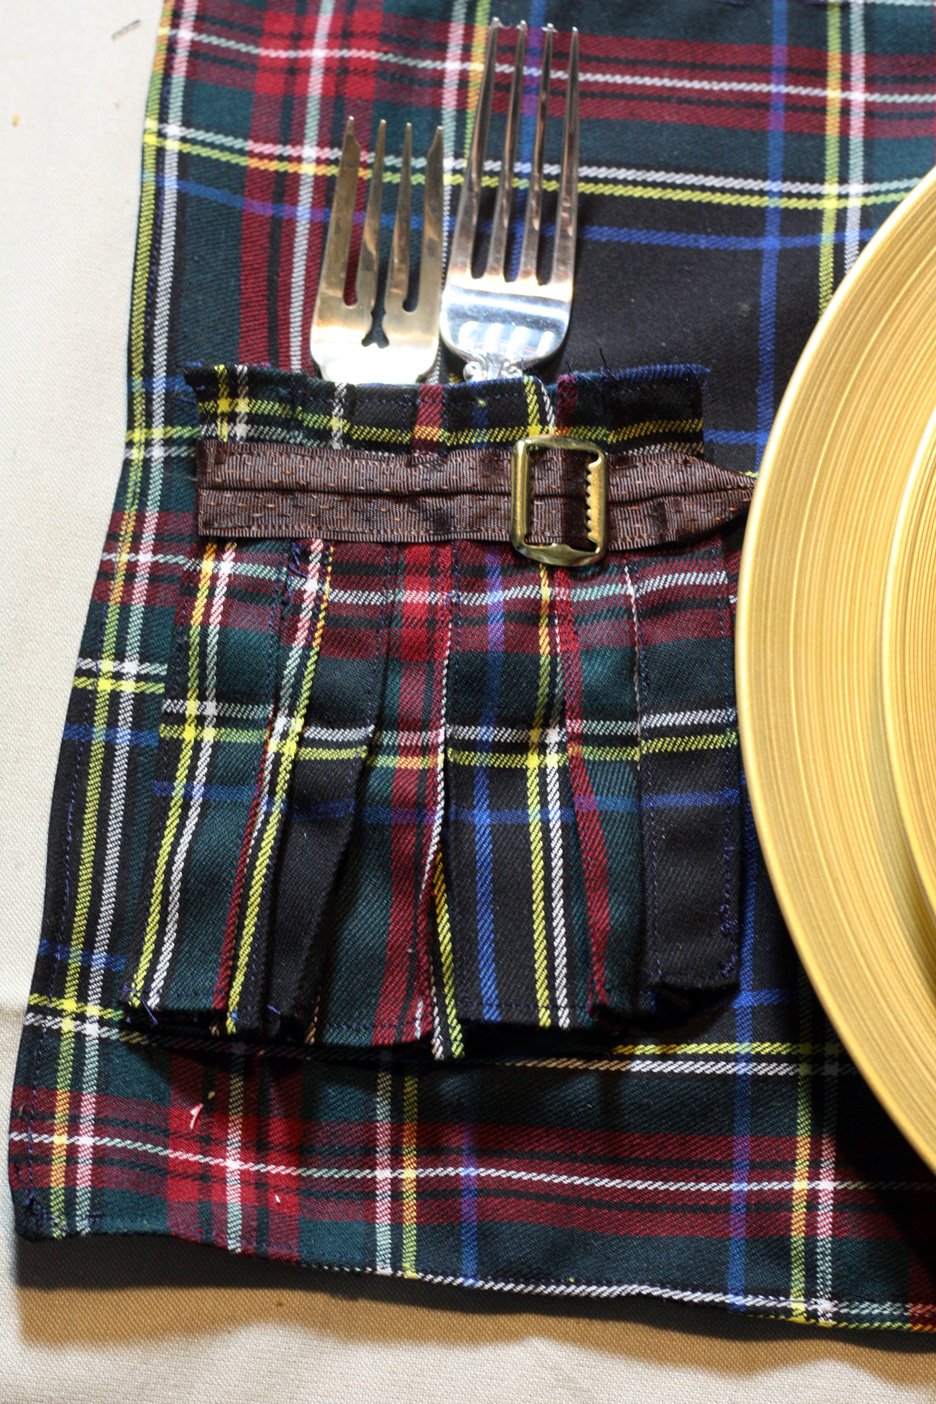
Scottish Kilt Placemats
On January 14, 2013 by sixtyacrebakerI‘m planning a Burn’s Night’s supper. It happens on January 25th and is a night of literature, revelry and haggis. I thought it might be fun to have place settings that match the theme. Plaid and kilts seem very Scottish to me.
these are time consuming, but easy for anyone with basic sewing skills. if you have any questions about the tutorial or method, please leave me a comment and i will get back to you in a jiffy
Click here for Tutorial
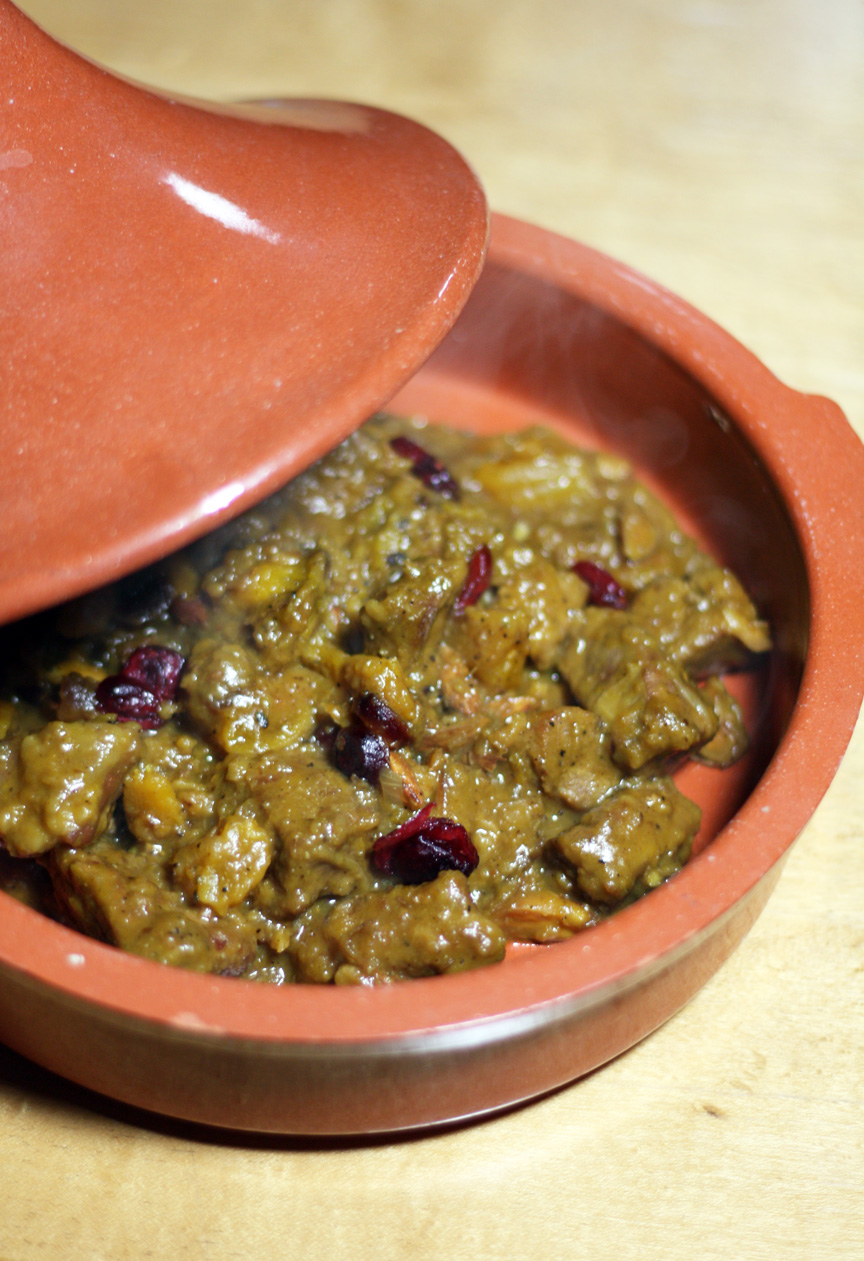
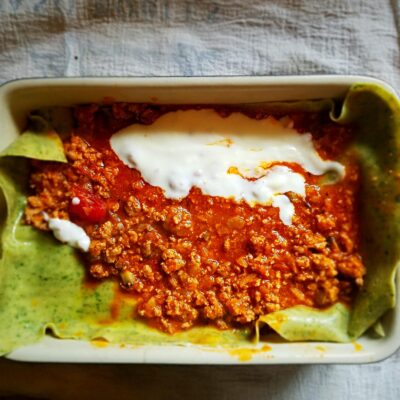
Venison Tagine
On January 12, 2013 by sixtyacrebakerI may have mentioned before a time or three that my husband is a hunter. It affords us a freezer full of rich meats antelope, boar, venison and elk. Venison works well with the heady spices found in an african pantry.
Venison Tagine
serves 4
1 1/2 lbs venison (or lamb) cut into chunks
1/2 cup (about) flour
olive oil
salt to taste
3/4 tsp pepper
1 Tbs garam masala-after grinding*
large pinch saffron threads
2 cups warm water
1 medium onion-grated
1 clove garlic-finely chopped
generous handful dried cranberries or cherries
1/2 cup dried apricots, cut into slivers
1 lemon-grated zest and juice
1 cup blanched almonds
1/4 cup honey
2 Tbs unsalted butter
Dissolve saffron in the warm water. Preheat oven to 350F. Heat olive oil in bottom of heavy bottom (oven proof) pot or dutch oven. Coat the venison pieces in flour and brown in olive oil. Once brown, add in onion and cook until the onion just begins to brown on edges. Toss in garlic and give it a few stirs. Allow to cook a couple of minutes. Add saffron water, cover and place in preheated oven. Cook until venison is very tender about 45-60 minutes). Remove from oven, add in cranberries (or cherries if using), apricots, honey, lemon zest and juice, almonds, and honey. Place over medium heat on stove and cook for about 15 minutes more. If it appears to be too dry add a bit of warm water just to loosen a bit. if it is too watery, remove the top and cook and stir to slightly thicken. Remove from heat and stir in butter just before serving.
serve with couscous or over rice
*i use whole spices-toast them and then grind in mortar and pestle…but if you can find garam masala in your spice aisle, by all means use it!enison tagine
serves 4
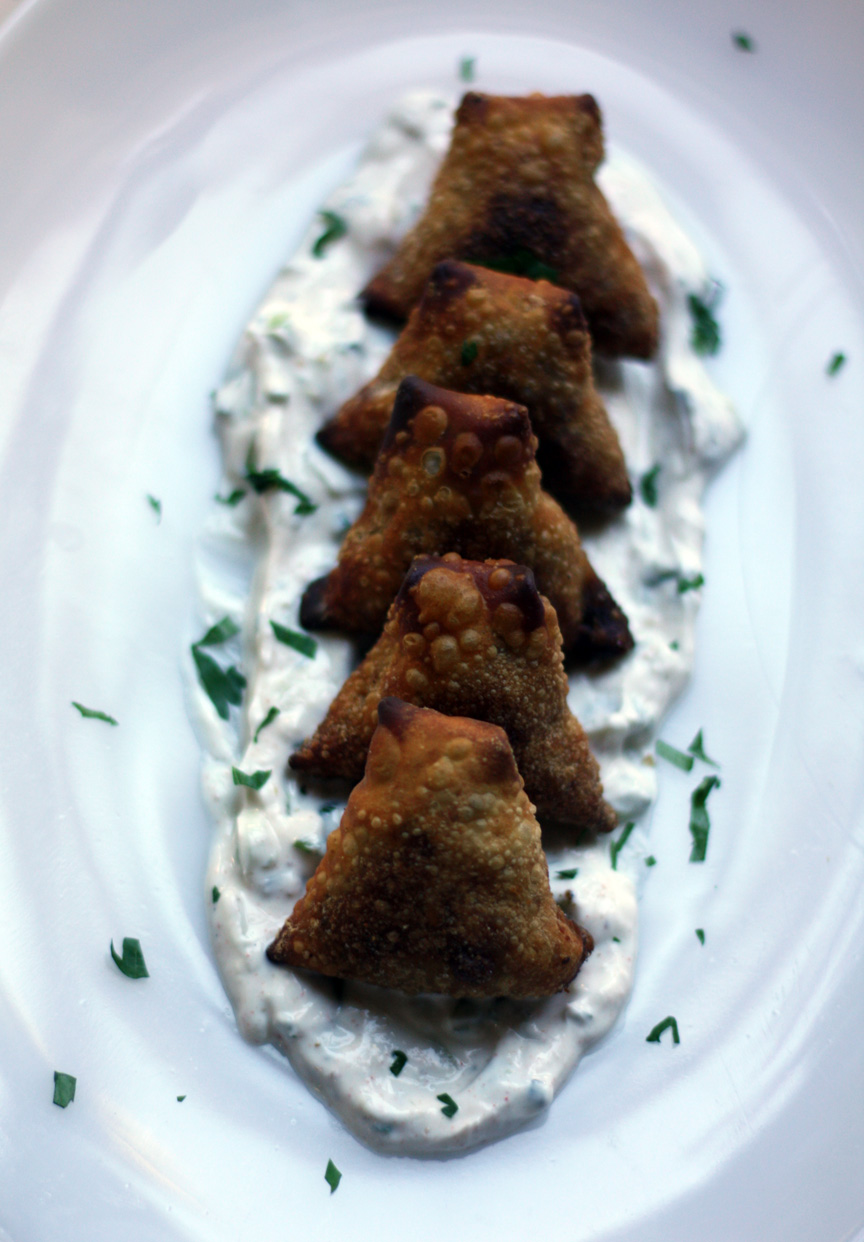
Beef and Potato Samosas
On January 3, 2013 by sixtyacrebakerOn a trip to India I was slightly obsessed with street food. I had convinced myself, I would find authenticity and flavor only imagined. What i hadn’t considered was how difficult it would be to convince others to stop the car, and dig in. One afternoon, while sitting in the hotel bar. overlooking the Taj Mahal, I inquired if the kitchen could fix us a few snacks typical of what locals might eat. Surprisingly, they couldn’t accommodate unless we took the meal in our room. You see, my request of samosa, pakora and the like wasn’t upmarket enough for the hotel. If we ate it in secret, they would fix it.
fine.
by.
me.
Lounging on our hotel room balcony, watching the sun set over the Taj, while sipping cocktails, is a treat Doing it while enjoying a loaded platter of savory treats with spicy chutneys. is an experience i won’t soon forget.
Beef and Potato Samosas
(while the samosas served did not contain beef, i find it a great addition)
1 lb ground beef (max 15% fat)
1 1/2 cup russet or yukon gold potatoes–peeled and cubed
3 Tbs vegetable oil
1 cup onion–finely chopped
1 tsp garlic–finely minced
1 tsp ginger–peeled and finely minced
1 tsp thai bird chili–finely minced
juice of half a lime
2 Tbs fresh cilantro–finely chopped
square wonton wrappers (small for appetizer size)*
oil for frying
Boil potatoes in salted water. Mash and set aside. Saute onion in vegetable oil until golden. Add ginger, garlic, and chili. Stir for about 3 minutes. Add Masala and continue to stir. Add ground beef and continue to cook until no longer pink. Let cool. Stir in lime juice, cilantro and mashed potato.
Make a cone with the wonton wrapper, sealing sides with water. Again using water to seal, close the cone and set on a cookie sheet, lined with parchment paper and dusted with cornstarch. You may refrigerate for several hours at this point, or freeze for future use.
Heat oil in heavy bottom pot to 350F. Drop samosas in a few at a time, careful not to crowd the pan. Cook until nicely browned. Serve warm or room temperature with raita and a variety of chutney.

Masala
1 Tbs whole coriander seed–toasted and ground
1 tsp whole cumin seed–toasted and ground
1/4 tsp cayenne
1/4 tsp ground black pepper
1/4 tsp turmeric
small pinch cinnamon
1 tsp kosher salt
Boil potatoes in salted water. Mash and set aside. Saute onion in vegetable oil until golden. Add ginger, garlic, and chili. Stir for about 3 minutes. Add Masala and continue to stir. Add ground beef and continue to cook until no longer pink. Let cool. Stir in lime juice, cilantro and mashed potato.
Make a cone with the wonton wrapper, sealing sides with water. Again using water to seal, close the cone and set on a cookie sheet, lined with parchment paper and dusted with cornstarch. You may refrigerate for several hours at this point, or freeze for future use.
Heat oil in heavy bottom pot to 350F. Drop samosas in a few at a time, careful not to crowd the pan. Cook until nicely browned. Serve warm or room temperature with raita and a variety of chutney.
Samosa Wrappers
2 1/2 cups flour
1 tsp kosher salt
1/3-1 cup water
sift flour, add salt. add water a little at a time and mix until you have a soft, but not sticky dough. cover and let sit for about 30 minutes. divide dough into 6 portions. flatten each portion into a disk. roll each disk to a 6″ circle. cover and let rest about 15 minutes. roll each circle further into a 12″ circle. heat a griddle and toast each circle slightly (but do not fully dry out). cut each circle into quarters. fashion each quarter into a cone and fill. use water or egg wash to seal the edges and close the wrapper over the filling. fry in 350F oil until golden brown.
you may alternately use wonton wrappers. they are not quite the same as homemade, but work just as well
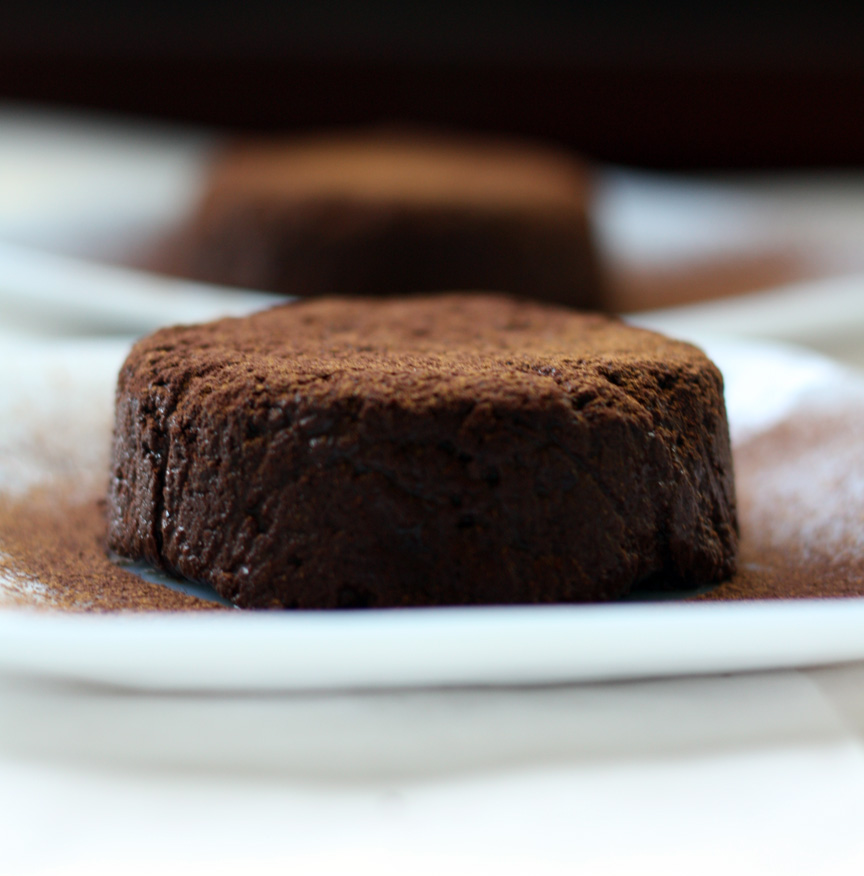
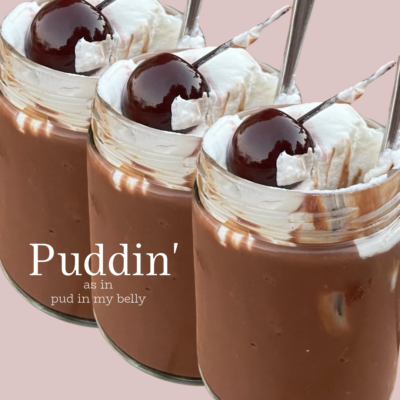
Mayan Truffle Cake
On December 21, 2012 by sixtyacrebakerIn celebration that today is rather than isn’t, I am sharing a special treat to honor the Mayans. They loved chocolate as much as I.
Mayan Truffle Cake for two
3/4 cup whipping cream
1/4 tsp salt
1/8 tsp nutmeg
1/4 tsp cinnamon (plus more for dusting)
1/8 tsp smoked paprika
4 oz bittersweet (70%) chocolate–melted
cocoa powder for dusting
Spray 2-8oz ramekins with pan spray,then line with plastic wrap. Set aside. Pour cream in a bowl large enough for whipping. add in the salt, nutmeg, 1/4 tsp cinnamon and smoked paprika. Whip to soft peaks. Allow to warm a little (you do not want the whipped cream to be super cold for the next step). Add about 1/4 of the whipped cream to the chocolate mixture and stir until it has been fully incorporated. This will lighten the mixture a bit, which will make it easier to fold in the cream in the next step. Gently fold the remaining cream into the chocolate mixture. If your cream is too cold at this point, your chocolate will clump up and not incorporate well into the mixture, so be careful. Pour into prepared ramekins, smooth down the top and place in refrigerator for about 2 hours or longer, if you have the time.
When ready to serve, invert onto serving place and dust with cocoa powder and cinnamon. Serve with rich dark coffee
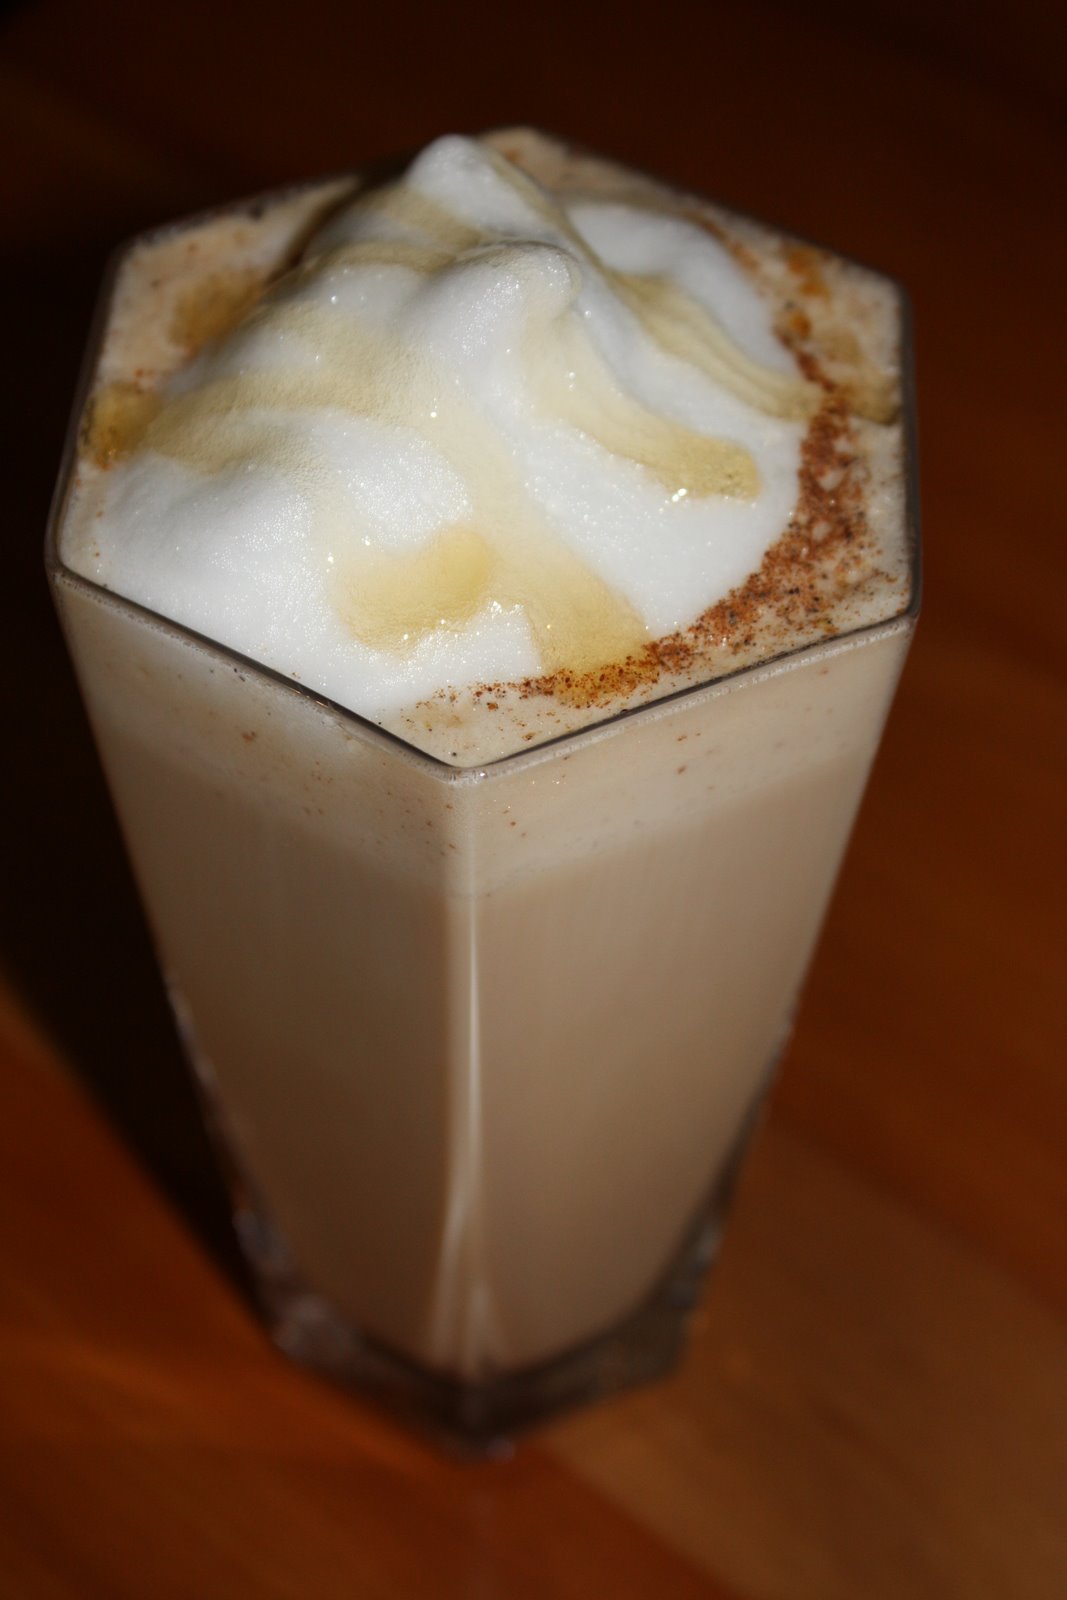
Honey Spiced Latte
On December 10, 2012 by sixtyacrebakerI mostly drink tea; but this time of year, i love a festive coffee drink that isn’t filled with syrups and sugar. Because we have honey bees, I have a nice fresh stock of honey on hand at all times. Paired with warming spices, it is a delicious additiont to a hot cup o’ joe.
Honey Spiced Latte
perfect for a cool day, or apris ski
1 Tbs honey
dusting of cardamom
dusting of cinnamon
dusting of ginger
4 oz of hot espresso
6 oz steamed milk and foam
Put the honey in the bottom of the mug or glass. Dust the spices over the honey. Pour the hot espresso over and stir until the honey melts. Add milk to your liking. Top with foam and dust with a bit more cinnamon and ginger. Drizzle honey on top.
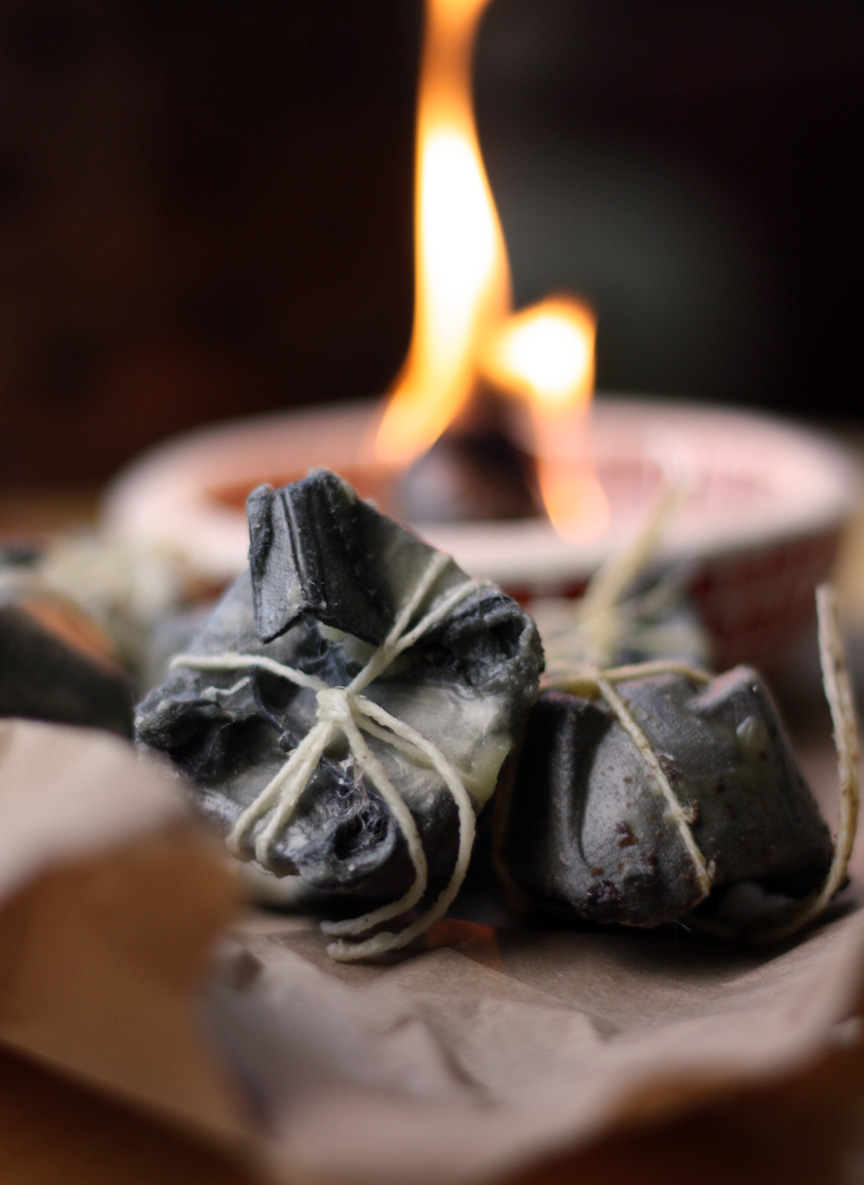
Homemade Fire Starters
On November 30, 2012 by sixtyacrebakerI love the chill of winter. The scent of snow and chimney smoke make me swoon. No matter my hurry, a crackling fire shifts me to pause if only briefly. I repurpose simple household items to make these useful goodies.
Fire Starters
paper egg cartons
dryer lint
cotton kitchen twine
bees wax or leftover candle bits
Place the wax/candles in an old can or jar with a wide mouth and place in a saucepan with water filled so it comes about halfway up the jar. Place over low to medium heat, to indirectly melt the wax. Meanwhile. cut the top off the egg carton, and then cut the egg cups apart. Tightly pack lint into each cup, leaving a bit of headroom, so you can close the tops, but folding the corners in. Tie into a bundle using kitchen twine, allow for a fairly long wick, so you can use it to dip the cup into the wax. Once the wax is liquid, dip each cup into it, allow it to be fully immersed. I use disposable chop sticks or skewers to shimmy the cup, to make sure it is fully covered. Lay on wax or kitchen paper to cool. Once cool, trim wick and you are ready to go!
the wax is used to keep the starters waterproof…which is great for campers and hunters. if you will be using the firestarter in your home, you may not want to add this step. i always do, because i love the smell of beeswax
if you really jam pack these with lint, they will burn for 10 minutes or so and smolder for quite some time as well. i find it enough time to get the kindle lit and the logs on their way
Snow Globe Cupcakes
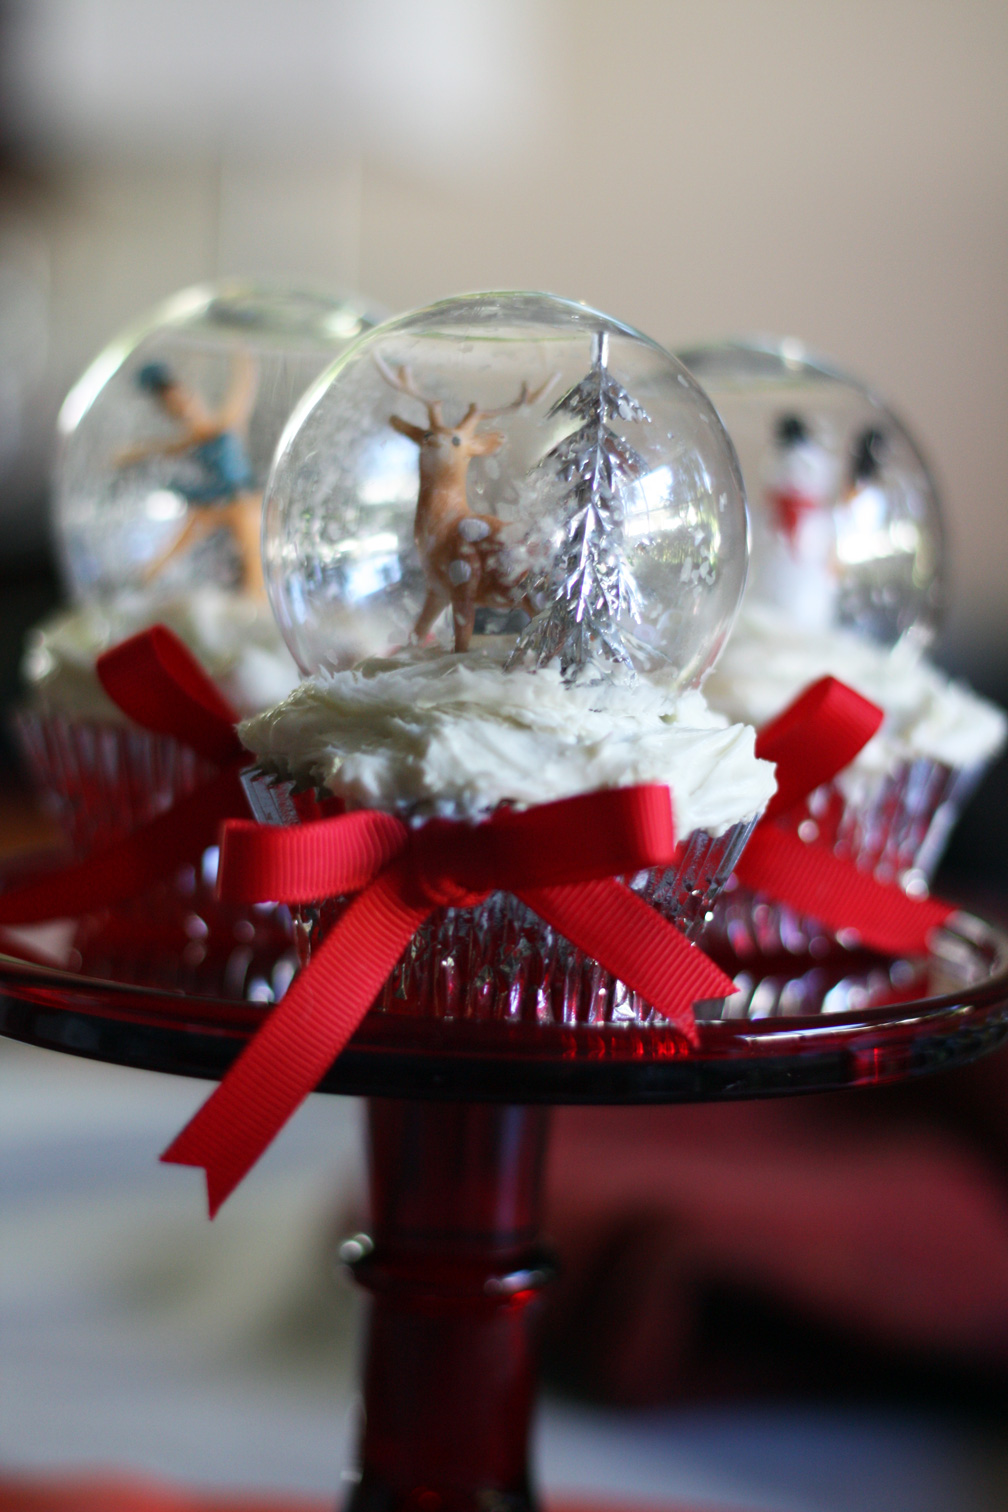
On November 19, 2012 by sixtyacrebakerI love snow globes. When i see grand collections, a tinge of envy bubbles up; like plastic snowflakes in a whirl. It then turns to a settling calm, because, the last thing i need is another collection. Unless of course we are talking
edible. Like these little darlings. This is an incredibly simple project perfect for your holiday table.
Snow Globe Cupcakes
1 recipe of your favorite cupcake baked and cooled
my favorite
1 recipe of your favorite frosting
1 dozen plastic clear christmas balls
like these

cupcake toppers deer, trees, house in the woods; whatever your fancy
edible glitter in white
ribbon
imagination
using a sharp scissor or craft knife, cut the top off the ornament like so

Wash and dry the “globe” then sprinkle some of the edible glitter in the bottom. swirl it around. Most of the glitter will stick, what doesn’t will fall to the cupcake when you invert. If you want lots of “snow” in the globe, brush a bit of vodka on the inside of the globe, swirl the glitter. It will stick well, and the vodka will evaporate, eliminating any unwanted moisture. Frost the cupcake as you normally would, place your decorations on top, and carefully invert the globe over the top. Finish with a little bow
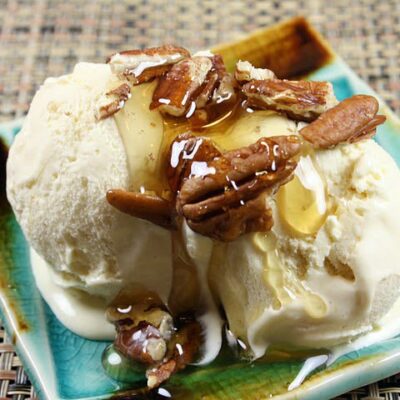
Simple Nut Tart
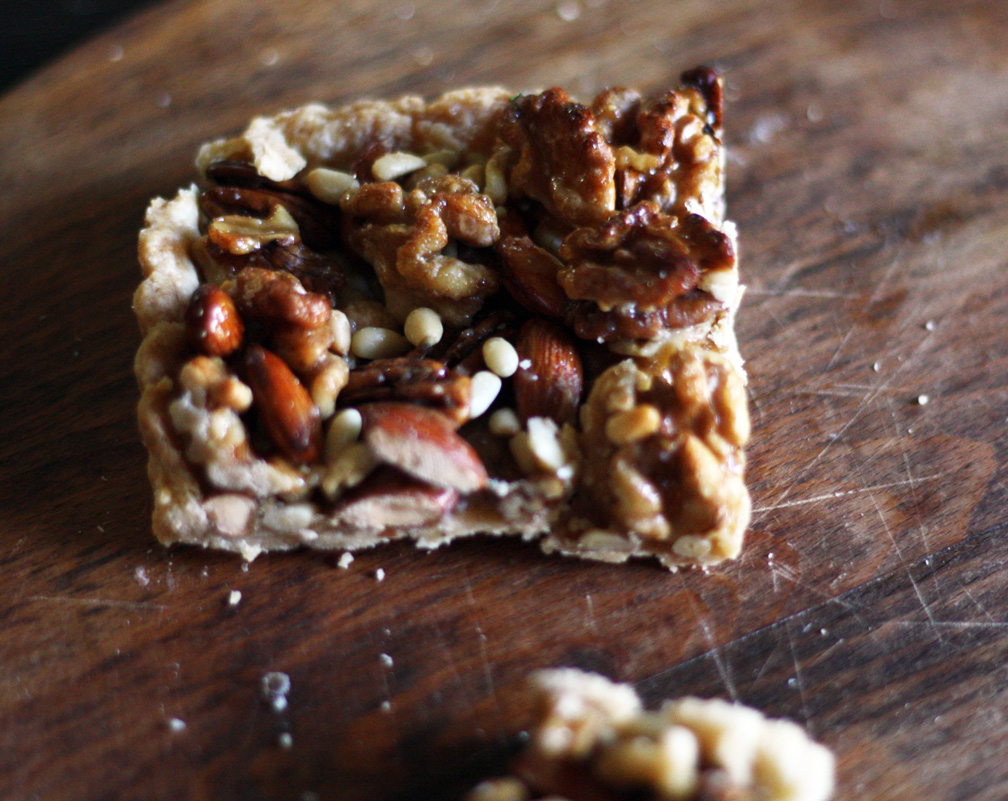
On November 10, 2012 by sixtyacrebakerDinner parties stump me sometimes. Being that I am trained in pastry, there is a certain expectation that dessert will be served. Andit will be from scratch. Normally not a problem, but i don’t always want to finish
with a substantial & heavy dessert. Sometimes a simple nut tart served with strong coffee and paired with a bowl of clementines, is just the trick.
Simple Nut Tart
1 pastry crust, pressed into an 8″ square tart tin–baked blind
1 cups walnut–toasted
1 1/2 cups pecans–toasted
1 cup almonds–toasted
1/2 cup pine nuts–toasted
1/2 cup dark brown sugar
1/4 cup granulated sugar
2 Tbs honey
1/2 tsp kosher salt
1/4 cup water
1 oz whiskey
preheat oven to 350. place all nuts in a large bowl and mix until well combined. put brown sugar, granulated sugar, honey salt and water in a heavy saucepan. stir well, place on medium heat and bring to a simmer. allow to boil for about 3 minutes. carefully add the whiskey and bring back to a boil. boil for 2 more minutes. the sugar should get a bit syrupy, but should not smoke or turn excessively dark. keep a constant eye on the sugar. remove the sugar from heat and tip in the nuts. stir well, giving each nut a coat of syrup. immediately tip into the baked crust, gently and spreading to cover the entire crust. pop into the oven for 5-7 minutes. remove from oven and allow to cool before serving.
variations
-add orange juice in place of some water in caramel; a pinch of orange zest & a sprinkle of cinnamon to the nuts
-the addition of fresh rosemary when stirring the nuts into the caramel (light hand) make for a beautiful winter tart
–drizzle with bittersweet chocolate or drench in dark ganache
-substitute vanilla for whiskey
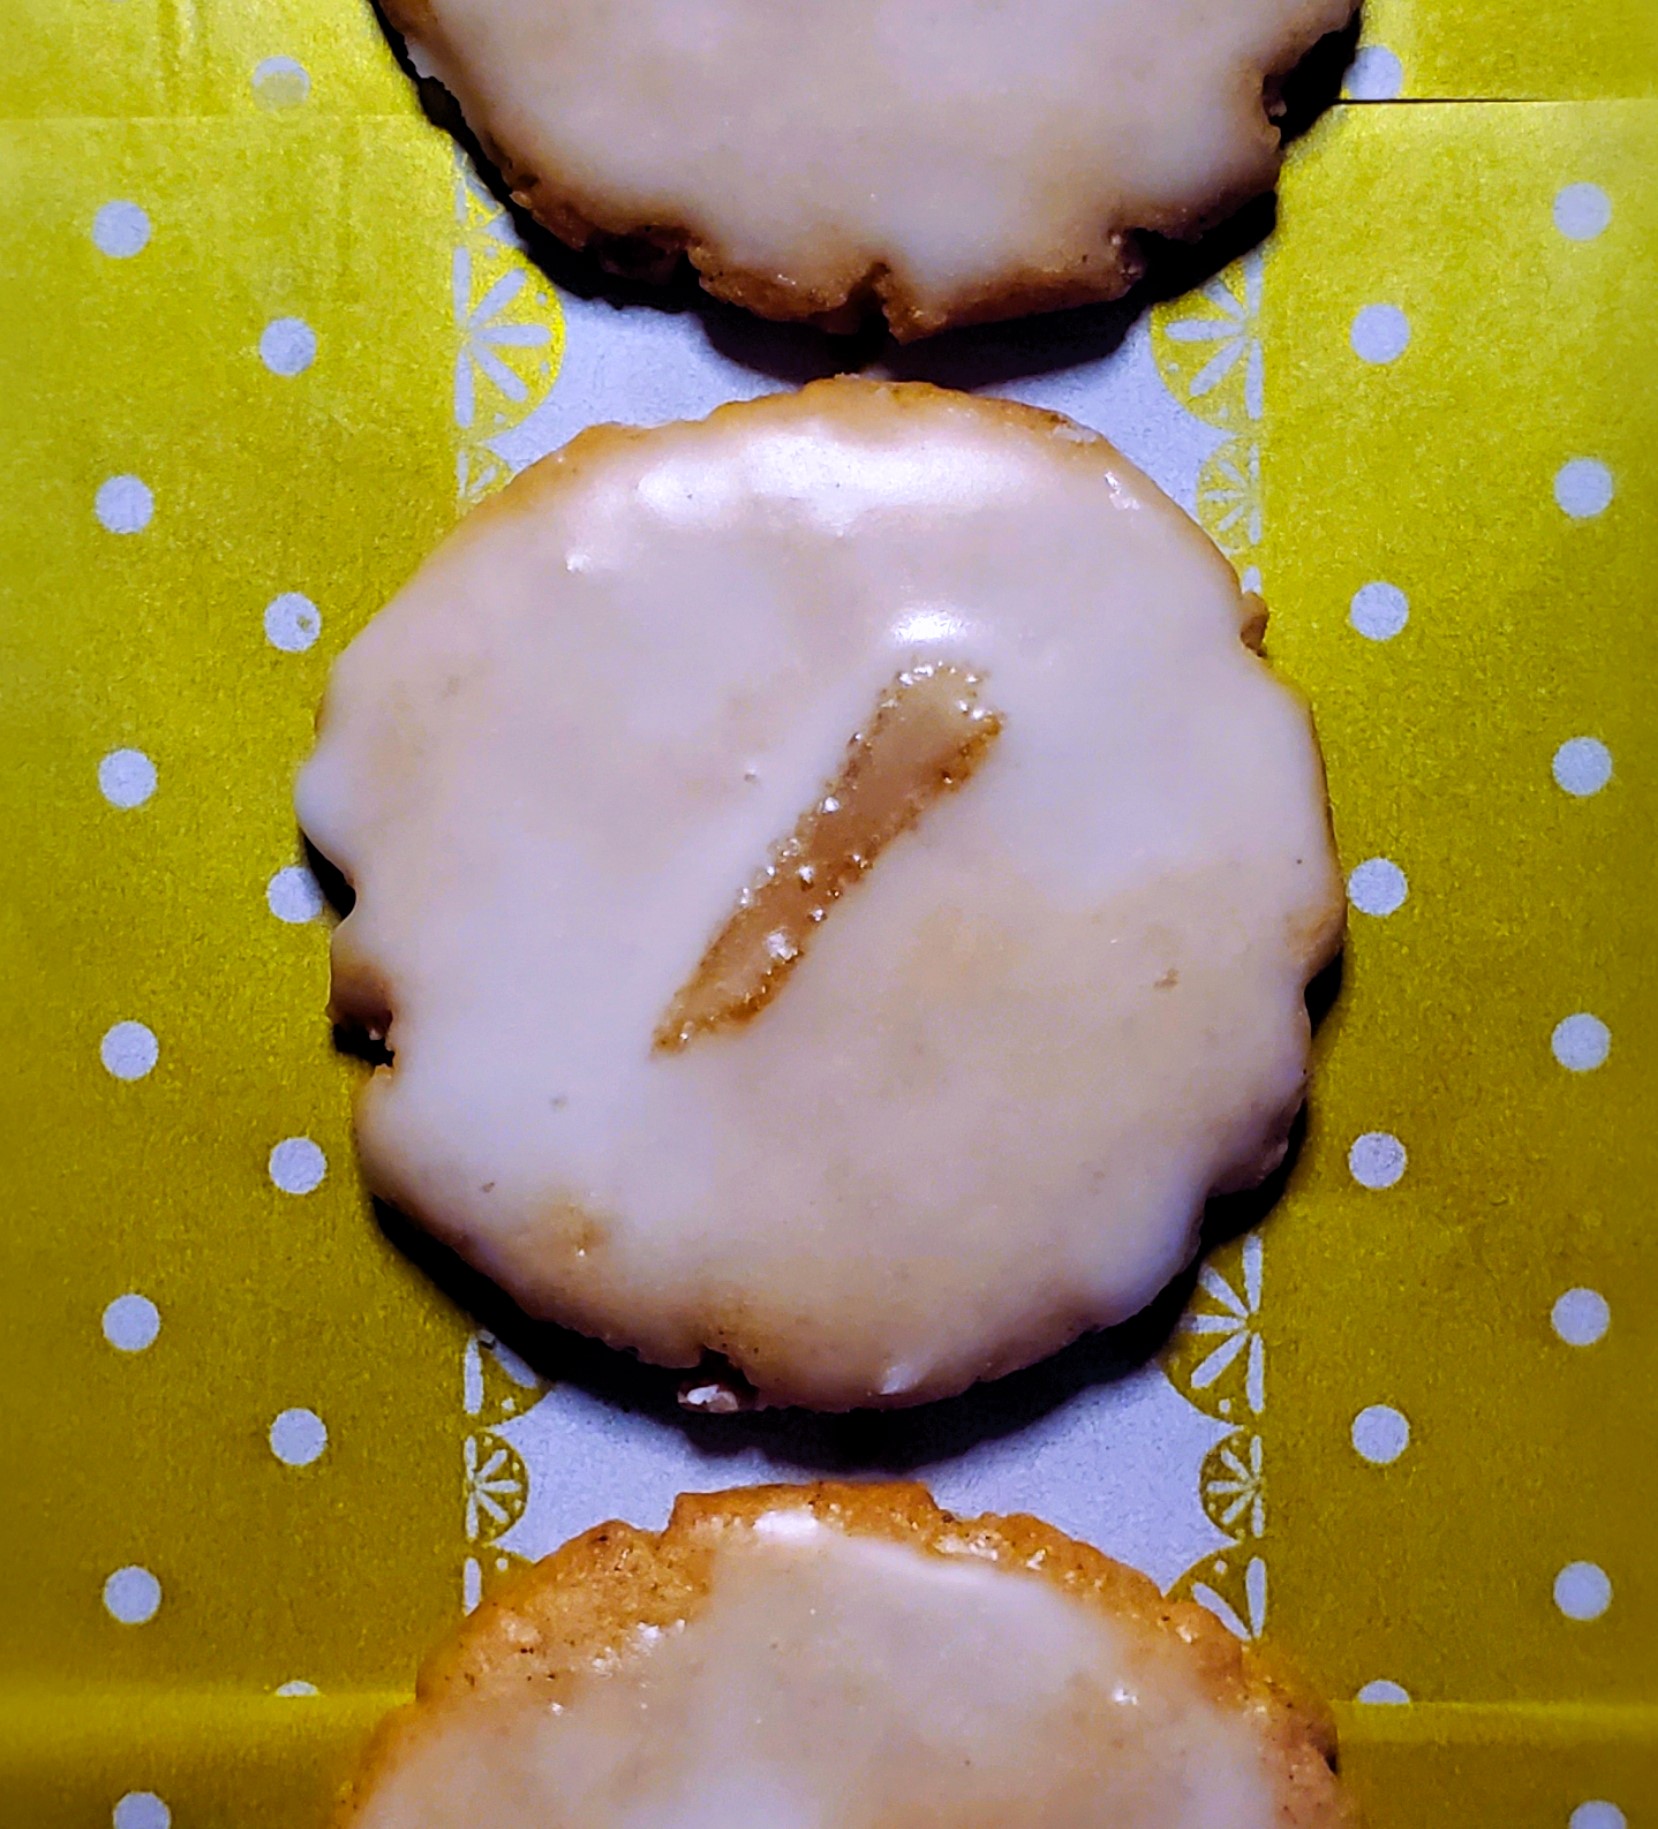
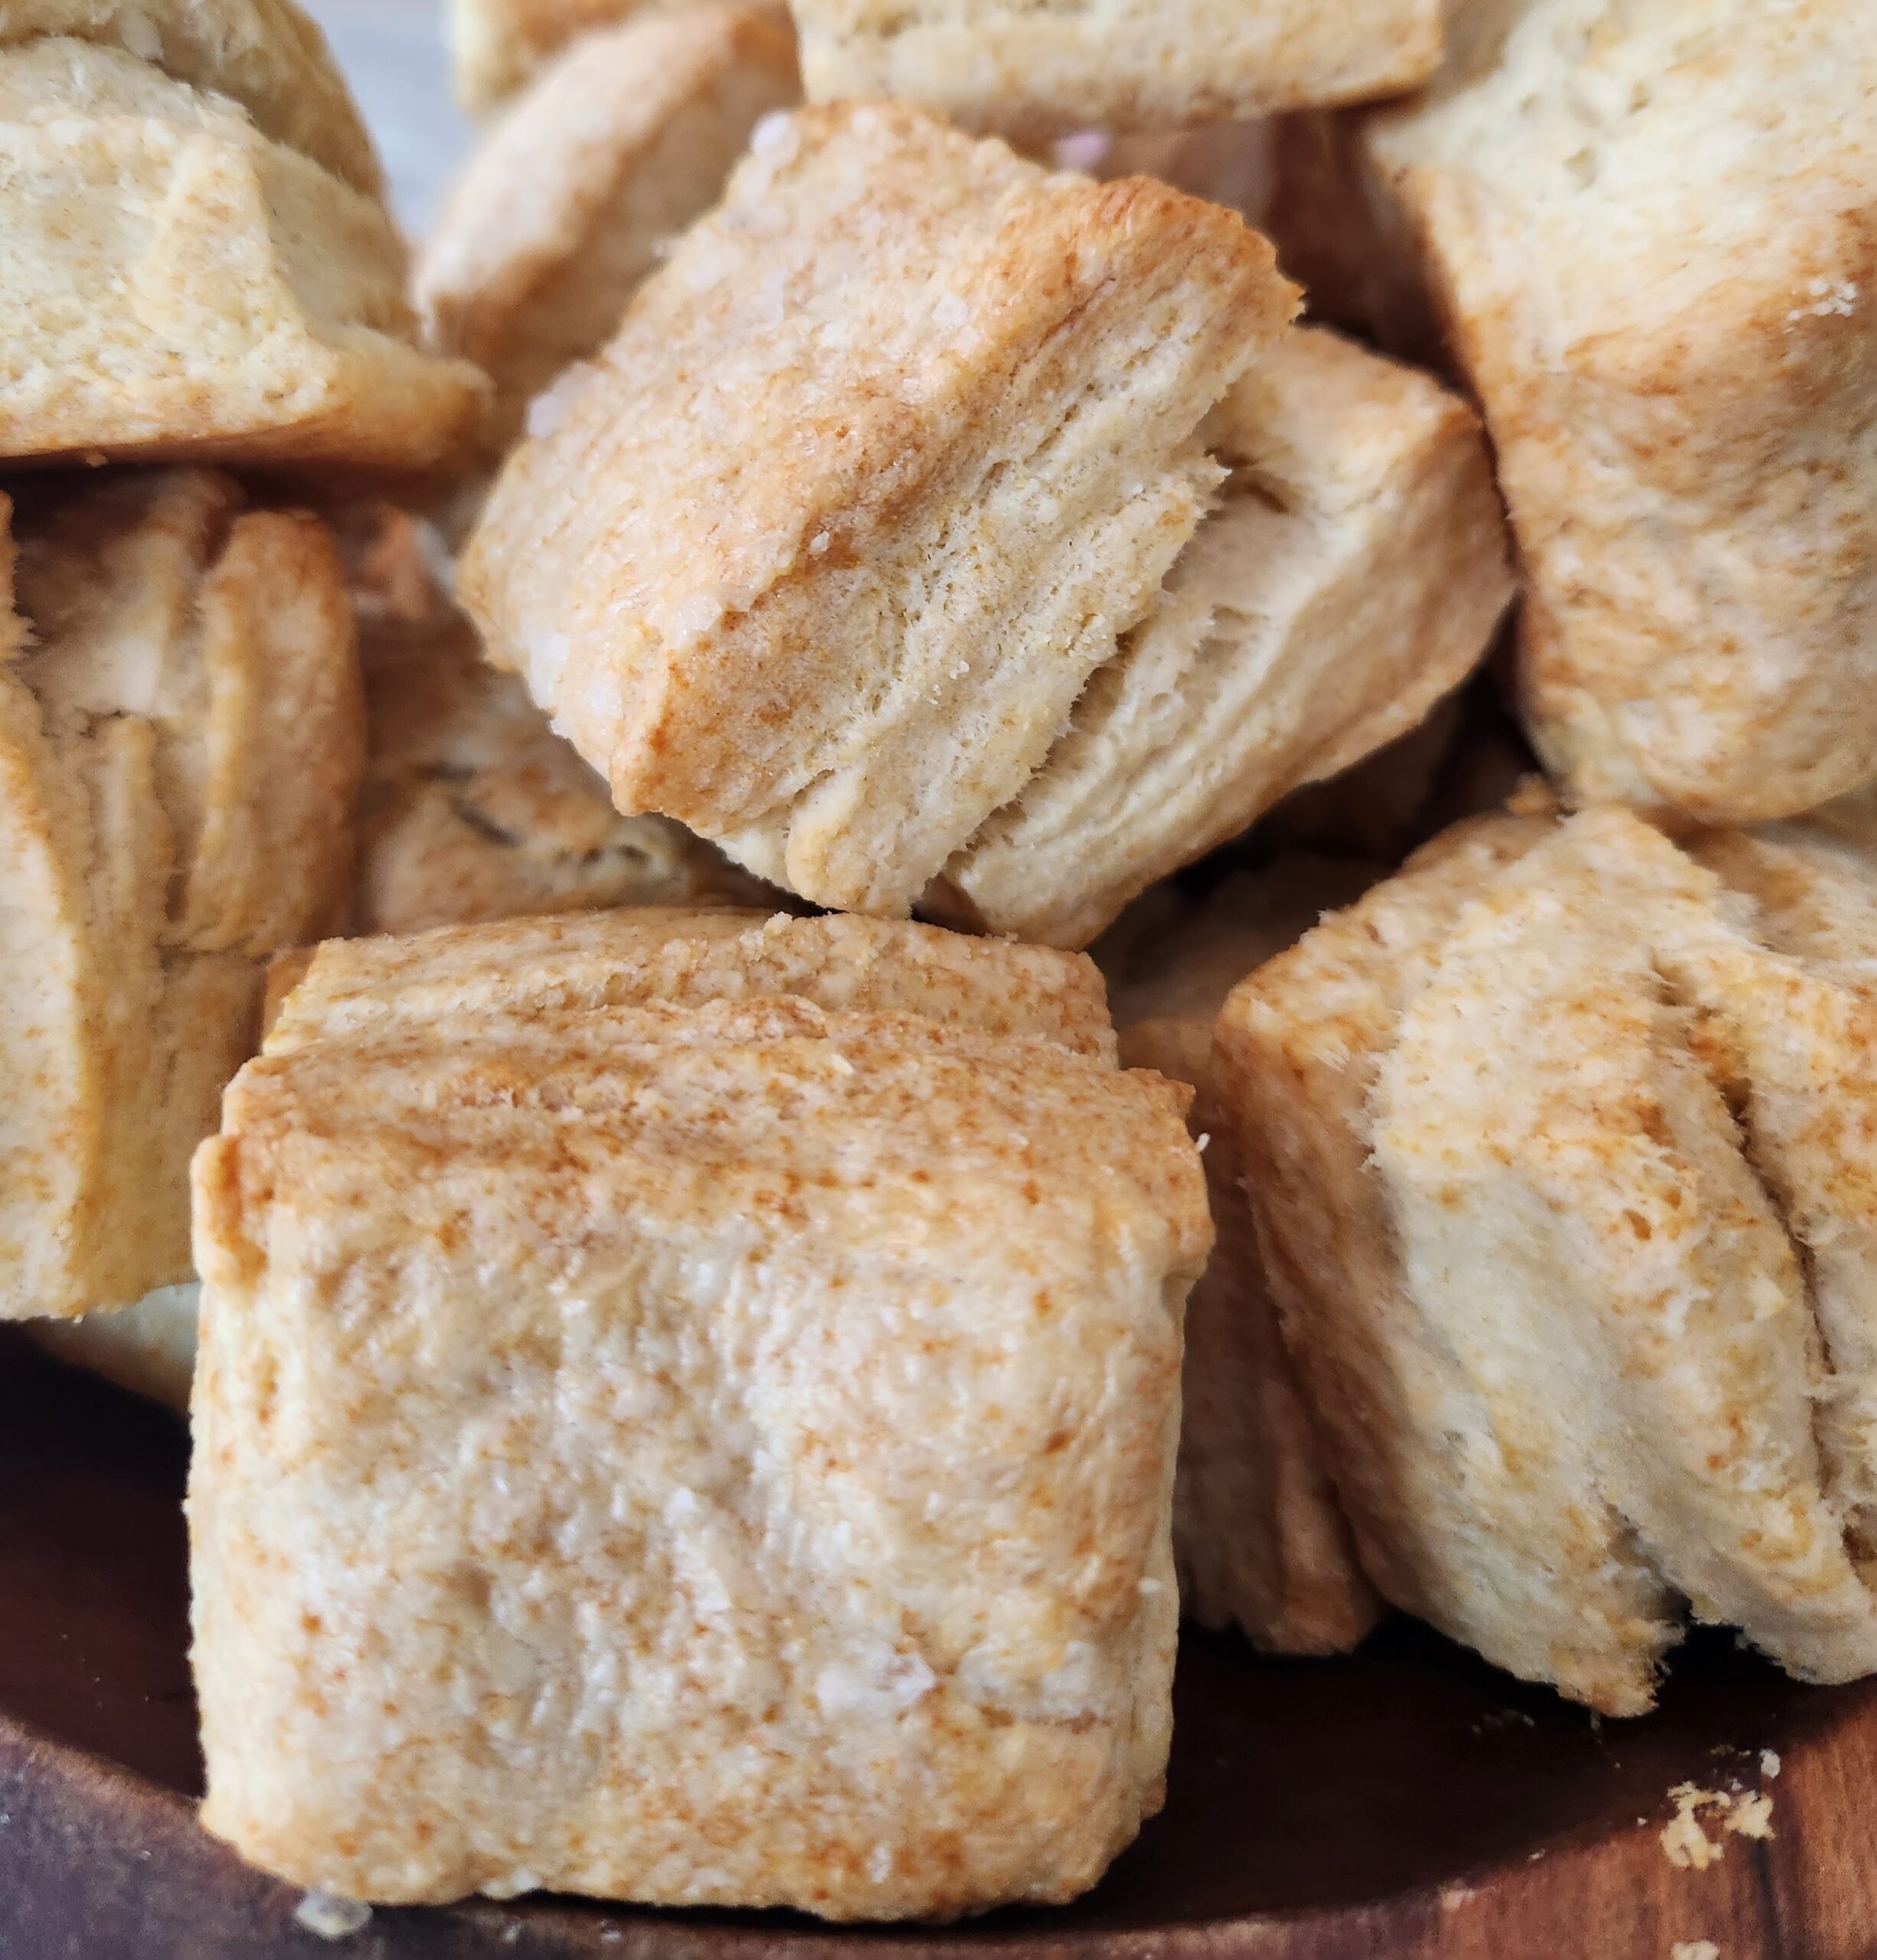
Buttermilk Biscuits
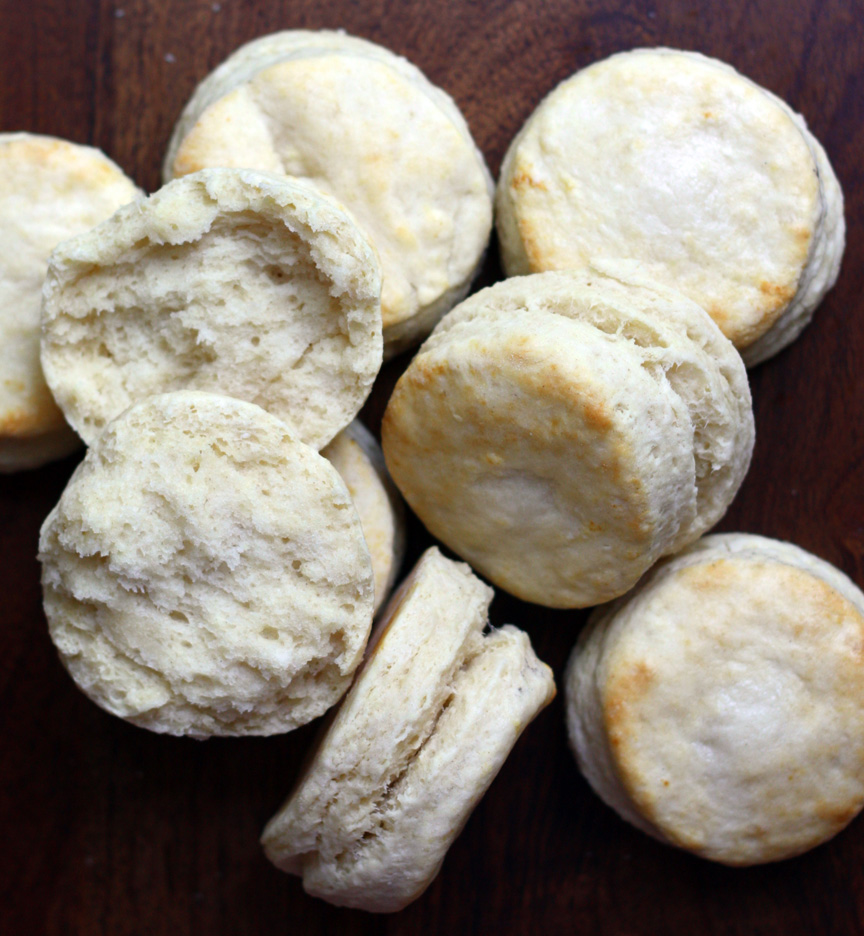
On October 30, 2012 by sixtyacrebakerWhen I was in high school what we called“the roach coach”, rolled up come lunch-time. It was selling all sorts of delicious read really unhealthy food stuffs. Once a week it stopped at KFC; loading up on chicken and biscuits. I would queue
for the length of our lunch break, for those biscuits. Big, fluffy & buttery, they were just the nutritious lunch i needed (ha ha). Those days are long gone. Roach coaches are now gourmet eateries. And i am much more discerning in my biscuit adoration.
Buttermilk Biscuits
2 cups flour-plus more for kneading
4 tsp baking powder
1 tsp bakewell cream
3/4 tsp salt
1/2 tsp baking soda
5 Tbs unsalted butter–cold & cut into small squares
1 cup buttermilk–cold + more for brushing tops
Mix the dry ingredients together in a bowl. Using your fingers or a pastry knife to cut in the butter, allowing for both pea size and smaller pieces of butter. Do not overwork, you want the butter to stay relatively firm and cool. Quickly add in the buttermilk and stir to create a moist dough. Turn dough out onto a well floured surface and press into a rectangle. Do not saturate in flour, but also use enough to prevent sticking. Bring the short ends of the dough in, folding into thirds. Give the dough a quarter turn and press or roll again into a rectangle. Fold into thirds. Repeat 2 more times, using enough flour to keep dough from sticking. After the final turn, roll the dough into a 3/4″ rectangle. Use a biscuit cutter to make rounds, or for simplicity, cut evenly into squares. Brush top of each biscuit with buttermilk, and place on a lined baking sheet. I like to place my biscuits fairly close together, so they bake together a bit. It gives it a little softness around the edges. If that is not your thing, make sure you have at least 1 1/2″ separation when placing in pan. Bake at 400F for about 15-20 minutes, or until golden brown.