Chocolate Dipped & Walnut Stuffed Figs
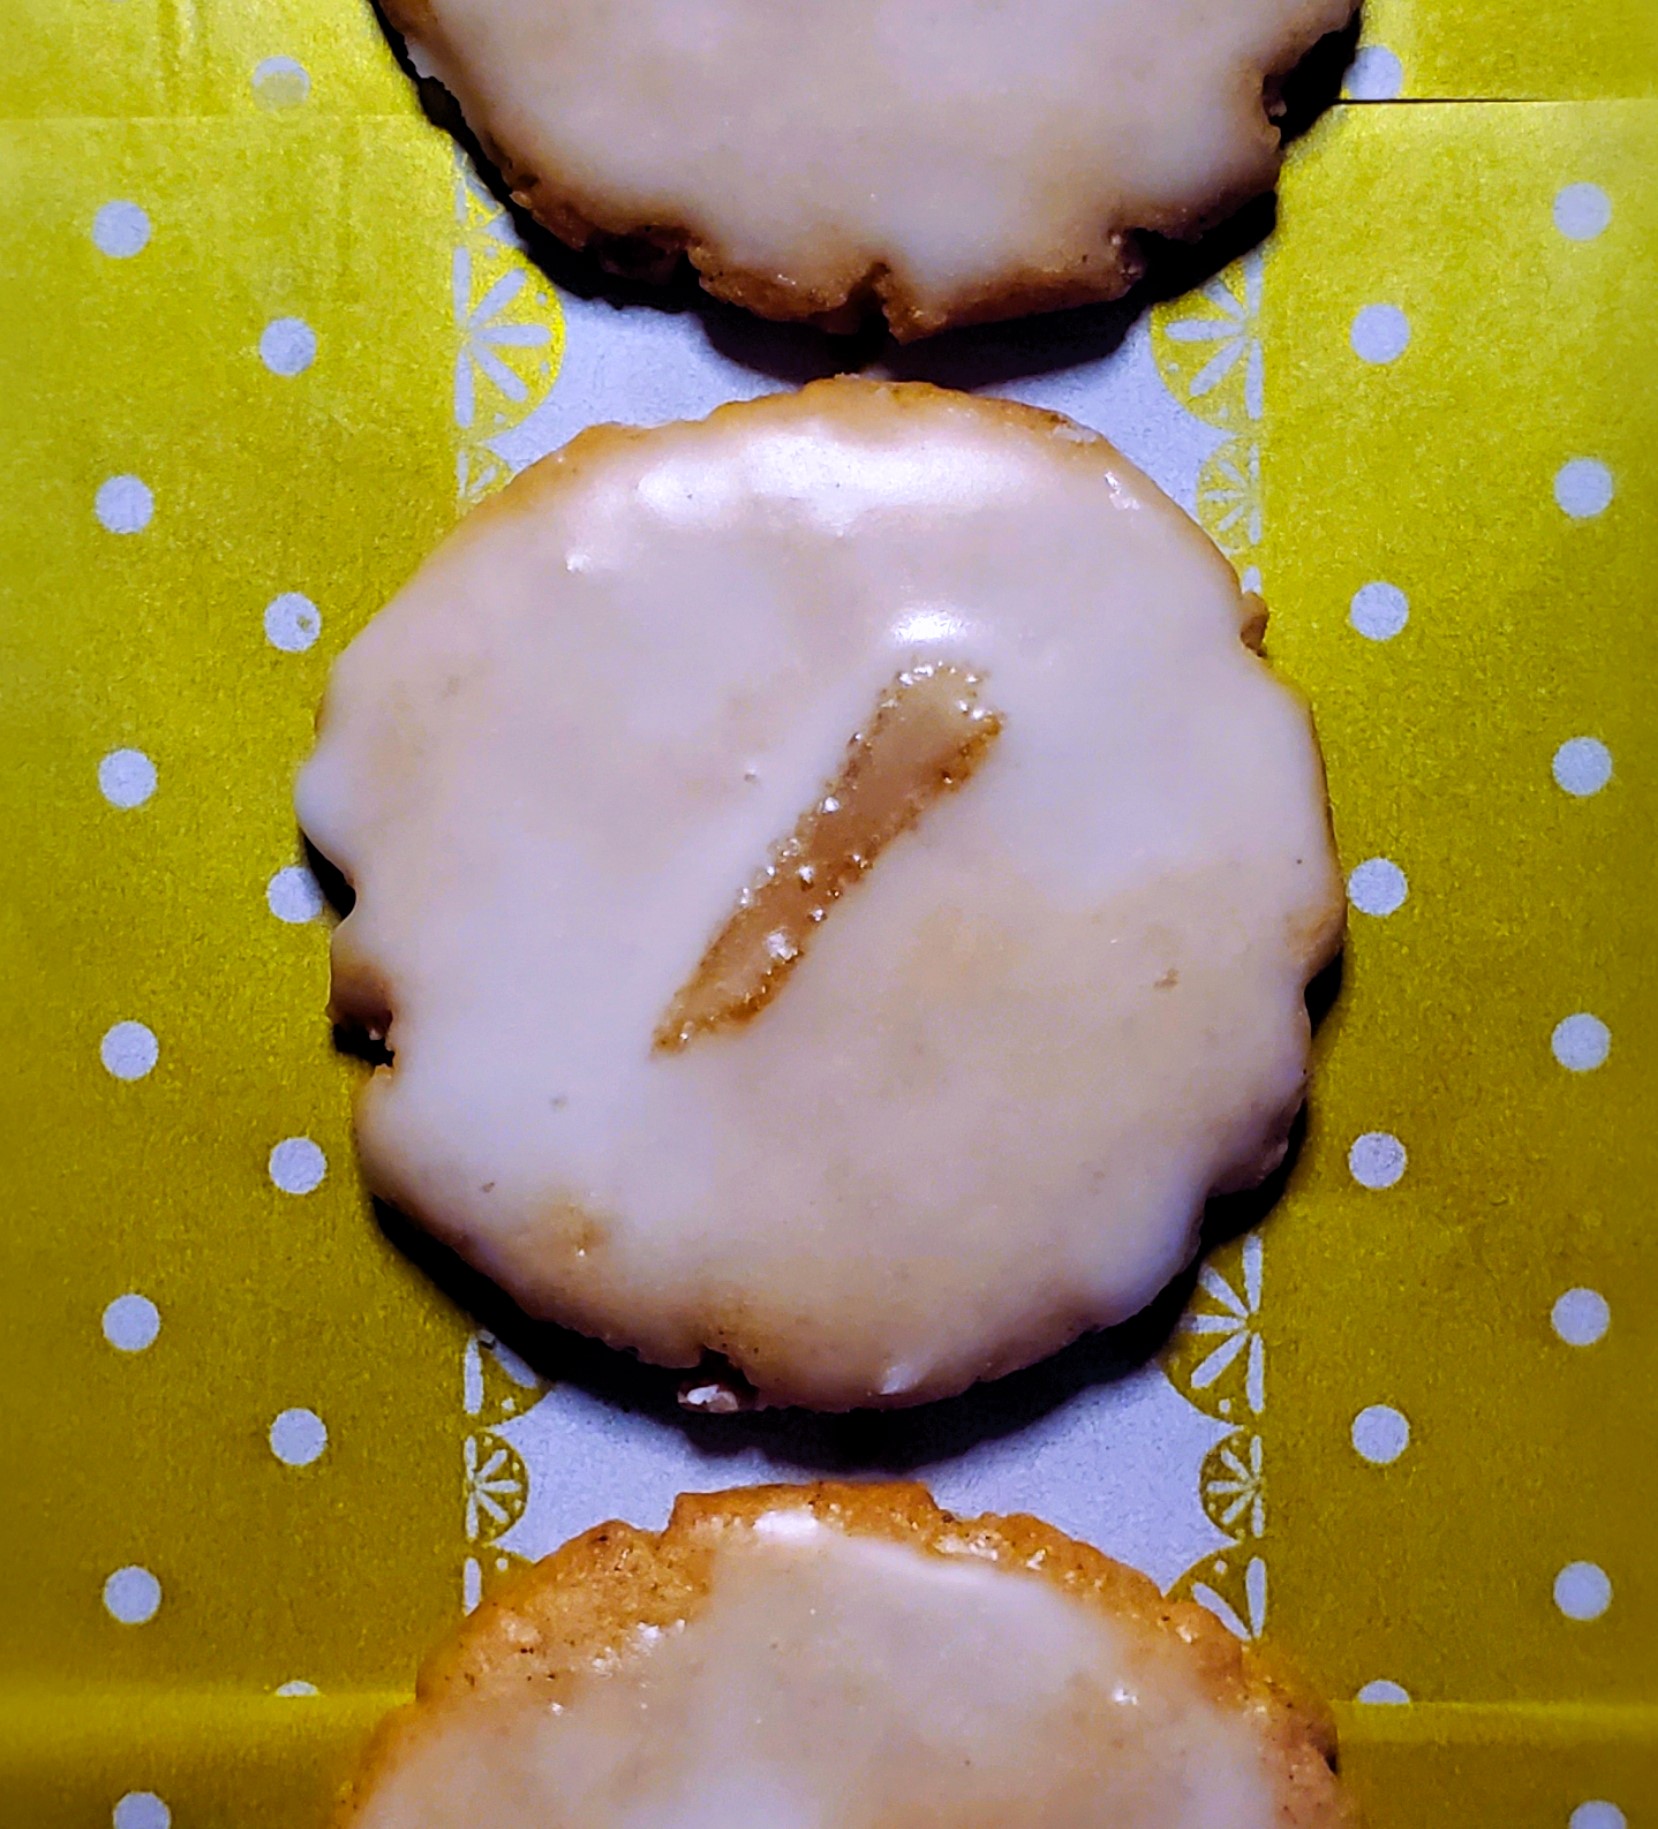
On December 29, 2011 by sixtyacrebakerWe really didn’t eat a lot of desserts when I was a kid. After dinner a pot of coffee was brewed and bowls of fresh fruit and nuts were heaved to the table. One particular treat, at holiday time, was freshly cracked walnuts stuffed into dried figs. This year I gave the treat a little update, by dipping the figs in bittersweet chocolate. A sweet with benefits.
Walnut Stuffed Figs
12 dried figs
12 large walnut halves-toasted
bittersweet chocolate-melted and tempered
Using a sharp knife, make a split in the fig without cutting all the way through
Stuff a walnut into the fig and close it completely. Dip in chocolate and allow the chocolate to harden at room temperature. You can store these at room temperature or the refrigerator.
Gravlax
On December 26, 2011 by sixtyacrebakerWe had a gorgeous feast for Christmas dinner. A feast of seven fishes. I was excited to present home cured gravlax during cocktails. Many years ago, before i had cable, I watched a lot of Julia Child on PBS. An episode I distinctly remember is one where she made gravlax with a Seattle chef. I was amazed, but never actually made it. Truthfully, I’m not much a fan of salmon. But this, this gravlax, is something really special. Pure in flavor: sweet, salty, briny, and fresh. My family, never shy to poke fun, was primed to make bait jokes. but They found it difficult to utter much of anything through their stuffed gullets.
Gravlax
this takes several days to cure, plan accordingly
1 1/2 lbs fresh salmon filet (you must use salmon in season)
1/2 cup kosher salt
1/4 cup brown sugar
1/4 cup vanilla sugar*
1 Tbs grapefruit zest
1 heaping Tbs pink peppercorns
1-2 sprigs thyme
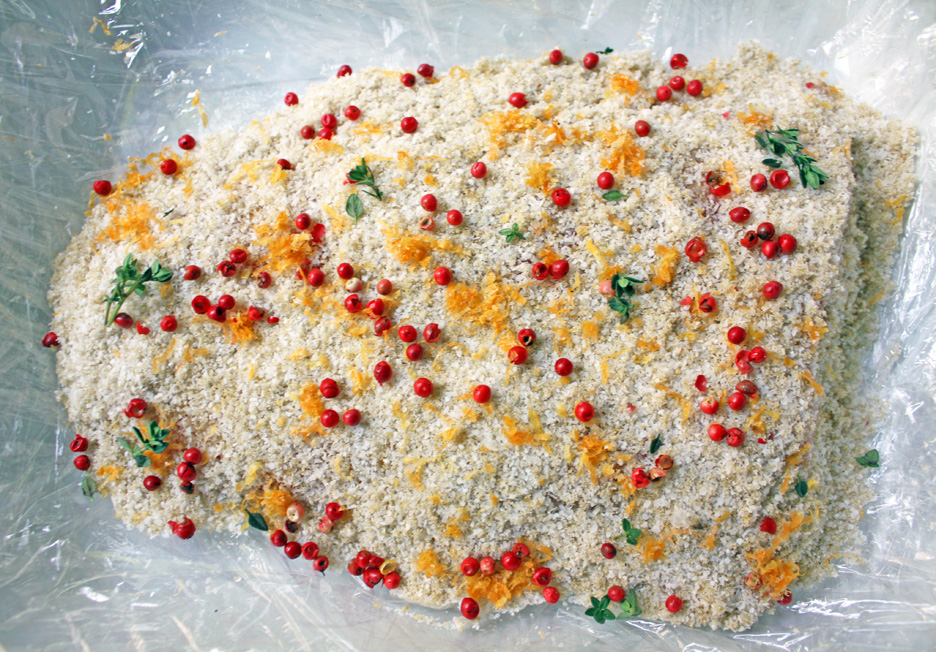
Rinse and dry the salmon filet. Line a casserole dish with plastic wrap, overlapping considerably. Place salmon filet in dish. In a bowl mix together the salt, vanilla sugar, brown sugar, grapefruit zest, peppercorns and thyme. Coat the salmon heavily with the mixture…be generous and make sure the entire surface is covered. Close the salmon in the plastic wrap, making sure it is well covered. Place a board or casserole dish on top of the fish, then use cans or bottles to weigh it down. Place in the refrigerator for 24 hours. After 24 hours, remove the weight, open the plastic wrap; you will see that the sugar and salt are now liquid. Use it to baste the fish. Wrap again in plastic and place the weight back on. Place in the refrigerator for another 24 hours. On day three, repeat the process. On day four, your fish will be cured (if you are using a larger piece of fish, it may well take a bit more time). Your fish should be firm and have become a bit deeper in color. Remove from the cure and gently rinse with very cold water. Dry. Slice off a thin piece and taste. If it is overwhelmingly salty, place cold water in a casserole dish and put the fish in meat side down. Cover and place in refrigerator and let sit for 1 hour. Remove from water and taste again. if the fish is still unbearably salty, soak it again for a maximum of 1 hour.
Serve with blini, creme fraiche and dill or chives

*to make vanilla sugar, whirl 1 cup granulated sugar with 1/2 dried vanilla bean pod in a food processor.
Tomato Chutney
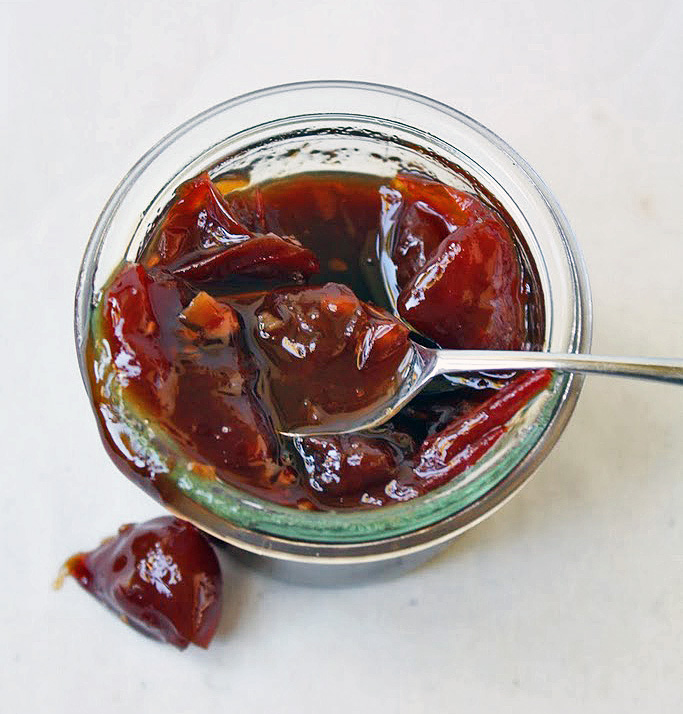
On December 10, 2011 by sixtyacrebakerBasically, I am obsessed with this stuff. It is a recipeI I swiped from my visit to Ca’ di Gosta, in the hills of Umbria. It was served one afternoon and after catching me licking the jar clean, Jenny shared the recipe with me. Great on a turkey sandwich or a perfect condiment to roast pork. Make it. make. it. now.
Tomato Chutney
makes approx 6 pints
3 lbs cherry tomatoes-cut in half
1 head garlic-peeled and finely chopped
1 heaping tsp crushed red pepper
about 2″ root ginger–peeled and finely chopped
10 oz cider vinegar
1 1/2-2 lbs dark brown sugar
generous pinch of kosher salt
Place all ingredients in a large pot. Stir and allow to sit for 30-60 minutes. Place over medium heat, stirring occasionally and allow it to get to a dark, jammy like consistency. This should take the better part of an hour. When you think the chutney may be ready, taste for flavor. You can adjust the sweet/sour/spicy at this point by adding more sugar, vinegar or red pepper. Test for doneness by placing a small bit of the chutney on a cold plate. If the chutney allows you to run a finger through it leaving a clean break, it is ready. You do not want it to get hard like a candy. Place in glass jars and store in the refrigerator or if you are familiar with proper canning procedures, process for 15 minutes (at sea level) in sterilized jars.

Gingerbread Side Cars
On December 6, 2011 by sixtyacrebakerI have made gingerbread villages, chateaus, and houses for as long as I can remember. Last year I spotted little gingerbread houses perched on a mug at a blog called Not Martha. as far as I can tell–this is her original idea. Giddy and obsessed, as i have been known to get, I went to Mike to beg for help. He agreed to make cookie cutters so i wouldn’t have to knife cut each piece. Blowtorch in one hand, pliers in the other, he made these.
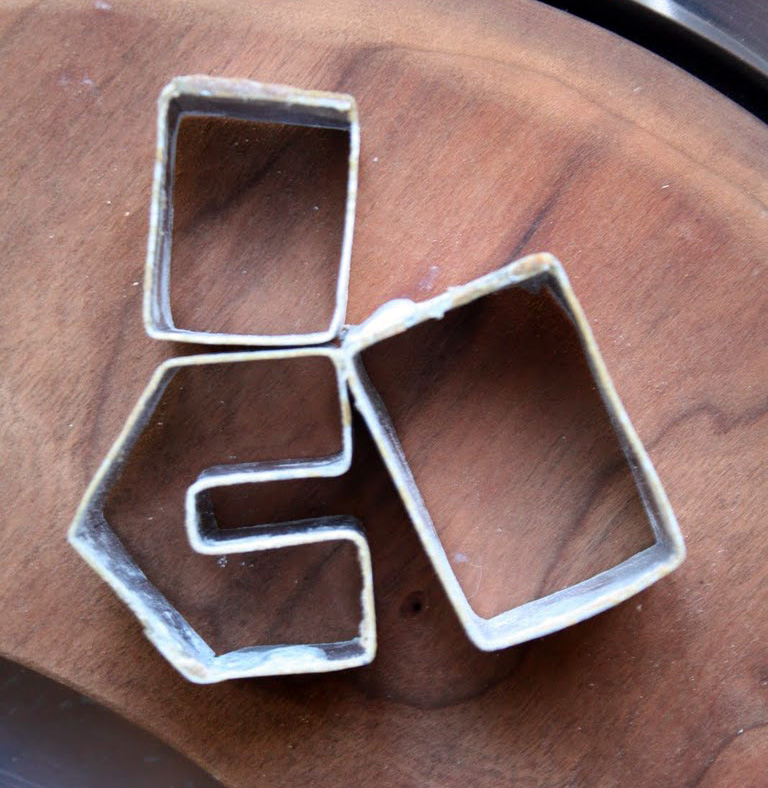
I in turn, made these adorable side cars, for a hot mug of cocoa or glass of milk.
Use your favorite gingerbread cookie recipe and bake as directed. Cool, assemble and decorate. Tip: I plane the sides with a microplane to ensure straight edges. These attach quite easily with royal icing make it nice and stiff. The wreaths are also made from royal icing colored green and piped with a no.63 tip onto parchment paper. I used sprinkles for berries. Allow to dry overnight–remove carefully–attach with royal icing.
Fried Artichokes
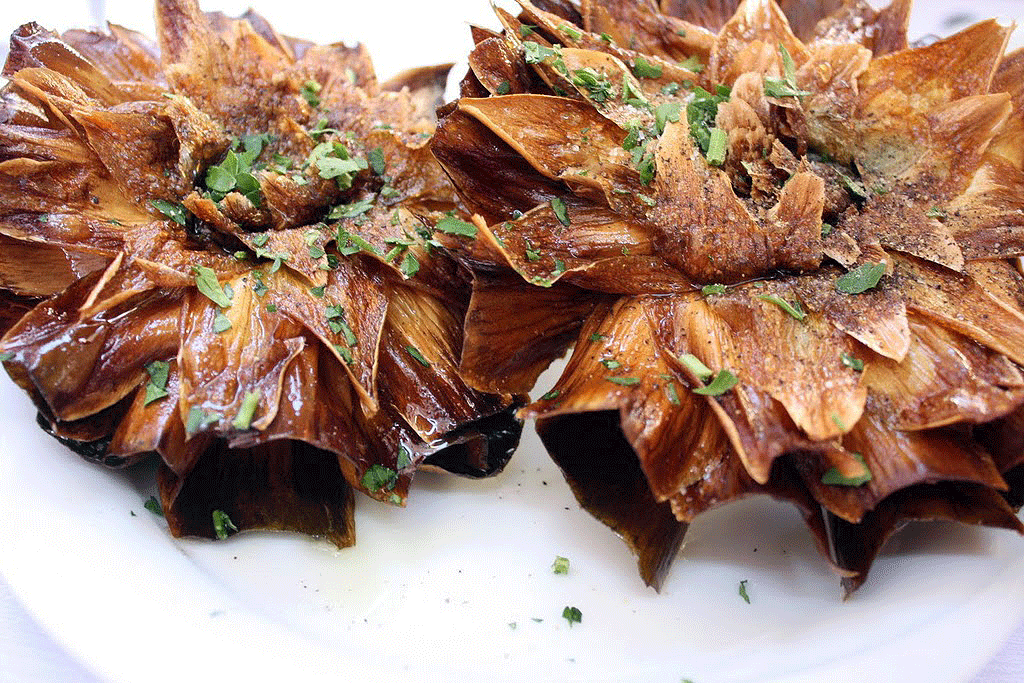
On December 4, 2011 by sixtyacrebakerMuch like finding crawdads in Louisianna, brisket in Texas and barbeque in Memphis, you can find specialties in each Italian region. Rome is no exception. It also has something really special; the Jewish Ghetto. It is very small and virtually abandoned come dusk on Friday. It has a cuisine of its own. The most famous item is possibly the fried artichoke.
Carciofi alla Giudia
serves 4-6
4-6 chokeless or baby artichokes
lemons
olive oil for frying
salt and pepper
italian parsley (for garnish)
Fill a large bowl with cool water. Squeeze the juice of 1 lemon into the water and stir. trim each artichoke, removing all tough outer leaves and trimming the stem (do not remove entirely). Toss the trimmed artichoke into the lemon water to prevent discoloration.
*if you cannot find chokeless or baby artichokes, you can use any artichoke, however, you must trim it to the tender leaves, cut off the prickly tops and remove the choke prior to placing in the water.
Heat at least 3-inches of oil on the stovetop to 325 degrees. Meanwhile, remove the artichokes from the water and place on paper towel to dry. Place each artichoke stem side up on the counter and gently push to flatten, being careful not to break the leaves. Place in small batches in the hot oil and cook until soft, but not browned. Remove from oil and place on paper towel or kitchen paper to drain and cool. Allow to sit at least 30 minutes, and up to 3 hours. Just before serving, heat the oil to 375 degrees and fry the artichokes, careful not to crowd the pan, until they are browned and very crispy. depending on the size of the artichokes this can take as little as 5 minutes and as long as 10 minutes.
remove from pan, drain slightly. Sprinkle with salt and pepper. Serve with a garnish of chopped parsley and a lemon wedge.
Almond Cake
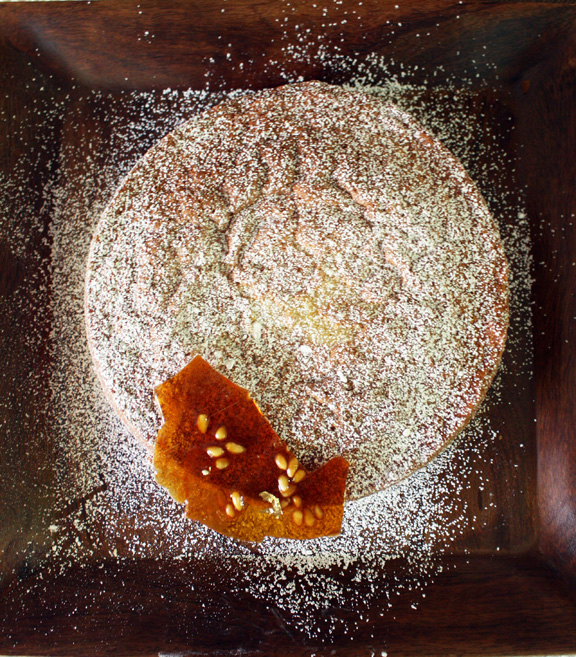
On November 20, 2011 by sixtyacrebakerI owe David Lebovitz a debt of gratitude. While searching for an almond cake recipe, not calling for almond flour, I came across his recipe. He readily admits this comes from Chez Panisse. My pantry held marzipan rather than almond paste, so I changed the recipe ever so slightly. This cake looks light and airy and it is. But it is also incredibly moist and almondy. Have a slice on its own or pair it with brandied cherries, peach ice cream or toffee. This cake would be a gorgeous addition to your Thanksgiving dessert display.
Almond Cake
v.slightly adapted from david lebovitz
1 cup + 2 Tbs granulated sugar
7 oz marzipan paste (i used odense)
1 cup all purpose flour–divided
1 cup unsalted butter–room temperature
1 1/2 tsp baking powder
3/4 tsp kosher salt
1 tsp vanilla extract
1 1/4 tsp pure almond extract
6 large eggs
Preheat oven to 325^F. Butter and flour a 9″ springform pan. Line the bottom of the pan with a round of parchment paper. Using a food processor with the metal blade, process the marzipan, sugar and 1/4 cup flour until it resembles fine sand. In a separate bowl, mix together the remaining flour, salt and baking powder. To the almond mixture, add the butter, vanilla extract and almond extract and pulse until a smooth batter forms. Add the eggs one by one, and scraping the bowl as necessary in between additions. Add half of the flour mixture and pulse until just combined. Add the remaining flour and pulse a few times. If need be, hand stir the flour until it is fully incorporated. Pour into prepared pan and bake for about an hour. Begin checking after 50 minutes. You can use the toothpick test to check for doneness, or whichever method you prefer. Once removed from oven and while the cake is still hot, run a sharp knife around the perimeter to loosen the cake. Do not open the springform pan until the cake is completely cooled. Allow the cake to cool in the pan. Serve with a dusting of powdered sugar

Halloween Costumes 2011
On November 2, 2011 by sixtyacrebakerYes I know. Halloween is in the past and we have moved rapidly on to the next big holiday. Never-the-less, I want to share something. I am not a seamstress; although there was that one quarter of sewing in jr. high school where we made pillows and wrap skirts. Really, I don’t even know how to sew legitimately, but I do it anyway. I act unafraid and I improvise. I’m sharing with you, so you understand it is possible with little or no training, combined with a bit of creative thinking, anyone can make these costumes.
For the Child Catcher Coat
I used simplicity pattern 5386–closed the back and didn’t add the collar or cuffs. I cut the sleeve pattern as prescribed, then pinned parchment paper to it, and fashioned it around my arm to the desired shape…and cut the parchment to match. Opened it up..and had a new sleeve pattern. All of the colors and patterns, are added on top of the the original coat giving it heft. I made this in one afternoon. The glove is a black glove with a piece of oasis duck-taped on it. the lollipops are simply stuck and hot glued.
For the Planet of The Apes Costume
I used butterick pattern b4574–instead of an open collar for the shirt. I kept it closed and added a rolled collar, and hemmed the shirt cuff rather than adding elastic. From the same pattern, I was able to make the vest–eliminating the cap sleeves and shortening it to hit at the hip. The vest is made of pleather. I was able to make the ridges by taking strips of the pleather hot-gluing 1/4″ cording down the center, then sewing the strips onto the vest. The ammo belt is also pleather, with a covering of fishnet.
I know this all seems rather simplified…but it is to make a point. It ,em>is rather simple. Sewing is all about the preparation. Much like carpentry, measure twice and cut once. Prepare your materials, pay attention to the directions and don’t sweat it. I doubt anyone will criticize your costume while you are handing them candy.
I hope you had a great Halloween and aren’t freaked by the notion that Christmas is only 52 days away.

Cake with Ice Cream Ghosts
On October 30, 2011 by sixtyacrebakerThese mini cupcakes are a lot of fun to eat, but if you are a perfectionist and don’t like it when things don’t go your way, don’t do the ice cream part. Use frosting. Make your favorite cupcake recipe and bake in mini-tartlet pan using paper liners. let cool. Dip each in bittersweet chocolate ganache and let firm up. Top with ghost–and serve.
The ghosts are made from homemade Philadelphia Style ice cream. Freeze the ice cream until it is quite thick and could hold shape. Quickly put it into a pastry bag fitted with a tip with a 1/4″ round hole. Pipe the ice cream onto a sheet pan, lined with parchment and immediately put it in the freezer for 4 hours. Remove the ghosts and pipe the chocolate eyes and mouth and return to the freezer. Let freeze overnight. Just before serving, use an offset spatula to move the ice cream from the sheet pan to the mini-cupcakes.
Take your bow, then eat.
If you choose to use frosting rather than ice cream….you can either pipe the ghosts directly on to the cupcake, or you can pipe them on to a sheet-pan, put them in the fridge for an hour or so, decorate with chocolate ganache, and then transfer by offset spatula to the cupcakes
Bram Stoker’s Dracula Dinner
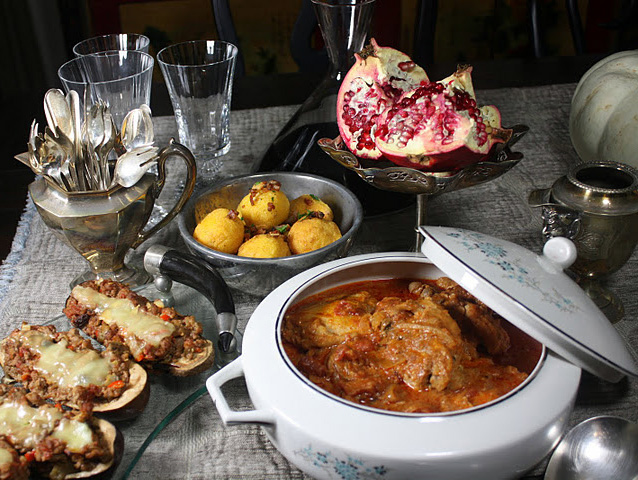
On October 28, 2011 by sixtyacrebaker“We left in pretty good time, and came after nightfall to Klausenburgh. Here I stopped for the night at the Hotel Royale. I had for dinner, or rather supper, a chicken done up some way with red pepper, which was very good but thirsty. (Mem. get recipe for Mina.) I asked the waiter, and he said it was called “paprika hendl,” and that, as it was a national dish, I should be able to get it anywhere along the Carpathians”
“I had for breakfast more paprika, and a sort of porridge of maize flour which they said was “mamaliga”, and egg-plant stuffed with forcemeat, a very excellent dish, which they call “impletata”.
Bram Stoker
Dracula
I‘m really not much for horror stories. However, if the opening chapter references two meals, I become open-minded. For the record, Dracula is a well written story with astounding imagery. We all know Dracula is the only vampire that counts (get it? count dracula!)
If you are indecisive regarding your Halloween meal, I present to you an idea that is both clever and delicious. A Dracula dinner party using recipes inspired by the words of Stoker himself.
Dracula Dinner Party
chicken paprikash
(printable recipe)
eggplant implatata-ish
(printable recipe)
hungarian-bacon stuffed corn fritters
(printable recipe)
custard tart with sour cherry glaze
tokay wine
