


Halloween Wreaths
On October 12, 2011 by sixtyacrebakerGuess who is getting Halloween happy. The mantle is nearly complete. Costumes are in full planning stage. And, the kitchen is awash in frightful projects. All that is excited, but for me, no holiday is official
until the wreaths are up. This year I went simple by starting with wreaths already aflutter in feathers. I just added a little bling.

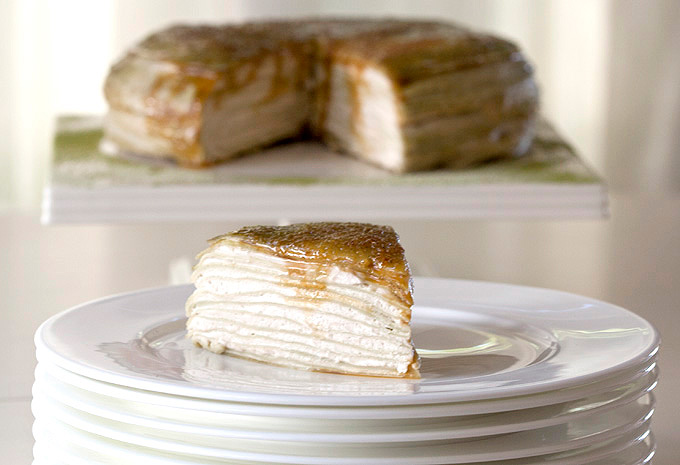
Crepe Brulee
On October 2, 2011 by sixtyacrebakerPasadena is not all about rose queens and debutantes, or penny loafers and posh hotels. Along the edges, nearing the fringe Bijouxs and the Baker (that’s me); inspired by art & culture, the storied past of Pasadena, more underground than paseo more after hours than high tea, more pop art than prep school, created an unexpected gem. A confection well loved in the tea salons of Paris, transforms to lust worthy in the Altier of Bijouxs.
Bijouxs and The Baker met at camp and instantly bonded over immaculately curated bunk rooms think pendleton blankets, leather steamer trunks and vintage oil lamps and an aversion to mingling. It was no surprise to learn they both hail from Pasadena. It was an instant friendship bonding while breaking bread. Not clear who said it first, but both agree; Pasadena can be sexy and hip and well ahead of the curve. It just doesn’t want everyone to know. Now the secret is out.
Lynn and i have collaborated on an amazing dessert: preppy handbook meets laduree.
Lynn gray of Bijouxs is an artist in the kitchen. She brings a designer’s palate to food. When the light casts like chiffon in my kitchen, I close my eyes and wander my mind to the Bijouxs studio to watch my simple dessert of crepes and custard become art.
Crepe Brulee
Makes 1-9-inch cake
Green Tea Crepes
3 cups milk
1 tablespoon matcha (green tea powder)
4 1/2 tablespoons unsalted butter, melted
7 1/2 tablespoons sugar
1/2 teaspoon kosher salt
6 eggs
2 cups flour
Place all ingredients in a blender and blend very well. Place in the refrigerator for at least 2 hours and up to overnight. Heat a 9-inch non-stick crepe pan over medium heat. Hold the crepe pan in one hand, while using a measuring cup or ladle to spoon a bit of batter with your other hand into the middle of the pan. Gently swirl the pan, moving the batter to make a thin pancake the same size as the base of your pan. Place back on heat and allow it to cook, but not brown. The top of the crepe will become dry. Turn and quickly cook the second side. Turn out onto a platter and proceed with the remaining batter. This recipe makes about a dozen crepes.
Raspberry custard
2 1/2 cups buttermilk
6 ounces fresh raspberries
1/2 cup plus 2 tablespoons sugar
6 egg yolks
1/4 cup cornstarch
3 ounces butter
Pinch kosher salt
1 tablespoon Chambord liquer (optional)
Whirl the raspberries, buttermilk and sugar in a blender until the raspberries are fully pureed. Pour through a strainer into a heavy saucepan. In a bowl whisk the egg yolks with cornstarch and salt. Heat the buttermilk mixture over low heat until it simmers. Remove from heat and slowly pour over the egg mixture while whisking the eggs. Return the mixture back to the saucepan, turn heat to medium and continually stir until thickened. Allow the custard to become a bit thicker than you would for a soft pudding. Place the butter and Chambord (if using) in a clean bowl. Run the custard through a sieve (to remove any lumps) into the bowl. Stir to melt and incorporate butter and Chambord. Continue to stir until the temperature drops a bit. Place a piece of plastic wrap directly on top of the custard and place in the refrigerator to cool and firm (can be made a day in advance)
For filling
Whip 2 cups cream with 1 tablespoons powdered sugar until peaks form. Mix in 50/50 with the cooled raspberry custard.
To Assemble
12-15 green tea crepes
1 batch raspberry filling
Granulated or demerara sugar
Brulee torch
Place one crepe on your serving platter. Spread a 1/4 inch layer of filling over the crepe using care not to go fully to the edge. Place a crepe on top. Continue layering until you have used all crepes and filling. The cake should be 10-15 crepes high. Cover and place in the refrigerator and allow to firm up. This can be done a day in advance.
Before you are ready to serve, remove from the refrigerator. Sprinkle a nice layer of sugar over the top and torch until crisp. Sprinkle a second layer of sugar and torch again. This will give you a nice thick crunch on top. Slice and serve while still chilled.
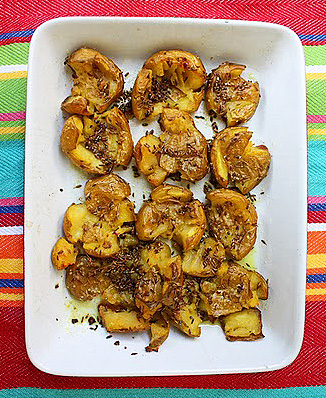
Turmeric and Cumin Crispy Smashed Potatoes
On September 28, 2011 by sixtyacrebakerI do enjoy serving a meal of homegrown and freshly harvested food. I swell with pride as I lay a platter down proclaiming all prepared from our garden harvest. ‘So simple and easy’ knowing full well that the ease I feel is from years of; curiously
observing generations of the amazing cooks in my family, of boldly wandering into restaurant kitchens simply asking to see a technique, of sitting with locals at a farm table in the hills of Italy, on the banks of a river in Costa Rica, or roadside in India. I listen of trial and error and of trial and success. I learned of turmeric potatoes in India, brightly colored and deeply spiced. They are a perfect accompaniment to richly stewed meats. The version I present here is a bit more tame; still brightly colored and assertively spiced, but more suited to roasted meats or a vegetarian meal.
Sadly, my potato harvest was a bit of a bust this year…but in a brush of serendipity, I was sent a few pounds of potatoes from Friedas asking if i would like to give them a try. I like the piccolo potatoes for this recipe. Once cooked they have crispy crust, with creamy interior
Turmeric & Cumin Crispy Smashed Potatoes
1 1/2 lbs small potatoes
(i used piccolo from the little potato company, this will work with new, fingerling or any other small potato)
1 Tbs turmeric powder
1 tsp kosher salt, plus more to taste
3 Tbs olive oil
1 generous teaspoon whole cumin seed
1/2 generous teaspoon whole mustard seed
Place whole potatoes in a pot of cool water to cover. Add turmeric and 1 tsp salt and stir. Bring to a boil and simmer for approximately 15-20 minutes (until the potatoes are cooked through). Drain and place in a roasting dish in a single layer. Using the back of a fork, press each potato until it is a bit broken and smashed, but not completely flattened. In a skillet, place the olive oil, cumin and mustard seed. Heat on medium until the seeds begin to jump and pop. Immediately pour the hot oil and spices evenly over the smashed potatoes. Place immediately into to 375 degree oven for about 30-45 minutes. Check periodically and stir if needed for even roasting. Remove from oven and taste for salt. Pair with roasted chicken or minted lamb or simply dab a bit of plain greek yogurt mixed with a bit of lemon juice over the top for a warm salad.
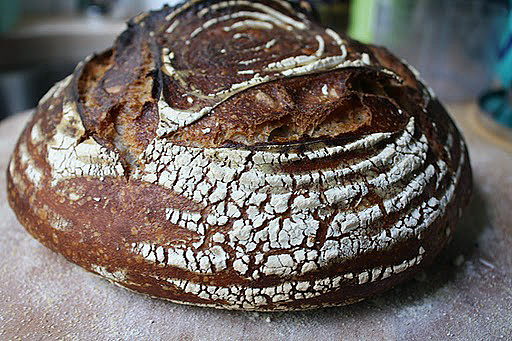
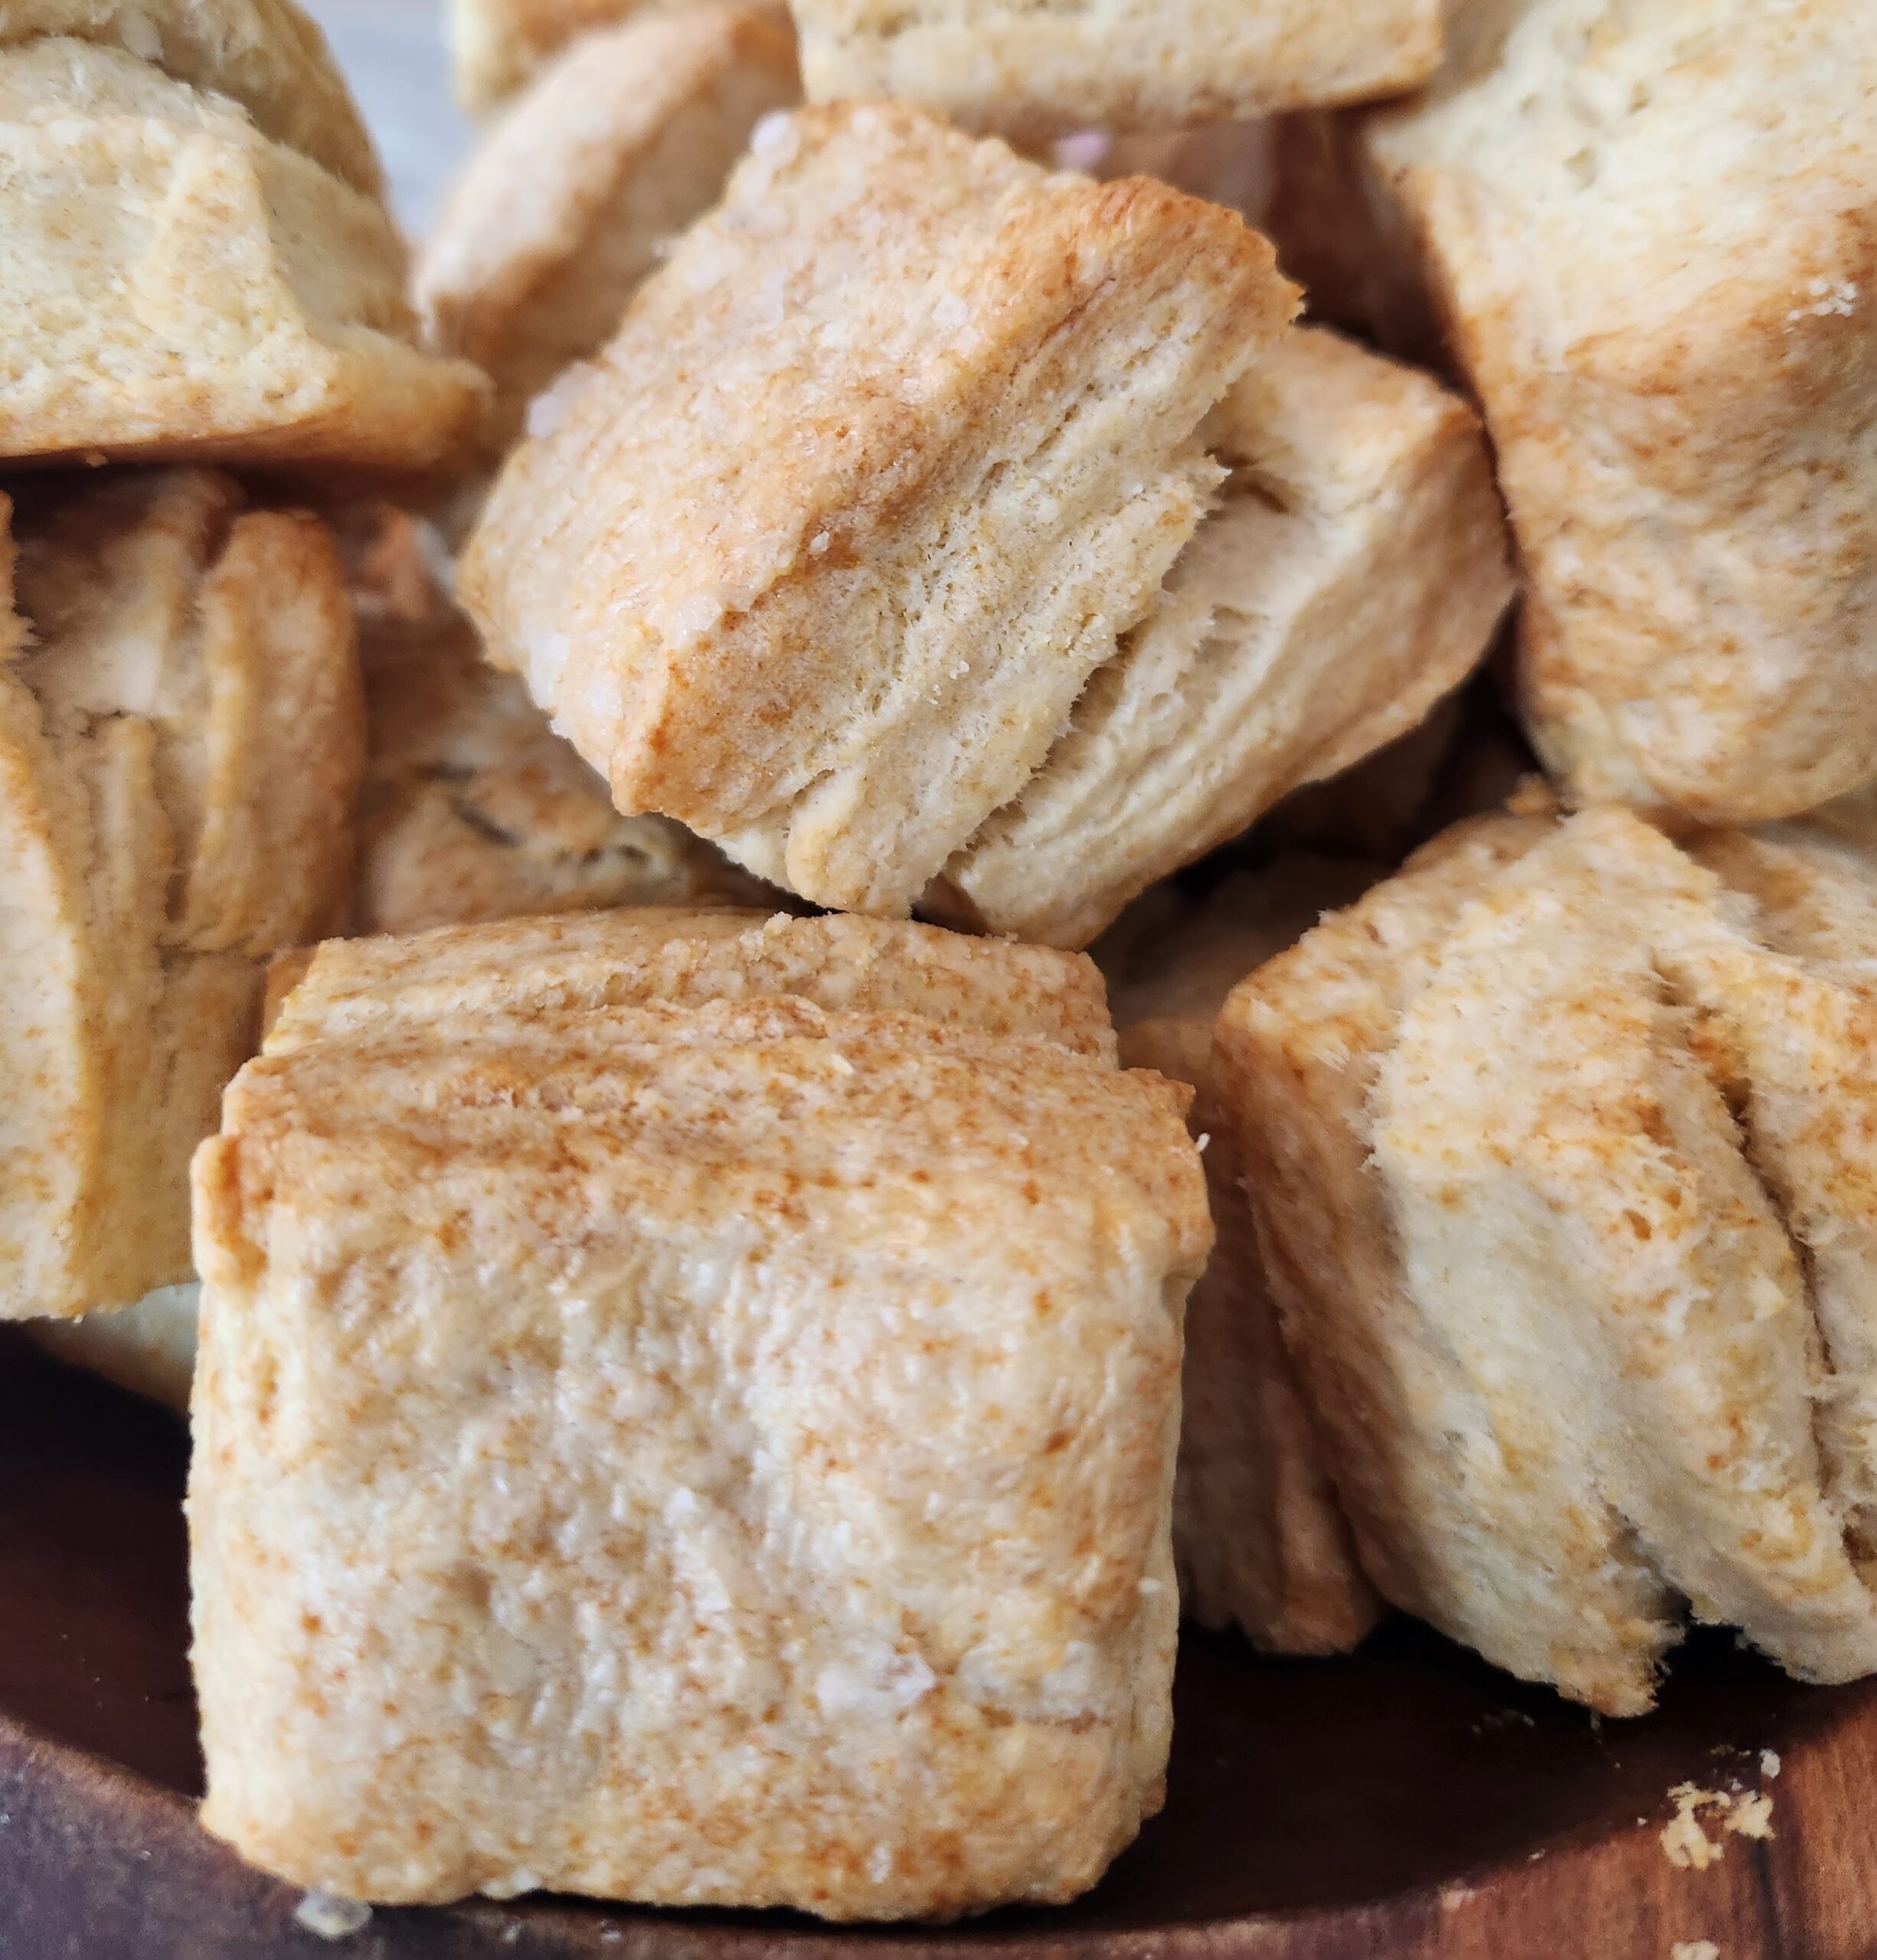
Levain Bread
On September 21, 2011 by sixtyacrebakerIt isn’t true that graduating from le cordon bleu in baking and patisserie makes you a fearless baker. I know. I have a diplome; yet the seemingly innocent combination of yeast, flour, salt and water gives me the shakes. Or, should i say
gave. On a bit of a whim, I signed up for a course at The Institute for Domestic Technology. I came for the goats, but i stayed for the bread.
Levain Bread
recipe from erik knutzen
(full recipe with detailed instructions here)
100 grams starter
250 grams white flour
250 grams whole wheat flour
375 grams filtered water
10 grams sea salt
Stir together the starter and water until dissolved. Mix in the flour until water and flour are incorporated. Do not knead, just get the flour fully combined. cover and allow the mixture to sit for 30 minutes. Add the salt and mix together with wet hands. Cover. At the end of the 1st hour turn dough onto a floured surface. Hold one end of the dough and with your other hand, pull the other end to stretch. Fold the stretched end on top of it. Give the dough a half turn and repeat the stretch and fold. Place the dough back in the bowl, cover and let sit.
At the end of hour 2; repeat the stretch and pull and put back in the bowl. cover. At the end of hour 3 or 3 1/2: turn the dough onto a floured surface. Begin to shape the boule. Take the dough and pull the sides together as if you are making a beggar’s purse, press the edges together and pick up the dough. turn it over in your hands and turn to form a round.
Place the dough, round side down in a heavily floured proofing basket or in a bowl lined with heavily floured baking canvas/or cloth. Cover and let sit at room temperature for 3 1/2 hours or overnight in the refrigerator (preferred)
When ready to bake:
You will be baking this in an dutch oven. Preheat oven and cooking pot to 500 degrees. Turn the bread out of its basket or bowl onto a floured surface. Use a razor blade to score a 4″ square on the top of the bread. Once the oven/pot is up to temperature, plop the bread in the pot, round side up. Cover and let bake for 25 minutes. Remove the top and bake for an additional 20-25 minutes. The bread should be nicely browned and sound hollow when tapped. Allow to cool for 1 hour before eating

Cornmeal and Fig Financiers
On September 4, 2011 by sixtyacrebakerRecently I met a young man. He asked to meet to discuss an idea. An idea born in sharing. I was early for the meeting, mostly because I have yet to shake some of my uptight corporate mores. He was tardy but only by minutes. A delay caused by
a sweet pause to pick gorgeous ripe figs which he then gifted to me. We talked for hours about our love of good food and how we share it with others.
Cornmeal and Fig Financiers
1 1/2 cups unsalted butter
1 cup sugar
1 Tbs honey
2 Tbs buttermilk
3 large eggs
1 tsp vanilla
1 1/4 cup flour
1/4 cup cornmeal *
3/4 tsp baking powder
1/4 tsp kosher salt
5-6 fresh figs-halved
Measure the flour, cornmeal, baking powder and salt in a bowl. Whisk to combine. In a mixer fitted with the paddle attachment, cream the butter, sugar and honey. Add the eggs one by one, scraping down the sides of the bowl after each addition. Quickly beat in vanilla and buttermilk. On low speed, mix in the dry ingredients, do not over mix. Scoop into small brioche molds, cupcake tins or other vessel. Fill to about the halfway mark (perhaps just a tad bit more), and then gently push 1/2 fig on top. Bake at 350 for approximately 15-30 minutes. Use the toothpick method to ensure they are baked through.
*i used a medium coarse cornmeal–but you can use anything from fine to coarse…the texture of your cake will reflect whichever you choose to use.
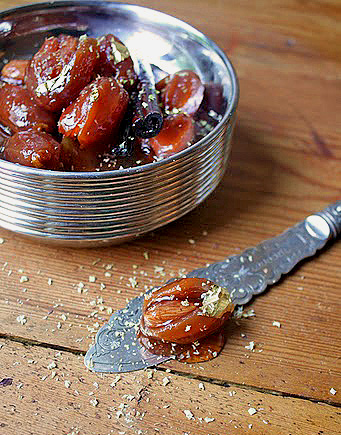
Sugar Poached Dates
On August 25, 2011 by sixtyacrebakerThe late summer heat has me dreaming of all things Moorish; exotic spices, grassy mint tea, souks with dark corners shrouded in silk -thread canopies, and gorgeous sweets like these. fresh dates have a pleasant albeit astringent taste. The longer they sit on your counter, the softer and sweeter they become. But, they are meant to be eaten as is. Dried dates are sweet and chewy and are great fodder for nuts, cheese and other salty bits. These fresh dates are really best left plain or poached to soft submission. The process is lengthy, but I promise the reward is a pot full of golden amber fruit, stuffed with nuts, in a pool of rich treacle heady with spice.
Sugar Poached Dates
this recipe takes 2 days to complete
Step One
100 fresh dates–peeled
water to cover
3 Tbs orange blossom water
parchment paper
100 non-pareil almonds
Place the dates in a pot large enough to hold the dates and water enough water to cover. You will want the water to come about 1 1/2 inches higher than the top of the dates. Add the orange blossom water. Cut the parchment paper to a round that will fit just inside of the pot, and then cut a small 1/2″ circle out of the middle of it. Place it on top of the water and simmer the dates, about an hour, until they are soft but not gushy. the parchment paper will keep the dates submerged in the water. drain and let cool–discard parchment. Using a small knife cut a slit in the date and remove the pit. do not cut completely in half, just enough to remove the pit. Replace the pit with an almond, and close the date around it.
Step Two
3″ lemon peel-pith removed
3″ orange peel-pith removed
1 cinnamon stick
4 green cardamom pods–lightly crushed
1 Tbs lemon juice
1/2 vanilla bean
3 Tbs honey
1 Tbs orange blossom water
3 cups water
3 cups sugar
Place all ingredients in a heavy pot. Cook to dissolve the sugar. Add back dates and simmer on low for 30 minutes. Turn off heat and let sit 12 hours or overnight-covered–once cooled, place in the refrigerator.
Step Three
Remove the dates from the syrup once again, reserving and measuring syrup. Add enough water to make 5 cups. However much water you added, add an equal amount of sugar. (example, if you needed to add 1 cup of water to equal 5 cups total syrup, then also add 1 cup of sugar). Stir
add back the dates and simmer, very gently, until the syrup is very thick and dates are a nice amber color. This may take 1 to 2 hours. Do not just let it boil away–keep a good eye on it. The syrup should not get any more dense than corn syrup.
Serve as is or sprinkle grated pistachio nuts and dress with gold leaf. Place a few over a bowl of plain yogurt or serve with a simple lemon tea cake. I can’t help but think these would make a delicious amuse bouche before a colorful Moroccan meal of cumin and carrot soup, lamb tagine and lemon couscous
salaam
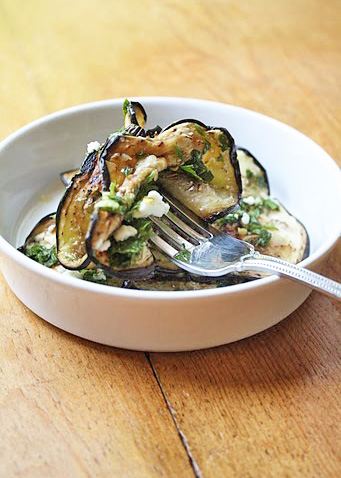
Eggplant Verde
On August 20, 2011 by sixtyacrebakerOur family, adults and children alike, gather each August for a beach vacation. Without fail, as predictable as the tides, each of us slides into our expected role as if we never left it. It is instinctual. Although we are all competent cooks,
I am easily coaxed into cooking big family dinners. The kitchen is where I do my best work and my siblings lovingly recognize it. My sister-in-law, anxious to learn new things, was my willing sous chef. I am happy to report that she successfully duplicated this at a dinner party of her own. I love this recipe for its simplicity. It can be served cool or room temperature; artfully showcasing the beauty of eggplant.
Eggplant Verde
1 large eggplant–cut into 1/4″ thick slices
1/2 cup finely chopped parsley
3 Tbs finely chopped coriander
2 garlic cloves–finely chopped and smashed to a paste
generous pinch crushed red pepper (more or less to taste)
generous pinch kosher salt (more or less to taste)
juice of 1/2 small lemon
1/2 -3/4 cup good olive oil
2 oz chevre
Layer the eggplant between paper towels to dry at least 4 hours but as long as overnight. Put the parsley, coriander, garlic, red pepper, and lemon juice in a bowl. Add enough olive oil to make a loose dressing.
Cook the Eggplant
Heat a skillet (it does not have to be non-stick) over medium heat. Let it get warm before placing slices of the eggplant directly on it. do not add oil, butter or spray. The eggplant will not stick. Watch it carefully and cook until it is lightly browned and softened. I tend to pay attention and flip each one 4 or 5 times before it is fully cooked through. Cook in batches and arrange the warm pieces on your serving platter. As each layer is placed on your platter…place a bit of dressing on each piece..use the back of a spoon to spread it. Do not saturate, you only want a tasting, not a drowning. Sprinkle a bit of salt on each layer as you go. Once you have cooked and layered all of the eggplant, sprinkle the chevre evenly over the top. Serve immediately, or store in the refrigerator until ready to serve. This can be made a full day in advance. I like to take it out of the refrigerator about a half of an hour before serving.
The leftover dressing is wonderful on steaks, chicken and shrimp..or just to dip your bread in.
While there is little chance of leftover eggplant, it is wonderful added it to sandwiches and morning omelets.
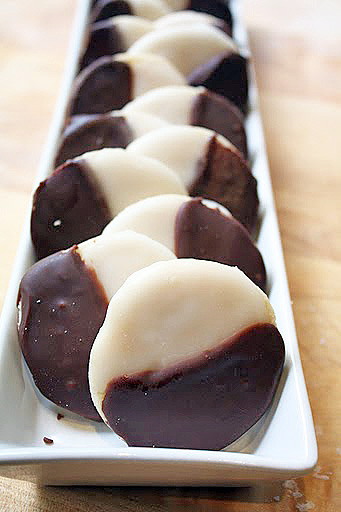
Black and White Cookies
On August 11, 2011 by sixtyacrebakerMy parents grew up in New York. Although we moved to California when i was a toddler, “new yorkness” remains in my dna. I won’t apologize for it. See? i warned you. My favorite goodies from the old neighborhood were tucked in a pink box and secured with twine. Wrapping not only sweets but stories of my mother as a young girl; a nickle in her pocket, walking to and from school in snow up hill–both ways, stopping at the local bakery to warm her toes and carefully choose an afternoon treat. Times have changed and so have bakeries. Fancy cupcakes, mini pies and low-carb muffins have edged out old fashion favorites like; slabs of coffee cake, sweet buns crullers and black & whites as big as your noggin. Thankfully, Nancy Baggett has a knock-out recipe for black and whites in her “The All American Cookie Book”. There is nothing I like more than presenting this New York favorite to my favorite New Yorker, my mom.
New York Black and Whites
recipe from Nancy Baggett
3 cups all-purpose white flour
Scant 3/4 teaspoon salt
1/4 teaspoon baking soda
1 1/3 cups sugar
2/3 cup (1 stick plus 2 2/3 tablespoons) unsalted butter, slightly softened
1/2 cup white vegetable shortening
2 large eggs
2 1/2 teaspoons vanilla extract
2 teaspoons light corn syrup
Scant 3/4 teaspoon lemon extract
1/3 cup sour cream
Quick Vanilla and Chocolate Fondants:
1/4 cup light corn syrup
5 cups powdered sugar, sifted after measuring, plus more if needed
3/4 teaspoons vanilla extract
2 ounces unsweetened chocolate, chopped
Preheat oven to 350 degrees F. Grease several baking sheets or coat with nonstick spray. In a medium bowl, thoroughly stir together flour, salt, and baking soda; set aside. In a large bowl, with an electric mixer on medium speed, beat together the sugar, butter, and shortening until well blended and fluffy, about 2 minutes. Add the eggs, vanilla, corn syrup, and lemon extract and beat until evenly incorporated. Beat in half of the flour mixture until evenly incorporated. On low speed, beat in the sour cream. Beat or stir in the remaining flour mixture, just until well blended and smooth. Let the dough stand to firm up for about 5 minutes.
Using a scan 1/4-cup measure of dough, shape into balls with lightly greased hands. Place on the baking sheets, spacing about 3 1/2 inches apart. Using your hand, press and pat the balls to about 3 1/4 inches in diameter.
i make mine mini..using a small ice cream scoop as my measurement
Bake the cookies, one sheet at a time, in the middle of the oven for 10 to 14 minutes, or until lightly browned at the edges and the tops just spring back when lightly pressed in he centers. Reverse the sheet from front to back halfway through baking to ensure even browning. Transfer the sheet to a wire rack and let stand until the cookies firm up slightly, 1 to 2 minutes. Use a spatula, transfer the cookies to wire racks. Let stand until completely cooled.
For the Fondants:
In a medium, heavy saucepan, bring 1/2 cup water and the corn syrup just to a boil over medium heat. Remove from the heat and stir in the powdered sugar and vanilla until completely smooth. Place the chocolate in a small, deep bowl. Pour 2/3 cup of the hot vanilla fondant over the chocolate. Stir until the chocolate is partially melted. Pour another 1/2 cup of the vanilla fondant over the chocolate. Stirring constantly, thin the chocolate fondant to a fluid but not runny consistency by adding 3 to 4 teaspoons of hot water, a little at a time. Stir until the chocolate melts completely and the water is thoroughly incorporated.
Set the wire racks with the cookies over wax paper to catch drips. Using a small, wide-bladed spatula, spreader, or table knife, immediately ice half of each cookies with the chocolate fondant. (if the fondant stiffens as you work, thin it by thoroughly stirring in a few drops of hot water. If the fondant cools completely, rewarm it over low heat, stirring).
In necessary, adjust the consistency of the vanilla fondant by stirring in additional powdered sugar or hot water until fluid by not runny. Ice the second half of each cookies with the vanilla fondant. Let the cookies stand until the icing set, at least 2 hours and preferably 4 hours.
**
This recipe comes directly from Nancy Baggett’s All American Cookie Book; a book that has been in my library for about 10 years. I have not bee asked to endorse the book or any individual recipes by the author or publisher. This is simply a darn good recipe, one of many in this book

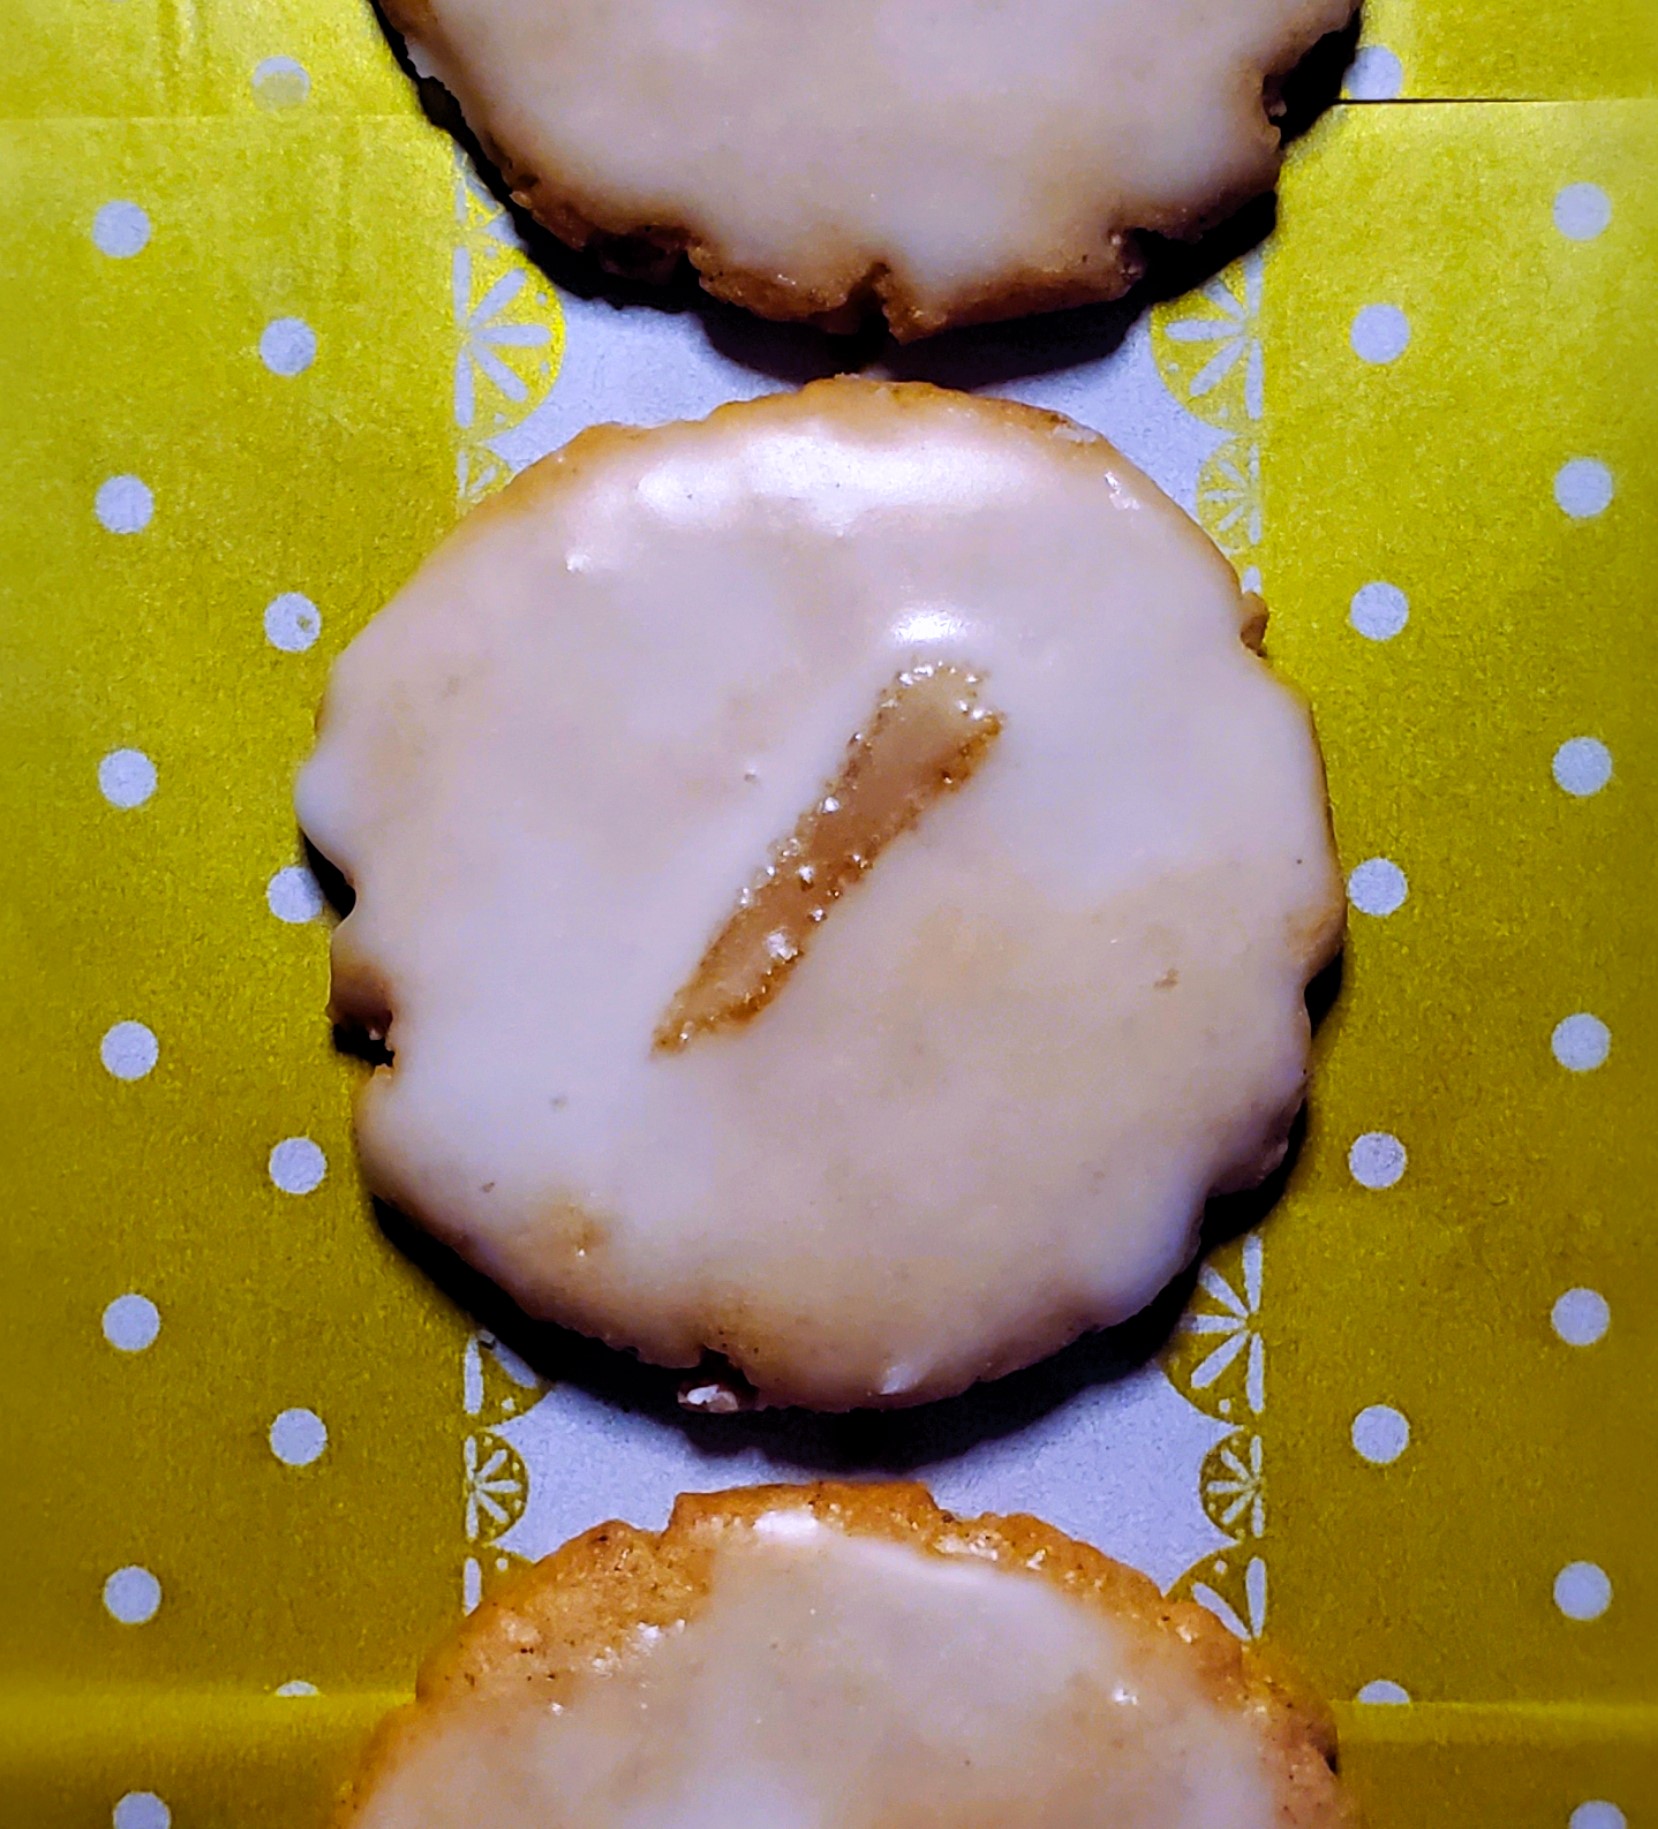
Lemon Cooler Cookies
On August 3, 2011 by sixtyacrebakerHonestly, I’m not sure if i have actually tasted the original lemon cooler cookie. I do know that I wanted to try them. But alas, they were in a box, on a shelf, in the grocery store. Lest you forgot, we have established that my mom didn’t do “store bought”. Odds are I only remember these cookies by how my friends, with better brown bag lunches than mine, described them. Which is why I believe my version is a perfect impostor. It packs a lemony punch with a sweet sugar chaser.
Lemon Coolers
1 1/2 cups unsalted butter–room temp
2 cups powdered sugar-divided
2 heaping tsp lemon zest
1/4 cup lemon juice
3 1/2 cups all purpose flour
1/4 cup cornstarch
1/2 tsp kosher salt
Stir together flour, cornstarch and salt in a bowl. In a mixer fitted with the paddle attachment, cream butter and 1 cup powdered sugar until evenly mixed. Beat in lemon zest and lemon juice. slowly stir in the flour mixture, mixing until just combined. Gather the dough and form into a flat ball. Divide dough into 4 pieces, rolling each into a log. The diameter of the log is to your own specifications, depending on your desired cookie size. My preference is about 2″ round. Wrap each log in plastic wrap and refrigerate for 2 hours or overnight. You may also freeze the log(s) at this time. When ready to bake, preheat the oven to 325. Line cookie sheets with parchment. Remove the log from plastic wrap and slice in 1/4″ rounds. Tt is helpful to twist the log clockwise each time you cut, so as to avoid a flattened bottom. Place cookies 1″ apart on the cookie sheet and bake approximately 10-12 minutes. Cookies are done when they are just turning golden on the bottom. While cookies are baking, place the remaining 1 cup powdered sugar in a shallow bowl. As you remove the cookies from the oven, they will be too delicate to handle. Once they are cooled a bit (not fully cool, still slightly warm), carefully turn them in the powdered sugar, and place back onto same cookie sheet. The sugar will melt slightly and be a bit like frosting. Once the cookies are fully cooled, toss them in the powdered sugar a second time.
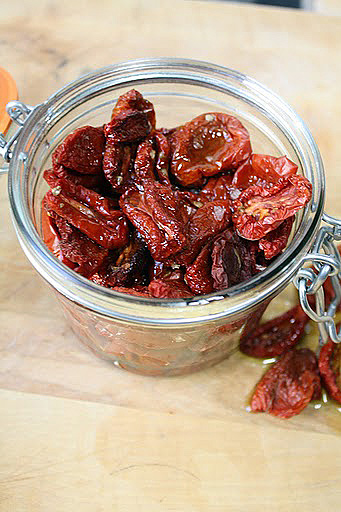
“Sun Dried” Tomatoes
On July 30, 2011 by sixtyacrebakerOur first tomatoes to ripen this season were our Romas. Unfortunately, they ripened while we were away from home. By the time I picked them they had shriveled on the vine. Handfuls upon handfuls of tomatoes baking in the sun. Going from sun-kissed
to heat stroke in my absence. Solar energy had zapped my tomatoes. Once picked, I sliced each tomato in half, placed them cut side up on a sheet pan and sprinkled with sea salt. I popped them in a 175-200 degree oven to dry. About 2 hours later, or maybe 3 i lost count. They should be checked on every 30 minutes after the 1st hour. They should be dry, but not dried out. After cooling, I stuffed the deep red chewy goodness into a fancy jar and smothered them with good olive oil.