Fresh Ricotta
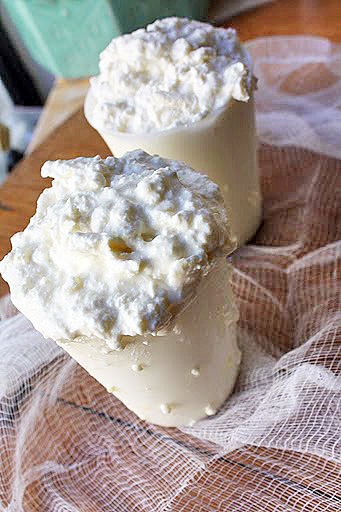
On March 24, 2011 by sixtyacrebakerHomemade ricotta is nothing like what you find in the supermarket; packed tightly into tubs with expiry dates a month long. It is naturally sweet with creamy curds and only lasts a few days. That is the good news. It is a bit time consuming,uses quite a bit of milk, and can be a bit of a mess. Last week cannoli was on my mind so I whipped up a pot of fresh ricotta. And when I say whipped, I mean spent an entire day preparing, cooking, skimming and draining. For my birthday, my friend gave me a beautiful cookbook
“my calabria” by rosetta costantino. Rosetta shares a family recipe for ricotta using a combination of milk and cream. It produces a large yield perfect for eating with a spoon, whipped into lemon pancakes,stuffed into cannoli shells, or sharing with friends.
Ricotta
*from my calabria
1 gallon whole milk
3/4 cup cream
2 tsp kosher salt
1 tsp rennet
1/4 cup cold water
Place the milk and cream in heavy pan and stir to mix well. warm over heat to 200-210F. Remove from heat and add the salt. stir to dissolve. Let the milk to cool to 100F. skim any foam or skin that forms on top of the milk. In a small bowl, mix the rennet with cold water. Stir the diluted rennet into the pot of milk, then leave undisturbed until the milk has visibly thickened, about 10 minutes. Cut a large “cross” in the milk. Stir quickly with a wooden spoon for 15-20 seconds to break up the coagulated milk. Using a perforated metal skimmer immersed in the milk,slowly and gently stir in one direction, so slowly that it takes about 20 seconds to make one revolution. Milk will begin to separate into curds and whey. Slowly pour off the whey through a cheesecloth lined colander, set over a bowl to drain. Let stand at room temperature until whey stops dripping from the sieve. Alternately, if you have ricotta baskets, you can use those to drain the curds. The ricotta should be covered with plastic wrap and stored in the refrigerator. It is best used within 2-3 days. This makes about 2 lbs
* I don’t throw the whey out…I use it. Mike and I use it in our smoothies and I give the dogs a bit of it in their kibble. It helps with a shiny coat. I can’t say the same for us humans.

Cannoli
On March 19, 2011 by sixtyacrebakerOn March 19th Italians celebrate St. Joseph in gratitude. During a drought and subsequent famine, in Sicily, the faithful prayed to St. Joseph in hopes he would intervene. When the prayers were answered with rain and a successful harvest, the people of Sicily vowed to give thanks. Yearly. For eternity. Today, you may find Italians wearing red, praying in churches, preparing the altar and abstaining from meat. You will also find this Italian enjoying sweets. This is a day of reverence and joy. Last year I dispensed sage advice <em?if you want to read it, click here. This year you get a recipe.
Cannoli
shells
(you can buy them..there isn’t a prize for the person who slaves over hot oil all day making these)
2 cups all purpose flour
2 Tbs crisco or lard
1 tsp granulated sugar
1/4 tsp salt
3/4 cup marsala wine
1 egg–whisked with a bit of water
Combine the flour, sugar, salt and lard together. Slowly add the marsala while kneading the dough. Continue working the dough until it is well mixed and a rather hard dough is formed. Cover with plastic wrap and let sit an hour and up to 3 hours. Roll the dough out to 1/4″ sheet and cut with a 4-5″ round cutter. Quickly run a rolling pin over the rounds in 1 direction to form the rounds into ovals. Place a metal tube in the center of the oval and bring the sides up, overlapping enough to form the shell. Brush seams with a bit of egg wash to seal.
Heat oil in a pot. Drop the shells a few at a time into the hot oil and fry until they are light brown and bubbly. Remove from oil and place on greaseproof paper. Allow to cool long enough to handle, then slide the tube out and allow the shells to fully cool.
filling
1 1/2 lbs ricotta–drained to remove excess moisture
1/2 cup powdered sugar
pinch kosher salt
1/2 tsp vanilla
1 Tbs finely grated lemon peel
1 tsp fresh lemon juice
1/2 cup mini semi-sweet chocolate chips or chopped bittersweet chocolate
Mix all ingredients together and let sit in the refrigerator for a few hours for the flavors to meld. Filled cannoli shells tend to get a bit soft after time. If you want your shells to remain crispy, wait until you are ready to serve before filling them.
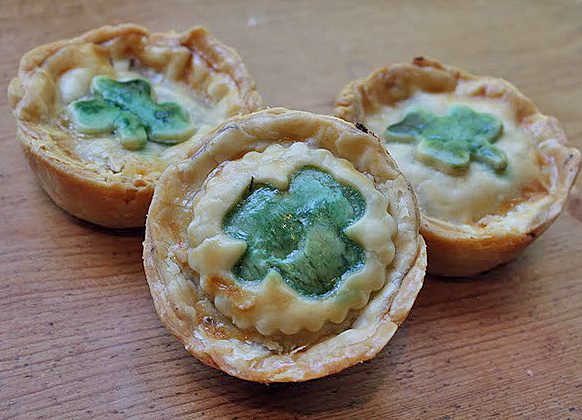
Lunch Box Pies
On March 16, 2011 by sixtyacrebakerGone are the days of the tartan plaid lunch pail replete with soup canister, trapped beneath a spring-loaded arm, and monogrammed cloth napkin. So sad. These savory pies, formed and baked in cupcake tins are perfect for lunch box days, picnics at the lake, afternoon snack for a carload of kids, or enjoyed as we are. As a St. Paddy’s day treat with a Guinness chaser.
Lunch Box Pies
1 lb ground beef
1/2 lb ground pork
1 large onion–finely chopped
2 stalks celery–finely chopped
1/4 tsp salt
1 Tbs creole seasoning
a few shakes of Tabasco sauce more or less to taste
1 cup breadcrumbs
1/4 cup hot water
1 recipe pie crust
Creole Seasoning
from Emeril’s New Orleans Cooking
2 Tbs chili powder and paprika
1 Tbs ground coriander, garlic powder and salt
2 tsp ground cumin
1 tsp cayenne pepper, crushed red pepper, black pepper and dried leaf oregano
Mix together and keep in an airtight container
Chop onions and celery and sauté until soft. Lightly cook pork and drain off grease. Add ground beef to pork and cook 5 minutes. Add onions and celery. Cook over low heat for 25 minutes. Drain any grease. Add seasoning, tabasco and salt. Add hot water and bread crumbs and mix well. Let stand 30 minutes. Meanwhile, line muffin tins with pie crust. Fill the crust 3/4 full with filling. Close with top crust. Decorate as desired. Brush with lightly whisked egg yolk. Bake at 400 until pie crust is golden..about 20 minutes. To make shamrock, color some of the egg with green food color and use a paint brush to paint design.
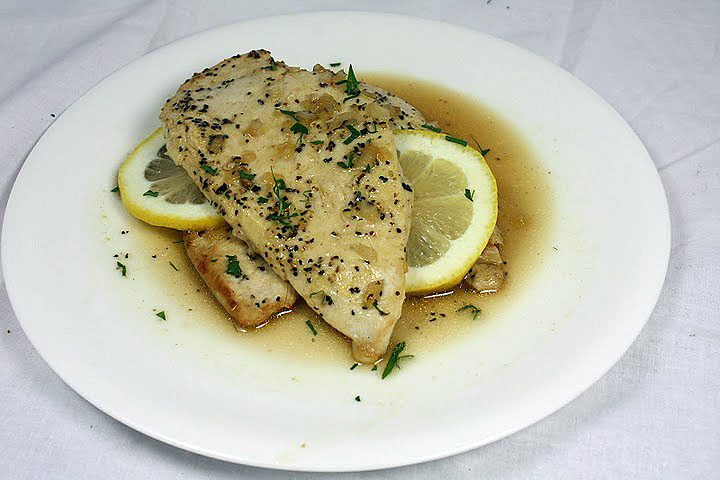
Lemon Chicken
On March 13, 2011 by sixtyacrebakerI seem to be on a bit of a citrus jag lately. I suspect the reason being this: on our back porch sits a potted lemon tree. It produces exactly 8 lemons every other year. We have coaxed coddled and crooned to it. Sadly, this is its best work. Consequently, when it produces, I get to work. This recipe is really a bit of this and smidge of that. Really delicious, very lemony and extremely popular in our house. The best part: it freezes well.
Lemon Chicken
1 lb chicken breasts
olive oil
1/2 onion–finely chopped
1/4 cup chicken broth
1/2 cup white wine
juice of 2 large lemons (a bit less if you don’t like your chicken really lemony)
1 tsp honey (or more to taste)
salt and pepper to taste
fresh parsley–minced
Pound the chicken breasts until they are thin like a cutlet. pat chicken dry. Heat enough olive oil to cover the bottom of a large skillet. Cook eat chicken breast enough to just brown, but not to cook completely through. Remove from skillet and reserve. Add a bit more olive oil and toss in the onion. Cook on medium heat until onion begins to soften. Toss in the chicken broth and use tongs or spatula to scrape up all the bits of chicken that stuck to the bottom of the pan. Add the wine, lemon juice and honey. Stir to combine, then put the chicken back into the skillet. Simmer on very low until the chicken is cooked through. Serve with the sauce spooned over the chicken. Sprinkle a bit of parsley on top. Sserve with lemon slices if desired.

St. Patrick’s Day Cake
On March 11, 2011 by sixtyacrebakerI do enjoy a snazzy chapeau. Especially if it is edible.
This is a simple 7″ layer cake placed on a 10″ cake round. Place the fondant covered cake in the middle of the round. Roll out a strip of fondant wide enough and long enough for the brim, curling up the edges. Using a brush, paint a bit of water on the round (only a little) to help the brim stick and carefully place along the edges of the cake. The shamrocks are fashioned from lightly colored fondant cut out with a cookie cutter. softened the edges a bit with my fingers to give them a bit of movement. The buckle is simply rolled fondant covered in edible gold leaf, then brushed with a bit of bronze luster dust. I used just a bit of water to adhere all the elements onto the cake.
If you would like more details or further instruction on how I made this, please ask. I promise i won’t tell you that a leprechaun left it behind, at the pub I frequent.

Vintage Suitcase Dog Bed
On March 11, 2011 by sixtyacrebakerI don’t speak French, which is why it is slightly insane that I subscribe to French magazines. Aside from the few French words incorporated into the English language, I have not a clue if the prose is inspired or insipid. However, the photos
and creativity never fail to turn this punctual taskmaster into a daring daydreamer. A recent issue of Marie Claire Idees showed a small dog perched in a darling white-washed bed, fashioned from an old valise. At a romp through an overstuffed antique store I found this

With a bit of fabric, little ingenuity and sackful of patience (i am a horrible seamstress). We now have our own darling version.
the little girl in the bed is Dharma.
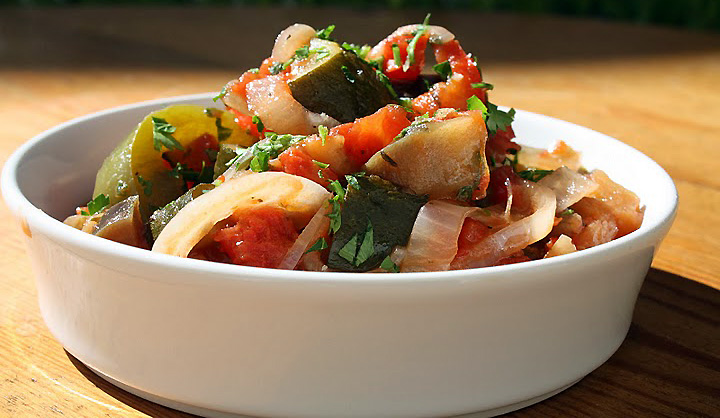
Ratatouille
On March 9, 2011 by sixtyacrebakerAll too often I fill my canvas tote with fresh from farm produce. I bring it home, lovingly display it, and then succumb to the reality that father time ages it faster than we eat it. I find myself racing time. Such an event happened today with a good ol’ fashioned crisper raid.
Ratatouille
olive oil
1 medium onion-thinly sliced
3 cloves garlic–chopped
1/4 cup red wine
1 red bell pepper-julienne
1 medium eggplant–cut into cubes
2 zucchini–cut into rounds
3 cups diced tomatoes–fresh or canned
1/2 tsp dried basil
1/2 tsp dried thyme
1/2 tsp dried oregano
pinch red pepper flakes
about 1/2 tsp sea salt (more or less to taste)
1 generous Tbs balsamic vinegar
2 Tbs chopped fresh parsley
Heat a small stock pot over low flame. Add enough olive oil to lightly coat the bottom of the pan. Toss in the onions and garlic and cook until they soften. Add in the eggplant and red pepper and give them a good toss. Cook for about 10 minutes. Stir in the red wine and cook for about a minute more. Finally, add in the zucchini, diced tomatoes, basil, thyme, oregano, red pepper flakes and salt. Give a good stir, cover and cook for about 25-30 minutes. Periodically give a good stir to the pot. Once the vegetables are soft, but not falling apart, remove from heat and stir in the balsamic vinegar and fresh parsley. Taste for salt and add if necessary. Serve hot, warm or room temperature.

Lemon-Pecan Mascarpone Pound Cake
On March 5, 2011 by sixtyacrebakerMarch 4th is national pound cake day. Don’t roll your eyes. It is legit. I read it on the internet. Before my great aunt passed, I borrowed her box of tattered and stained recipe cards and copied each one into a book of my own. My aunt rose baked a great pound cake. Several actually. All different. All delicious. For national pound cake day, I borrowed a recipe from her, with a few substitutions.
Lemon Pecan Mascarpone Pound Cake
1 1/2 cup unsalted butter–room temp
4 oz mascarpone cheese–room temp
1/2 tsp kosher salt
1 1/2 cups sugar
4 large eggs–room temp
1 tsp vanilla
2 tsp lemon zest
1/4 cup + 1 Tbs lemon juice
2 1/4 cups flour–sifted
2 tsp baking powder
1 cup toasted pecans
Cream butter and mascarpone until very light. Gradually add sugar and beat thoroughly, about 2-3 minutes. Add eggs one at a time, scraping down sides in between additions. Beat for an additional 2-3 minutes after you add the last egg. Beat in vanilla, lemon zest, lemon juice and salt, until fully incorporated. The batter may look curdled, which is okay. Blend in the sifted dry ingredients (flour and baking powder) and mix until silky. Fold in pecans. Bake in a greased pan (10 cup capacity) at 325 for about 60 minutes. If you separate the batter into smaller pans, bake for considerably less time.
Once cool frost with icing made from powdered sugar mixed with lemon juice. Add enough lemon juice to make a drippy icing with good lemon flavor.
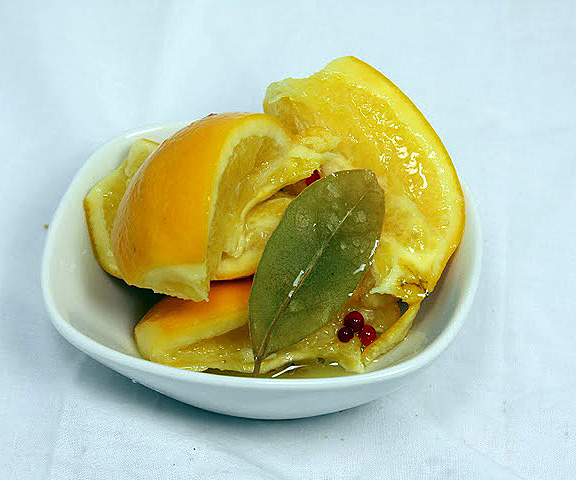
Salt Preserved Oranges
On March 4, 2011 by sixtyacrebakerI hadn’t yet been to Morocco when I first became seduced by tagine; meat braised into submission in the company of dried fruit, toasted nuts, exotic spices, and preserved citrus. Preserved lemon can be plucked off the shelf of your favorite fancy grocery. However preserved oranges are less likely to procured at your local. I have found preserved oranges offer a slightly sweeter note that couples well with headier spices like cinnamon, anise, nutmeg, and cardamom. Preserved oranges are easy to make at home and use few ingredients. Within 10 minutes you will be transported to a far away land full of culinary possibility.
Preserved Oranges
smallish thin rind oranges
kosher salt
pink peppercorns
star anise
bay leaf
Thoroughly wash and scrub the oranges removing stems. Cut into fourths without allowing the knife to cut all the way through. Cut approximately 2/3rds through the fruit. Generously salt the flesh of the orange Using a sterilized jar with proper fitting lid begin to press the oranges into the jar. Pour additional salt in between the layers of oranges. Periodically drop in peppercorns using no more than 10 in your entire jar. Continue doing this until the jar is well packed and full. Squeeze orange juice to fill in the gaps. Slide in a bay leaf and star anise. Add a bit more salt, then seal. Turn upside down on the shelf of the fridge overnight. The next day, turn it back right side up. If you see a gap, fill it with oranges, salt and orange juice. Close it up and place back in the refrigerator. Let “steep” for 4 weeks. These will keep for about 6 months. Rinse before using. Use as you would preserved lemons.


