Strawberry Crumb Cake
On May 29, 2013 by sixtyacrebakerStrawberries are ripe, ripe, ripe in my neck of the woods. Every farm stand along my tuesday evening route, touts the sweetest and freshest, organic berries. I can’t resist. Particularly because i make a really great strawberry-rhubarb jam, that disappears faster than anything else in the pantry. I grab loads of the juicy red fruit whenever i find it. Being as we spend most days at the ranch counting idle minutes on one hand, it feels less guilty to indulge in a bit of sweet at day’s close. When i have a moment, I bake a cake like this one. It is a simple twist on a classic crumb cake, using the sweet ripe fruit of the season in its crumb.
Strawberry Crumb Cake
cake
1 1/4 cup cake flour (sifted, then measured)
1/2 cup granulated sugar
1/4 tsp baking soda
1/4 tsp kosher salt
3/4 cup unsalted butter (room temperature–cut into cubes)
1 large egg
1 large egg yolk
1 tsp vanilla
1/3 cup buttermilk
4 tsp of your favorite strawberry (or strawberry-rhubarb) jam
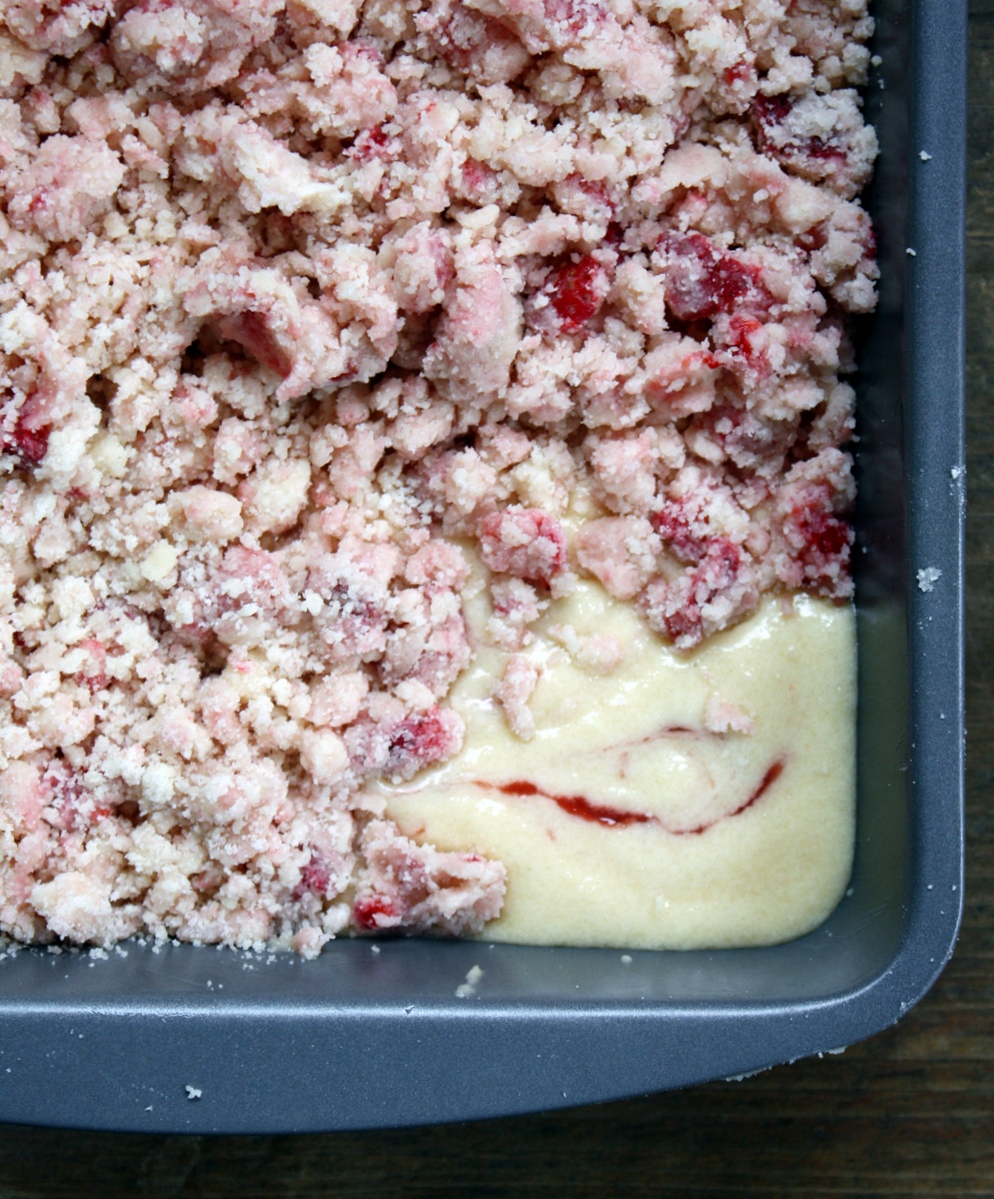
Place the flour, sugar, baking soda and salt in a stand mixer fitted with paddle attachment. Quickly give it a few turns to incorporate everything together. Add the butter. *the butter should be softened, but not warm and creamy. You want it to mix into the flour mixture making more of a clumpy sand consistency, then a creamed. Mix the ingredients until the butter is finely incorporated into the flour mixture. Meanwhile, combine the buttermilk and vanilla. Add the whole egg and the egg yolk to the flour mixture and mix until incorporated. Use a spatula to scrape down the sides and bottom of bowl to ensure there are no dry spots. With the mixer on low speed, add the buttermilk/vanilla mixture and mix until just incorporated. Do not over mix pour into a 8×8 buttered square cake pan. Strategically plop the 4 tsp of jam you can add a bit more if you like in the batter. Run the back of a butter knife through the cake batter to swirl the jam through evenly. Set aside while you prepare the crumble.
crumble
3/4 cup granulated sugar
1/2 tsp kosher salt
2 cups all purpose flour
10 Tbs unsalted butter–fairly cold–cut into 1/2″ pieces
1 cup fresh ripe strawberries–cut into 1/4″ dice
Mix together the sugar, salt and flour by hand in a large bowl. Drop in butter and either work in by hand, or use pastry knives/fork/blender to make fairly large crumble. Tip in the strawberries and work in by hand, using a bit of a firm hand, to get them mixed up well in the flour mixture. Don’t squeeze and knead, you do not want to warm the butter, but allow the strawberries to fully incorporate into the crumb. Gently pile on top of the cake. Some of the crumbs will sink into the cake as it bakes, which is why i make SO MUCH CRUMB!
Bake in a 375F oven for about 35-45 minutes. Check after 30 minutes and keep an eye on it. The cake is moist, so it can tolerate a bit of over baking, but don’t forget to keep an eye on it. Check by using a toothpick or wooden skewer to see if it is done baking. Allow to cool completely before eating
Firenze in April -day three-
On April 30, 2013 by sixtyacrebakerDay three is usually when jet lag hits. At least for me. After so many years of it being a pattern, it is probably now a learned response. Or maybe, I allow myself to succumb to it. Likely because, it is something I can say to people
and they won’t judge. Which is how we found ourselves giving rip van winkle a run for his money. After a long sleep, a long walk seemed in order. We cruised the streets of Florence until it seemed a respectable time to look for lunch. I was craving roasted chicken and potatoes. We found it on the menu of a place that looked really nice. Except they were playing Sade and I can’t stand Sade.Really, I can’t. No specific reason, just can’t tolerate her music. Reminds me too much of jazz, i think. I like a hook. Sade doesn’t give you a hook, so i refused to go in. Instead, I convinced myself that another place would be just as good.
I was wrong
Not even photo worthy. I will admit, Mike liked his. He got some sort of pasta and I ordered chicken with roasted potatoes. I was served, seriously, seriously, seriously overcooked anorexic chicken thigh-slash-leg, and french fries / I poked at it. At least I still had room for gelato.
But let me get ahead of myself here, don’t despair.
I had a bad meal in Italy, no biggie. I made up for it at dinner, and then some. We ate at a fun place. When i say fun, i mean…bring your sense of fun…because if you bring your >em>”that would never go in america” attitude, you.will. hate. this place, and they will hate you. So don’t go. If you still insist on going, don’t tell them i told you to, because I happen to like these people.
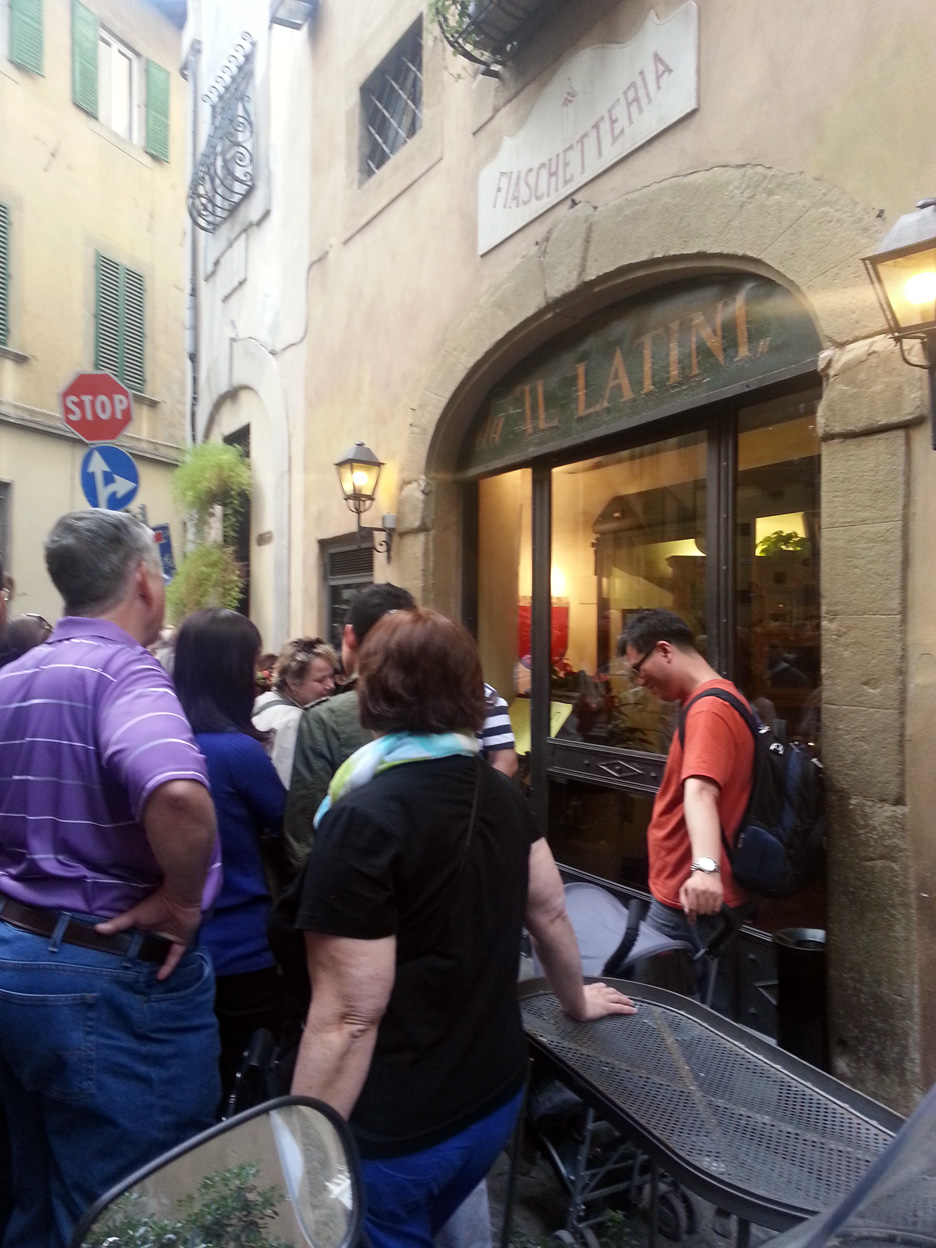
You must make a reservation at Il Latini, a restaurant that looks small but it isn’t. You make a reservation and queue up. Then the crowd starts building. Then the fervor starts building. Everyone starts thinking that their reservation is the most important.They open the door and it becomes a bit of a fiasco. They start calling out numbers, not names, but numbers. due, cinque, due, tre. Everyone starts pushing and throwing up their hands saying we are due, we are cinque, but mostly; they start yelling “I have a reservation.” Rest assured, everyone has a reservation and everyone gets in. And all the stress of getting in, is forgotten, when the food starts arriving. First the antipasto. Then you make choices: soup or pasta. Pasta? Do you want: ravioli, gnocchi, pappardelle, or spaghetti? Or perhaps all of them. Hubs chose ravioli, and I chose soup. did i mention that at this place they open a bottle of wine, and you pay for what you drink. Drink the whole bottle 10 euros. Drink only half, 5 euros. Drink less, pay less. I love this system.
The main course: roasted meats. You want chicken, rabbit, steak, lamb, pork, veal? All of them, some of them, one of them, none of them; you decide. And of course, the side dishes. This is what our table looked like.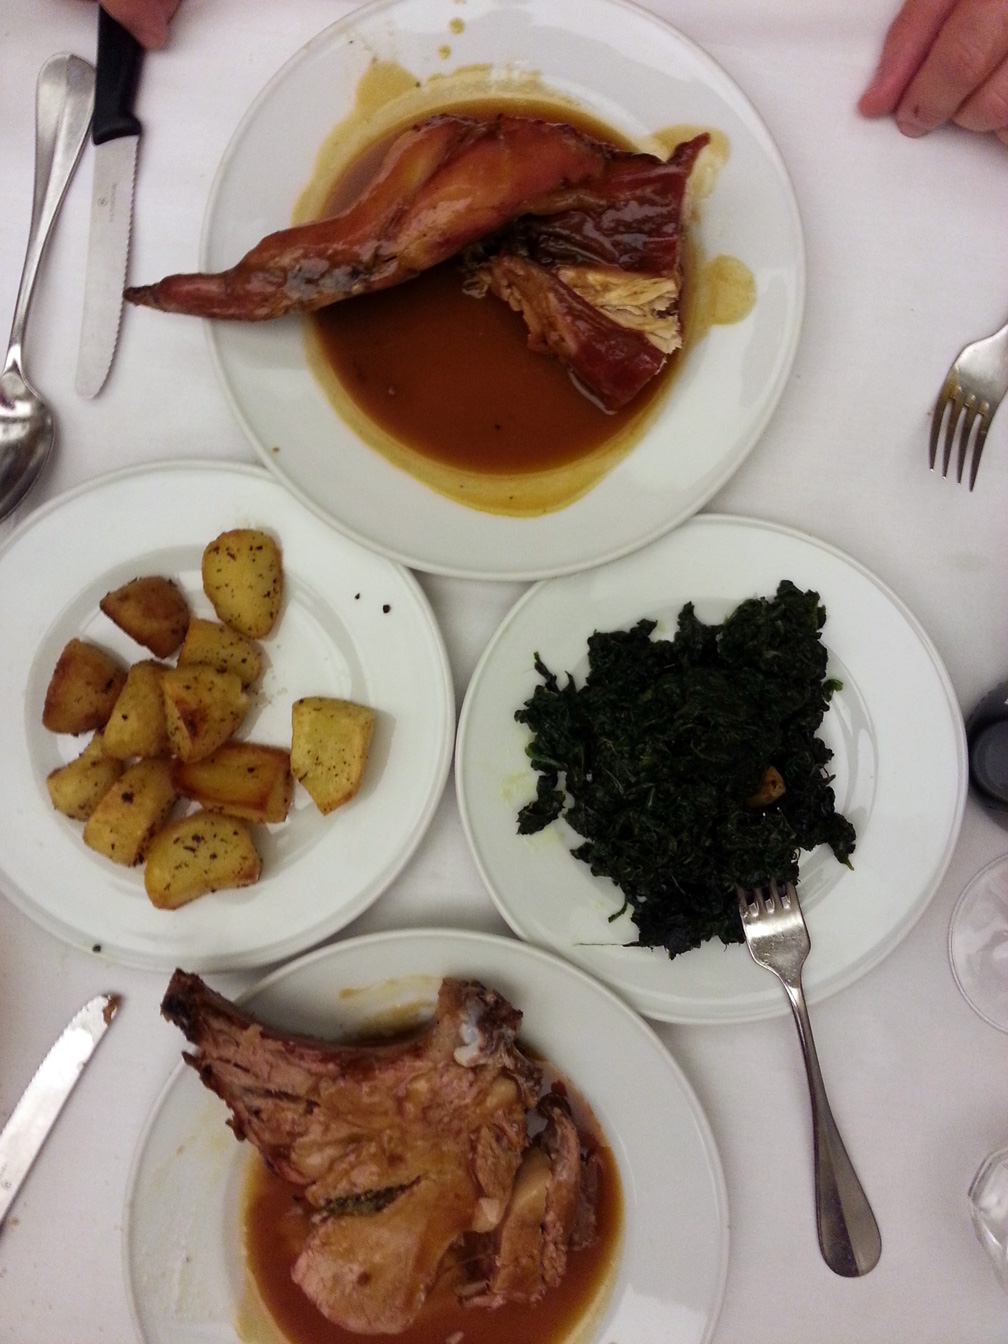
You should know, we cleaned our plates,but declined dessert. It was a good idea because, they brought out a plate loaded with cantucci and glasses of vin santo. Just as we thought it was all over they brought us a glass of moscato. You know,as you do. If you don’t know the drill
you think ahhh, they get you drunk so you aren’t freaked out by the bill. Because, come on, this kind of meal doesn’t come cheap.
Unless you are at il latini. They have reasonable in spades.

Pisa-Lucca in April–day two
On April 29, 2013 by sixtyacrebakerSaturday in florence is like Saturday in any city. Locals pouring into town to do their weekend shopping and tourists milling about in large groups, staring upwards. Just an all around crowded situation. Which is why we got out of town. Pisa and Lucca the destination. Turns out, it wasn’t such a bad idea. The weather had turned runny just as we took our seats on the excursion bus. Rain began pouring down. I never think i am a fan of the organized tourist train/bus/walk, but i nearly always give them a try. I am hardly disappointed; except when it includes food. Which is a big bad bust, most of the time. Those i avoid, because as you know, I am all about the food. Speaking of which. We had steak and eggs for breakfast.There are no photos, because i forgot. By the time i remembered it didn’t look so appetizing. Just trust me; leftover bistecca fiorentina with a couple of fried eggs and hunk of bread, is money.
In Pisa we did a tour of the church, which is beautiful but dark. Too dark to take photos. Because in churches, you can’t wear a hat and you can’t use a flash. The real draw in Pisa is the tower. A leaning tower.I love all the great photos that people fashion; holding the tower up, grimacing under the supposed weight. They never cease to humor me.However, I rarely see this maneuver.
Someone kicking the darn thing over.It is funny, right? That is my husband. He enjoys a good laugh as much as I. We hooted over this one for hours.
Time for lunch. In a tourist town, where restaurants actually name themselves restaurant tourista, getting a good meal is a bit dubious. We found one just outside the main tourist area called Trattoria Bruno.
Mike’s penne pasta with rabbit and boar was outstanding.
My handmade pasta with porcini mushrooms was also delicious. The pasta so thin, you could almost see through it.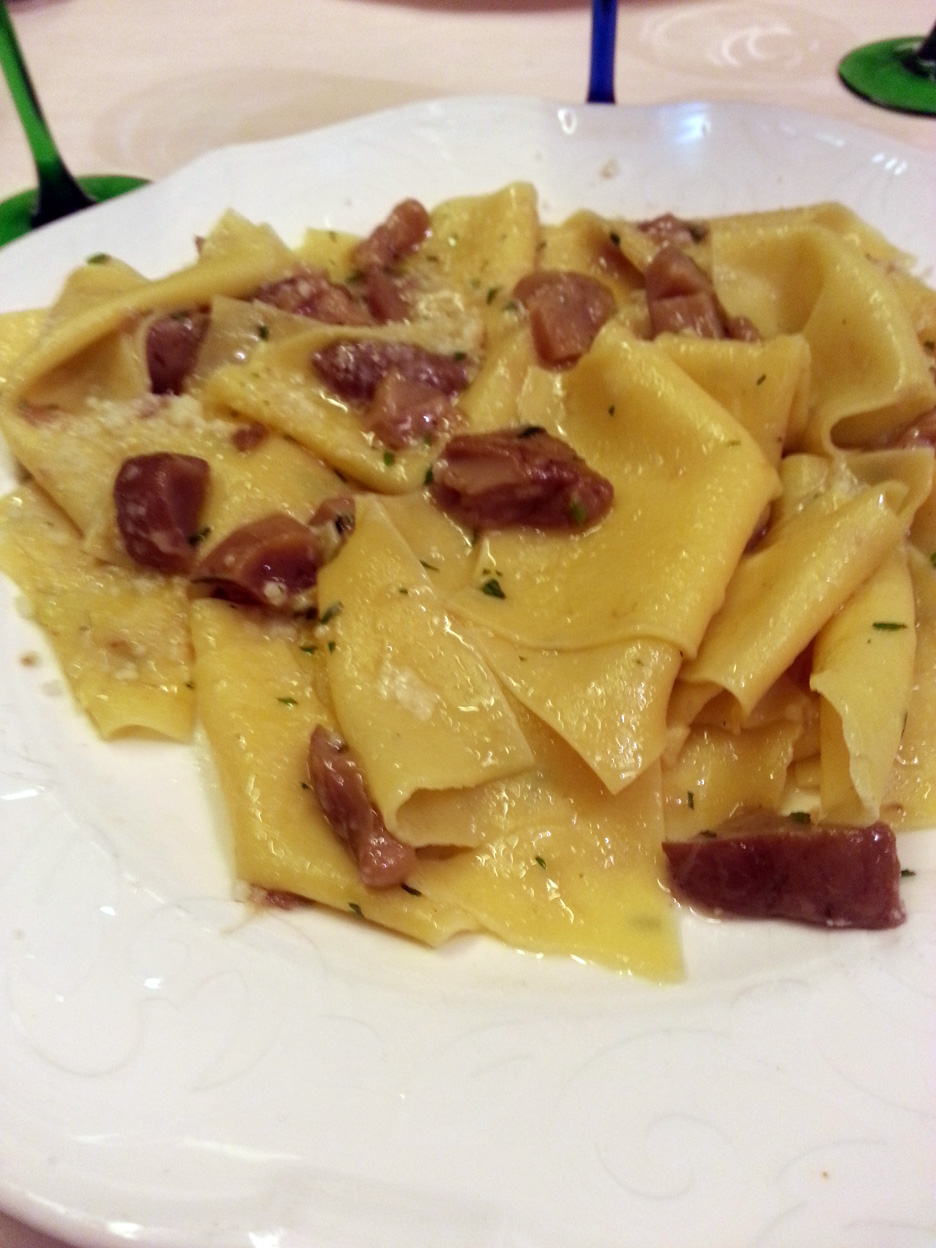
From Pisa we got back on the bus and headed to Lucca; a medieval city that is usually quite lovely.However, on a rainy Saturday with many of the venues closed for the afternoon,
there was little to see. After getting a bit drenched in the rain we stopped for a hot chocolate. In this part of Italy, hot chocolate is more like warm chocolate pudding, than chocolate water. You decide if it sounds better or not.
e poi
which means and then not the poi you eat in Hawaii, which is not Italian by any means. Despite having the same name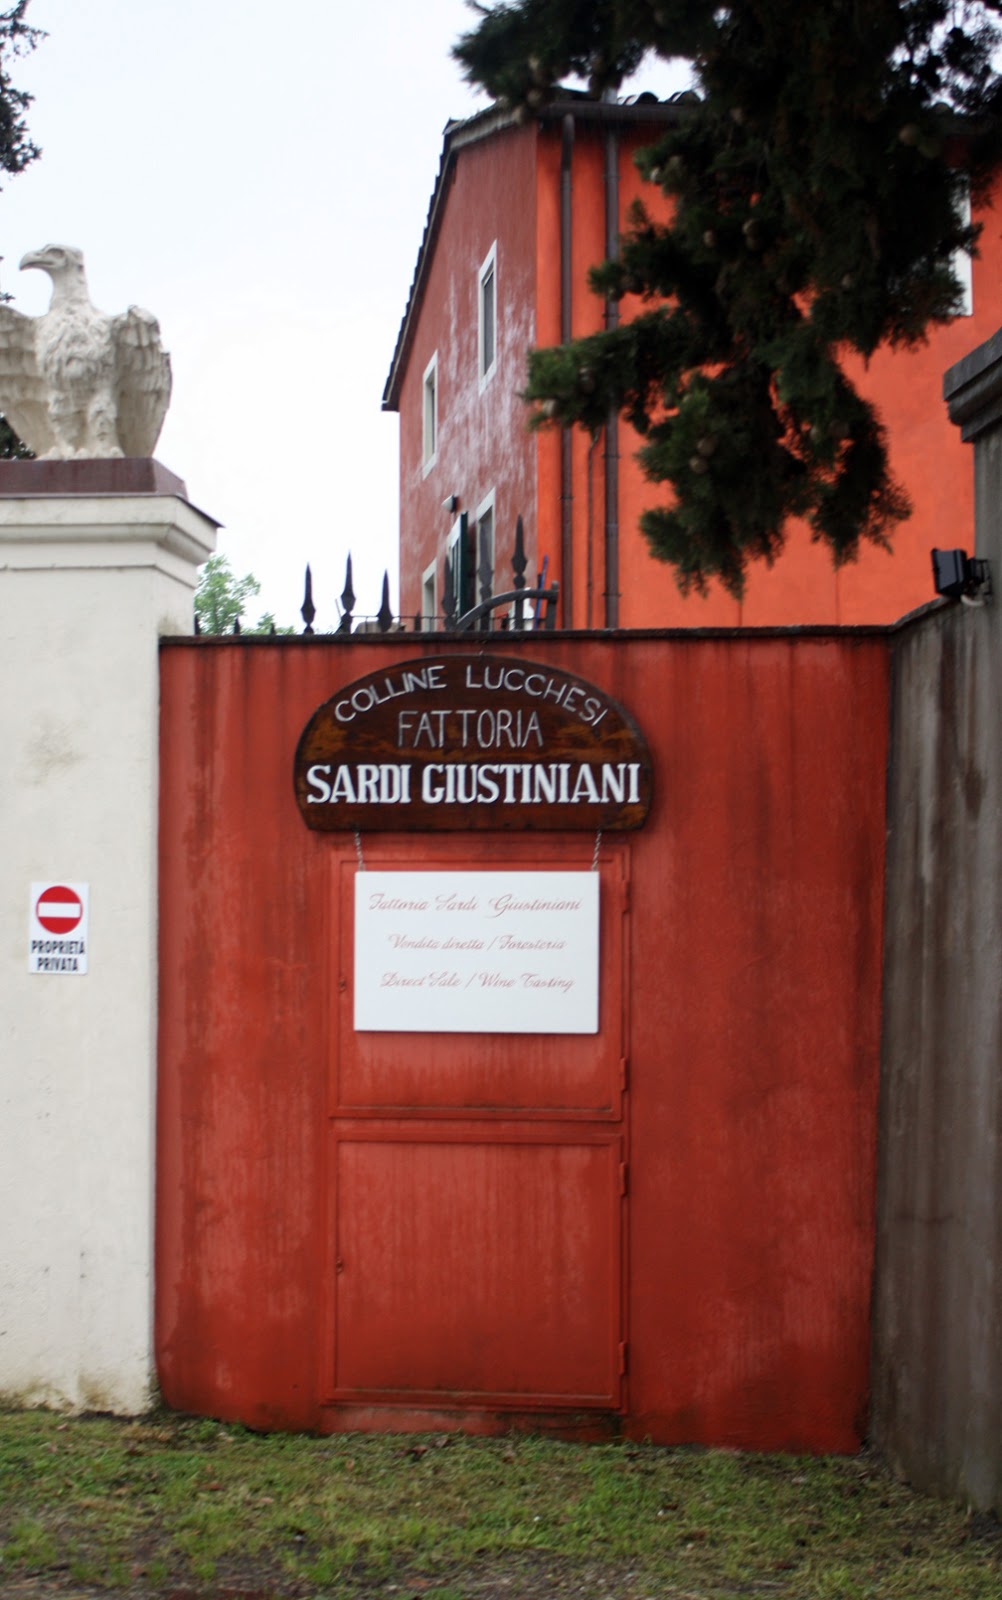
We visited a winery just outside of Lucca, where it turns out, they make the house wine for one of my favorite places in New York City. Sant. Ambroeus. When i was getting married
my dress came from vera wang. Before my first appointment and subsequently all my fittings, I would have coffee and a little something at sant ambroeus. So when the proprietor of this winery in Lucca off-handedly mentioned the restaurant I perked up with “on madison avenue!?!” Sje and i had a bonding moment. It is her brother’s place and all the “house wine” comes from here.
It is pretty good. A tasty drinkable wine. I was set to buy quite a bit, but then my new friend the owner gave me the name of their american distributor, so i wouldn’t have to pay for shipping. Which now means, i’ll probably buy a whole case.
After the wine and the food and the travel by bus, we were pretty wiped out and without plans for dinner. We grabbed a quick porchetta sandwich and called it a night. Actually,a night and half a day,since jet lag reared its ugly head. We slept about 12 hours. Waking up just in time to search out lunch….
Firenze in April–day one
On April 26, 2013 by sixtyacrebakerI should really keep a food journal. Not in the way that you think. I don’t want it to scold myself, but to extol the pleasures of each and every bite. Lovely lines filled with prose, explanations of the blissful moment that fork meets mouth. I would show it to my internist as i step on the scale, so he might be so wrapped in envy, he’d forget to scold. Fat chance literally. Today was our first full day in Italy. We rented an apartment; both for economy and luxury. I like to fill a fridge: beverages, fresh fruit, yogurt, and other simple provisions. This is so each meal isn’t eaten out and we can enjoy lazy mornings reading the local paper or catching up on email.
Those gorgeous hotel breakfasts served in Europe are mostly lost on me. I like to ease into my day, and an apartment in the heart of the city, affords me that luxury. As luck would have it, for longer stays the cost savings can be quite extraordinary.
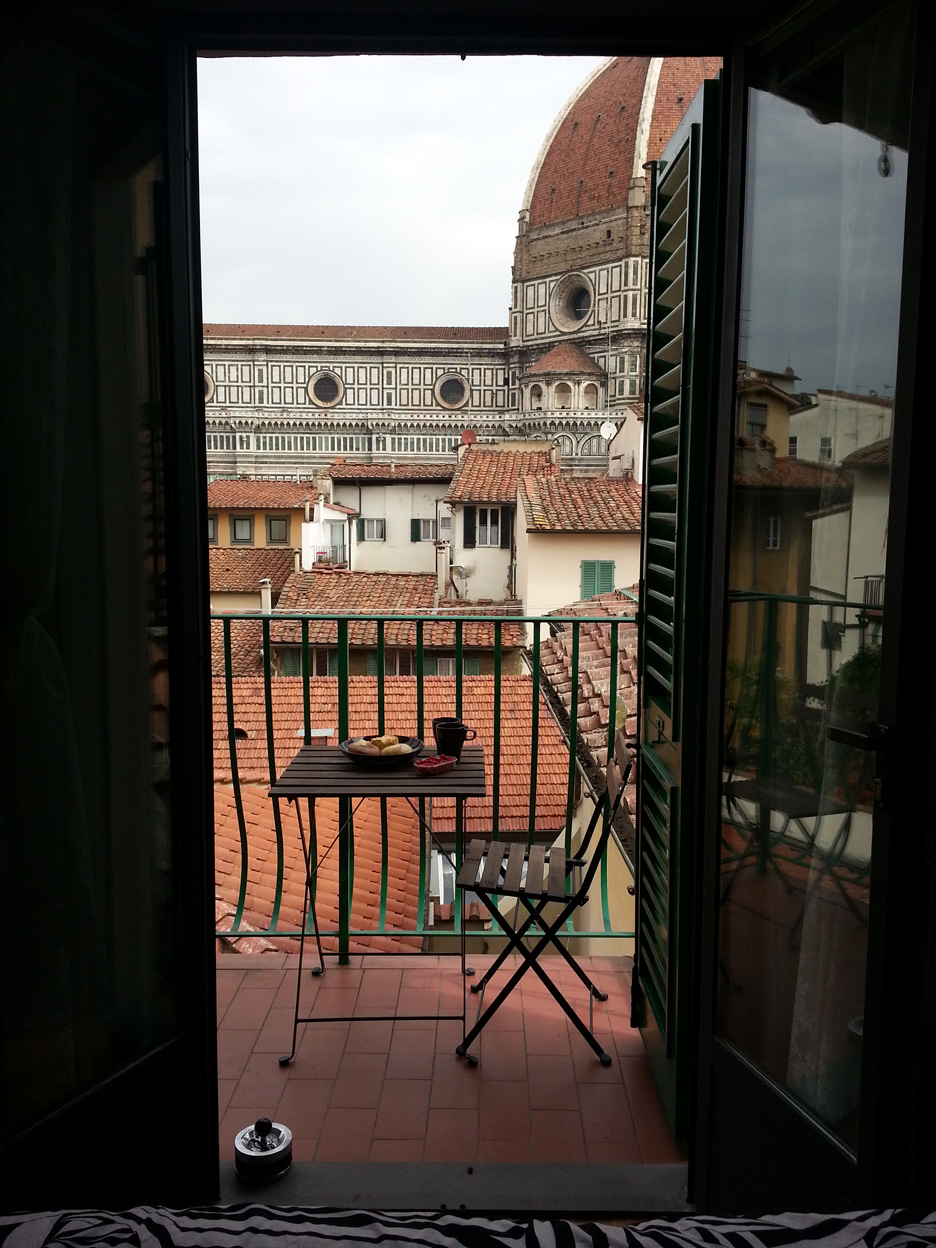
We dropped in to the local market last evening and stocked the fridge. This morning, I popped down to our local bakery and fruit stand to pick up a couple of things for breakfast. I made a pot of coffee, set up breakfast on the veranda, and enjoyed our
beautiful view of the Duomo.
These incredible fragoline wild strawberries from sicily are tiny and pure white on the inside. They are sweet as they are small with pure strawberry flavor. We are drying a few on the counter so we can bring them back home to plant. Hopefully they will germinate.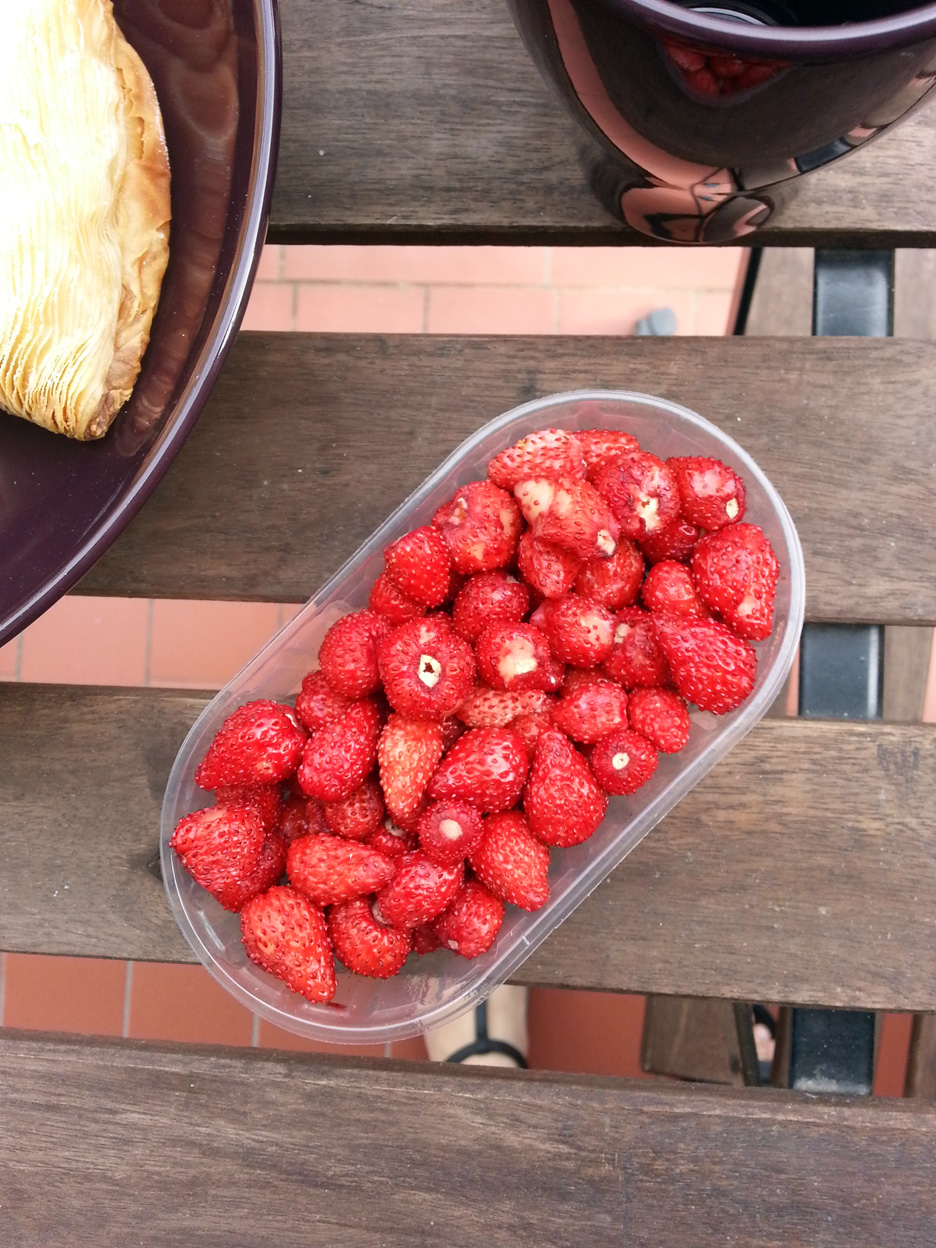
Post breakfast we walked, and walked, and walked some more. This town is crowded, people everywhere.
I was in school here in the 1980s and for the last decade or so, I’ve tried to make it back every year. Each time the crowds seem larger. The secret is definitely out; but, I do still feel the charm of a city i loved in my youth. Speaking of the secret being out, we had lunch at one of my favorite spots. It used to be a sleepy little place, in a lesser known square on the oltroarno. Partly by my own fault telling anyone who would listen and partly because of it hitting the guidebook circuit, it has become very, very popular. Surprisingly,
the prices remain low and the quality high. Osteria Santo Spirito is a true gem with simple yet delicious food. I always get the gnocchi tartufo small portion–still enough to share. The restaurant shared with me the ingredients for the gnocchi..but not the recipe. I have successfully duplicated the sauce both with pasta and potatoes and I may be persuaded to share!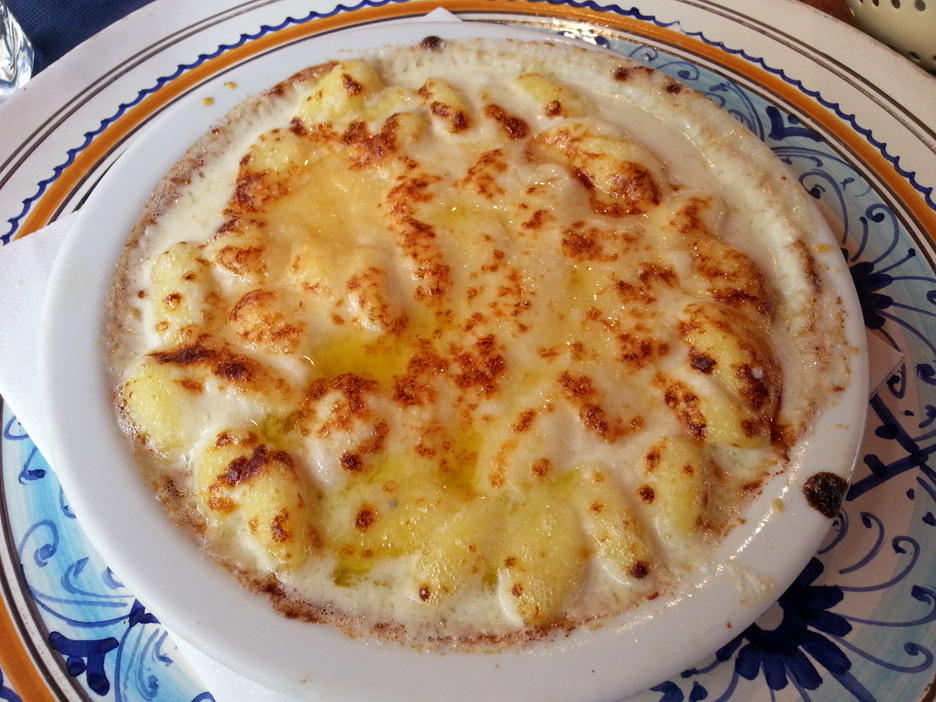
Mike went with the rabbit cacciatore which was equally delicious.
On our way back to the apartment we stopped in at the Gallileo museum. It is a relatively small space filled with the most amazing instruments, used in applied sciences. It also houses
Gallileo’s mummified finger; if you are looking for a draw for your teenage son or fully grown husband.
The day progressed with more walking, an afternoon relax, and this ginormous steak.
Farro Crostata
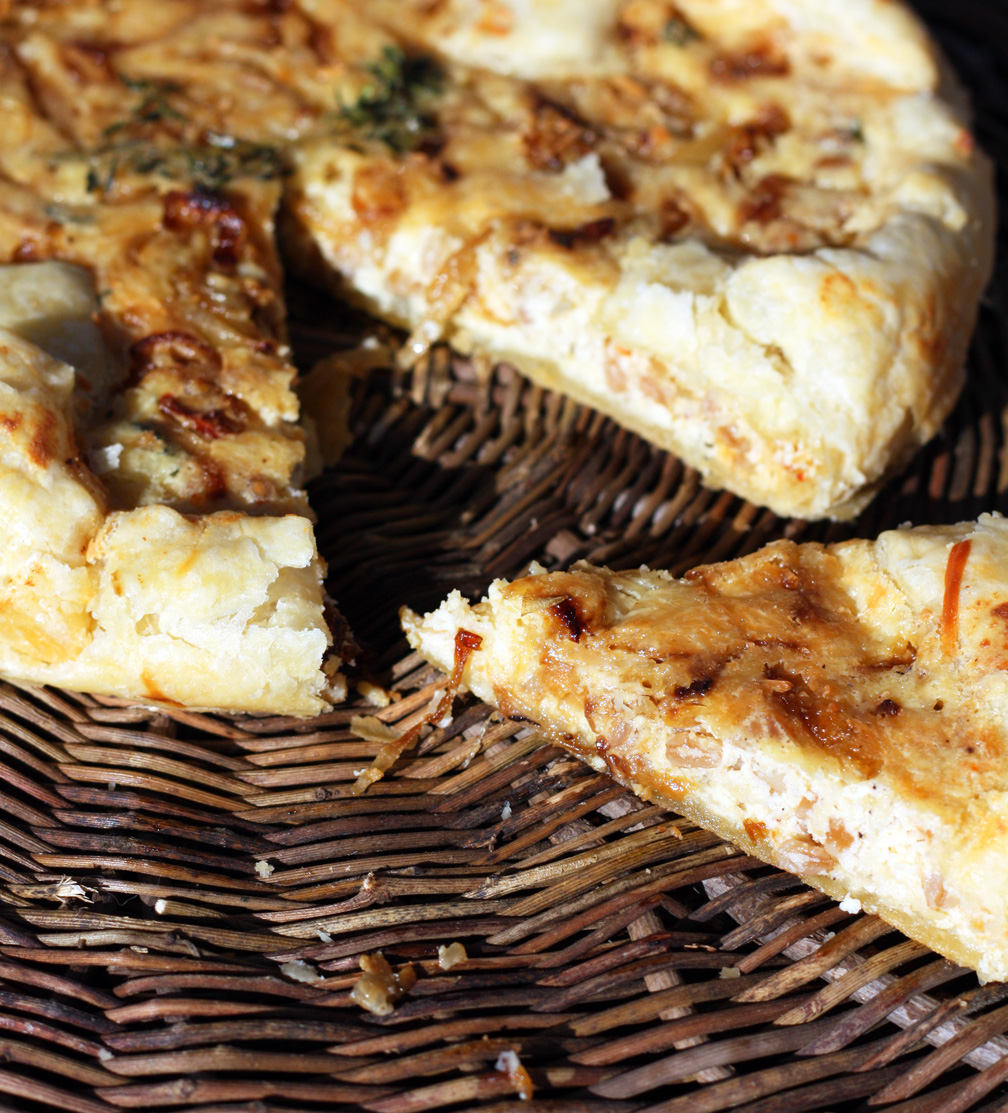
On April 6, 2013 by sixtyacrebakerAs spring arrives so does my realization that i have been tucking into thick suppers of roasts and shanks, for months. With the promise of long days and evenings of light, my desires change. I begin to crave hearty vegetarian suppers. When i was offered the opportunity to try Tuscan Fields Organic Farro, I jumped at the chance. I enjoy the meaty texture and nutty flavor of farro, using it mostly in soups and summer salads. However, for this recipe, I took inspiration from a classic and favorite Italian Easter Pie.
Substituting savory elements, for sugar and fruits, this farro pie is lovely as a simple supper. Eat it by itself or paired with a leafy salad.
Farro Crostata
1/2 cup onion–thinly sliced
1/4 cup onion–finely chopped
1 clove garlic–finely chopped
1/2 tsp fresh or 1/4 tsp dried thyme
1/2 cup organic farro alle verdure by Tuscan Fields -cooked
1/2 cup ricotta cheese
2 extra large eggs
1/2 cup grated parmesan (+more for topping)
generous pinch kosher salt
1/4 tsp freshly ground black pepper
1/4 cup cream
1/8 tsp freshly grated nutmeg
olive oil
1 sheet puff pastry
Pour enough olive oil in the bottom of a skillet to just cover the bottom. Toss in thinly sliced onions and over low heat, slowly caramelize. If you find that they are starting to cook to quickly, add a couple of splashed of hot water to slow down the cooking. Once fully caramelized (about 20 minutes), remove from pan and reserve. Meanwhile, whisk together the farro, ricotta, eggs, parmesan, salt pepper, and nutmeg in a large bowl. Using the same skillet in which you caramelized the onions, without washing, add a tiny bit of olive oil (1 tsp) and over low heat, saute the chopped onion, garlic and thyme just until the onion becomes translucent–keep from browning. Pour in the cream, use a spoon to scrape up the bits from the bottom of the pan. Allow the cream to come to a simmer, then slowly stir into the farro and ricotta mixture. Place your puff pastry on a cookie sheet or in a pie tin. It is not necessary to shape it into a circle, if it is square. Gently spoon the farro mixture into the center of the pastry, allowing it to naturally move towards the edges. Allow for at least 2″ from the mixture to the edge of the pastry. scatter the caramelized onions on top and sprinkle with additional parmesan cheese. Fold the pastry ends towards the center, overlapping itself and the farro mixture as necessary to keep the contents within the confines of the pastry. Alternatively, you can line a pastry tin with puff pastry and simply fill with the farro custard. Bake in a preheated 350F oven for 30-40 minutes. After 25 minutes keep a watchful eye that the custard is not “souffleing”–you do not want to over cook this, as it will dry it out and it will taste a bit eggy. This crostata is meant to be creamy. Serve warm or room temperature.
*i received several samples of Farro from Tuscan Fields, free of charge, to utilize in recipe experimentation.
The French Truffle
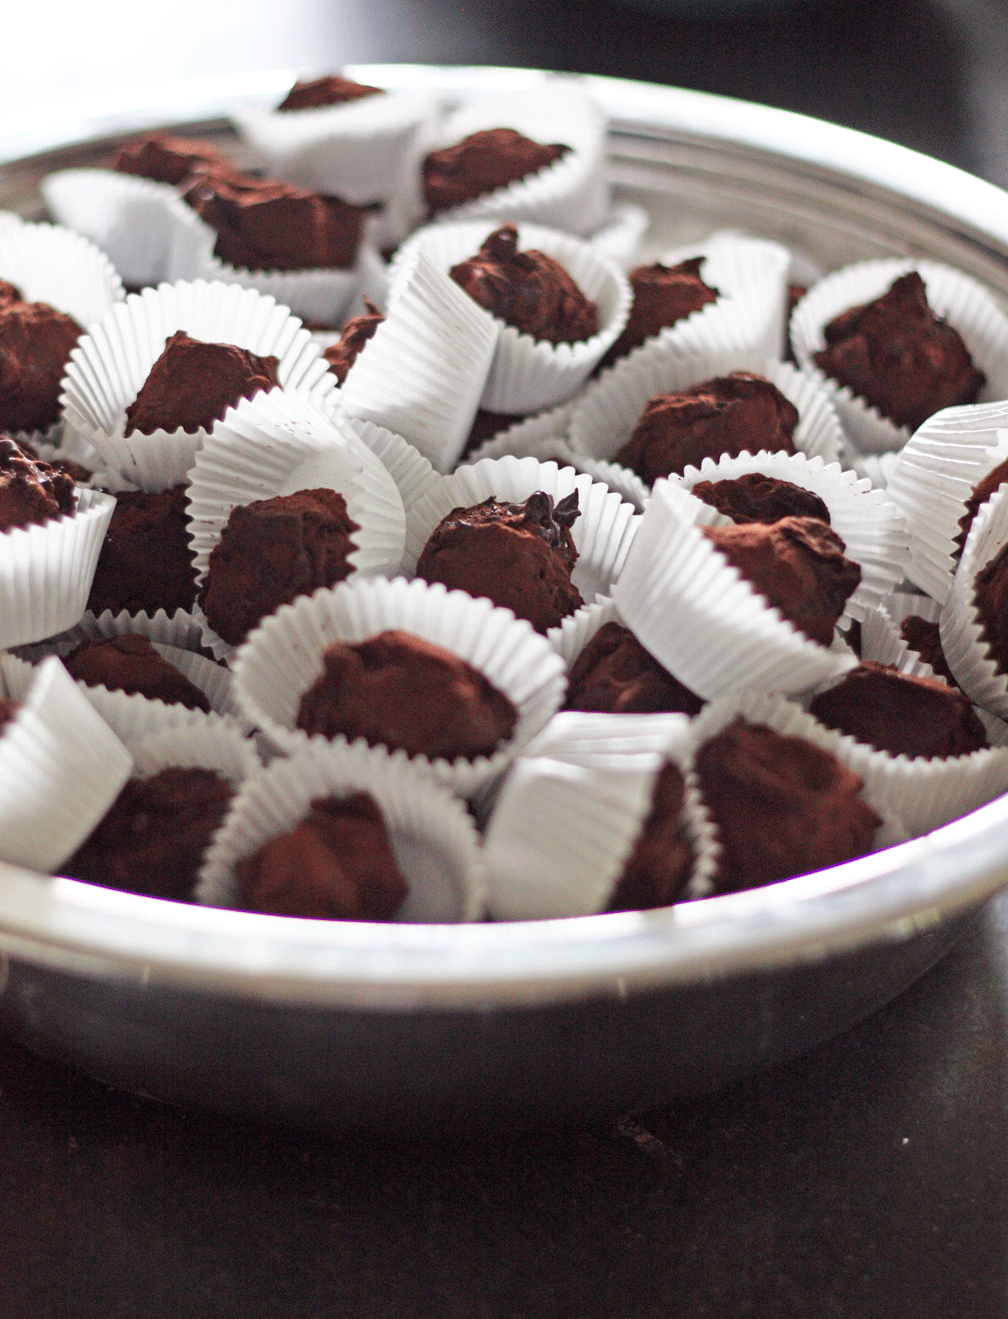
On March 16, 2013 by sixtyacrebakerI do love the simplicity of a unfussed truffle. No gild or frill. Just quality chocolate, a bit of cream, a splash of cognac, a wisp of sea salt, and butter dipped and dusted.
The French Truffle
9 oz bittersweet chocolate (min 65%)
6 oz heavy cream
pinch sea salt
1 Tbs unsalted butter
2 Tbs cognac
*chocolate for coating and cocoa powder (or powdered sugar) for dusting
Bring heavy cream and sea salt to a simmer over low heat. Place chocolate bits in a large bowl. Cut the butter into small pieces and place in bowl with chocolate. Remove cream from heat and swirl in cognac until incorporated. pour over the chocolate bits and allow to sit 1 minute before stirring. Stir until the chocolate and butter is melted and fully incorporated into the cream. The mixture should be thick. Allow to sit at room temperature until it hardens enough to form into balls. Using a small ice cream scoop, or melon baller, form filling into balls. Roll them between your palms until they are perfectly round. Allow to sit out (or place in the refrigerator) until they harden up again. if you put in the fridge, allow to come to room temperature. At this point, you may roll them directly into the cocoa powder or powdered sugar. I like to enrobe mine in chocolate. It gives them the rough exterior as well as helps preserve the delicate filling.
To enrobe:
It is not required to use tempered chocolate for this particular truffle because you will be rolling it immediately in cocoa powder. It is however, important that you do not heat your chocolate to too high a temperature otherwise it will not harden back up properly. Using a microwave safe bowl, cook about 8 oz of chocolate pieces 30 seconds at a time in the microwave. After the first 30 seconds, check the heat of the bowl. if it is really hot, you can melt the chocolate in its residual heat. Remove the bowl from the microwave and stir the chocolate. If it melts completely, then you are done. If it doesn’t melt at all…cook for another 30 seconds…if it is almost melted, go down to 10 second increments and watch to make sure that it doesn’t get too hot. When you are ready, place a shallow bowl of cocoa powder next to your bowl of melted chocolate. Dip each truffle in the melted chocolate, then immediately drop into the cocoa powder. Coat it completely, then remove to a lined baking sheet to cool. I do not recommend putting the truffles in the refrigerator before or after dipping (to harden) because it can cause the filling to expand and contract, and break through the coating. They should do fine at room temperature to firm up. I do however, recommend refrigeration for longer term storage.
You can also freeze the filling (once you have them formed into balls) well sealed for up to a month. Remove them and allow them to defrost in the refrigerator, then come to room temperature before dipping, being careful to remove any condensation.

Lollipops
On March 8, 2013 by sixtyacrebakerThese are rather simple. Of most importance is that you thermometer is accurate and humidity levels are at a minimum.
Lollipops
2 cups sugar
2/3 cup corn syrup
1/2 tsp cream of tartar
1/4 cup water
2 tsp flavor (if using extract–much less if using oils)
food color
Place sugar, corn syrup, cream of tartar and water in a heavy bottomed pot. Stir to combine, and wash down sides with a pastry brush dipped in a bit of water. Place on very low heat and stir until the sugar has melted and the liquid begins looks clear. Cease stirring and insert candy thermometer. Allow to boil, untouched until the syrup reaches 290F. Don’t loose patience, keep the fire on very low. At 290F, begin to watch very carefully. I like to allow the temp to come all the way to 310F, but if you are making a light colored pop, you may want to stop at 300F, as the sugar begins to develop a color around 295F. When you reach your desired temperature, add the food color and flavoring, and swirl to incorporate. Keep the pot on the fire and allow it to come back up to temperature (300F or 310F respectively). Carefully pour into your molds, or onto a greased sheet of foil. Add sticks and then allow to cool at room temperature.
makes about 18-20 2″ pops
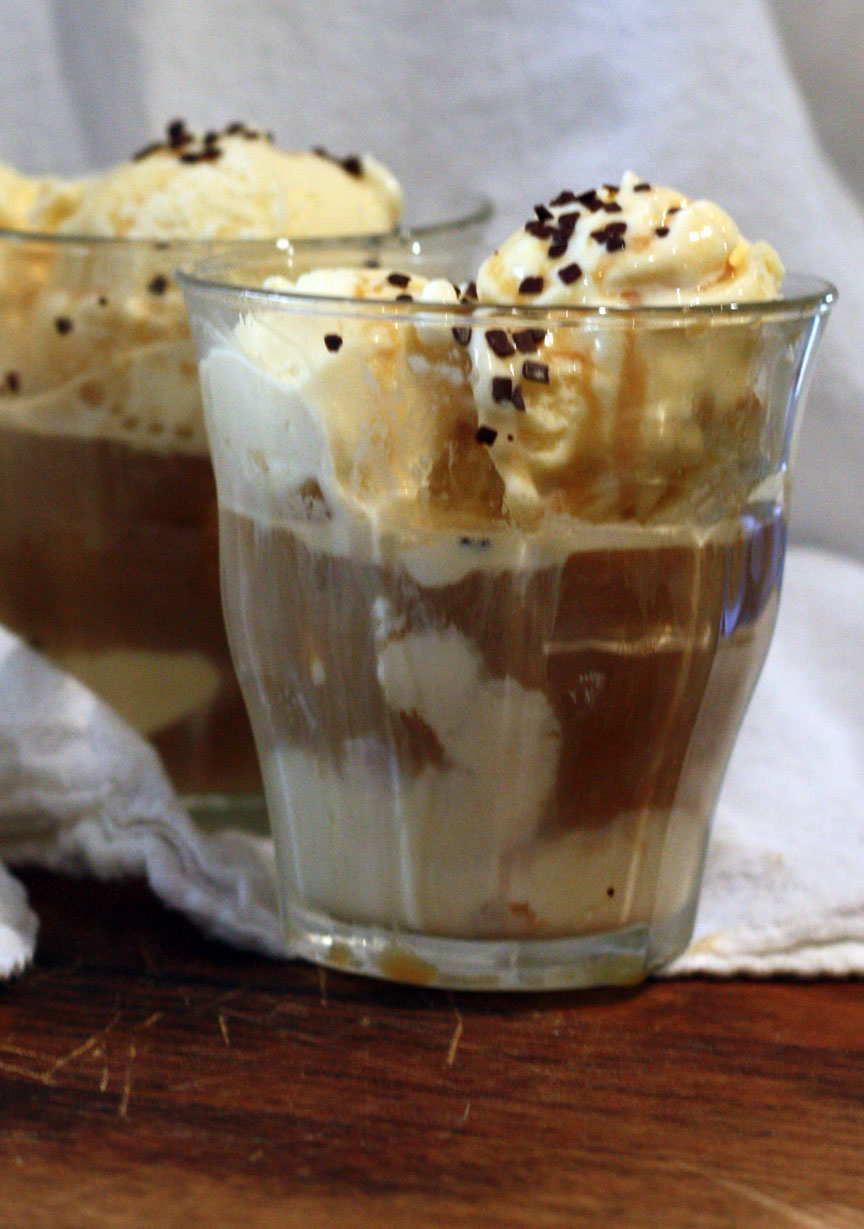
Affogato
On February 28, 2013 by sixtyacrebakerSometimes afternoons call for a snack; a pick me up that is both frozen and warm, and punched with caffeine. When the mood strikes, fix yourself one of these.
Affogato
vanilla ice cream
shot of espresso
This is not a sundae…nor it is meant to be a huge dessert. use a nice vanilla ice cream and give yourself a nice size scoop. While your shot of espresso is still warm (but not piping hot), pour over the ice cream. The espresso will melt the ice cream, so don’t linger too long….
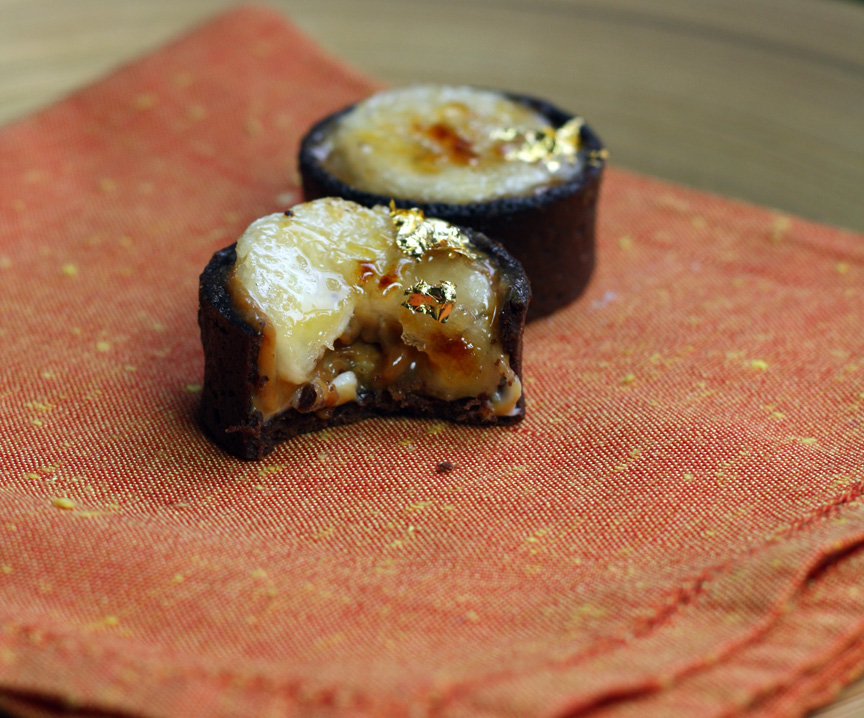
Banoffee Brulee Bites
On February 8, 2013 by sixtyacrebakerI can’t resist this perfect little bite. It is decadence in a shot. With a crackly pop of burnt sugar crust, they are irresistible. Fix a few for the person you love; especially, if it is you.
Banoffee Brulee Bites
1 recipe chocolate sable recipe here
1/4 cup semi-sweet chocolate-melted
dulce due leche prepared or 1 can sweetened condensed milk
small tub mascarpone
bananas
sugar
freshly grated nutmeg
edible gold leaf (optional)
If you are making your own dulce de leche, you need to start a day in advance. Pour the sweetened condensed milk into a pie or cake pan at least 8″ in diameter. Place in a larger cake tin or oven safe pan that will leave at least a 1″ (moat) around the pan. Fill the larger pan with water, half way up the rim of the smaller pan (making a bain marie). cover the smaller pan with foil. Place in a 425F oven for about 1 1/2 hours. Check after about 45-50 minutes to make sure the water does not evaporate completely. Add more water if you see it getting low. after 1 1/2 hours the milk should be caramelized. remove it from the water and stir until it is smooth. allow to cool before using. will last in the refrigerator about a week.
bake off the chocolate sable in small tart tins (about 1- 1/2″). A mini muffin tin is a good mold for these. let cool and remove from tin. Using a small paint brush, cover the inside of each shell with a thin layer of melted chocolate. Allow to harden.
to assemble
Spread about 1/4 tsp of mascarpone in the bottom of each tart shell, allowing it to come up the sides. Top with a thin layer (about 1/4tsp) of dulce de leche. Top with a thin slice of banana (1/16″), spread just a whisp of dulce de leche on top of the banana, then top with another banana slice, a bit thicker (1/8″). Sprinkle a bit of sugar on top, and a light dust of freshly grated nutmeg. Using a torch, caramelize the sugar. for a thicker sugar crust, add a bit more sugar and caramelize with the torch again. Top with a bit of edible gold as an option
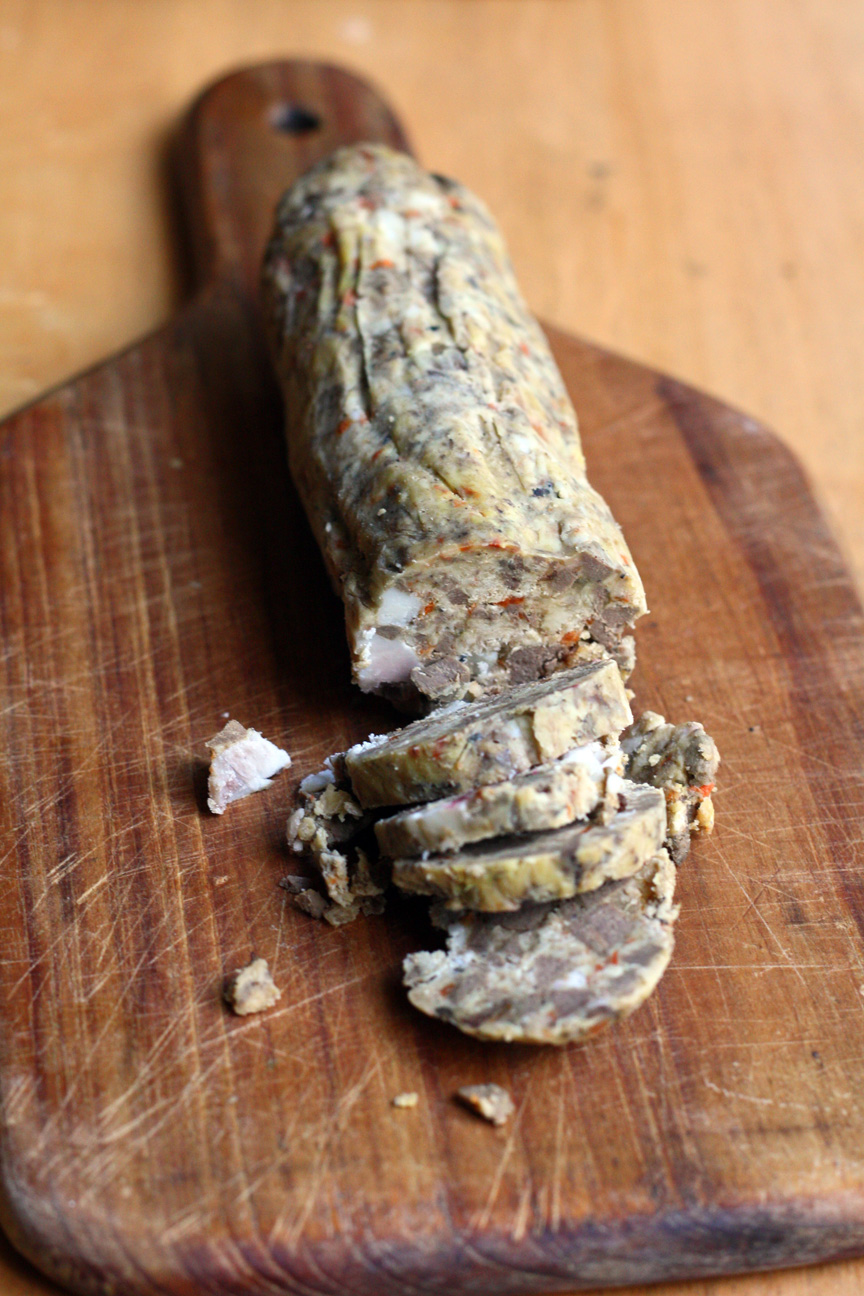
Haggis Reimagined
On January 26, 2013 by sixtyacrebakerAcross the pond and north a bit, January 25th is a big deal.
It is Burn’s Night.
It is a night, in deference to a favored Scottish poet, Robert Burns.
Revelry is compulsory.
And so is haggis.
Words are read, songs are sung and haggis is served.
On this side of the world, prepared haggis is difficult to find.
So, this year I set out to make my own version.
Although true to the spirit, its authenticity can be called to question.
It is not for the weak of stomach nor those with a flair for the dramatic.
My version is haggis-lite; using more readily available ingredients and served in a less traditional fashion.
To learn more about Burn’s Night Supper click here
Haggis
to prepare sheep heart
1 sheep heart (about 1 lb)
milk
3 pearl onions
6 whole cloves
10 peppercorns
1 large or 2 small bay leaves
a 1/2″ piece of lemon peel–pith removed
water
Thouroughly clean the sheep heart under cool running water. Soak in milk (to cover) for about 4 hours or overnight. Remove from milk and rinse once again. Place in stockpot. Stud the pearl onions with whole cloves and place along with peppercorns, bay leaf and lemon peel in the stock pot. Add enough cool water to cover. Simmer over low heat for 3-4 hours or until the heart is very tender. Remove and let cool, then finely chop the heart. Reserve broth
for the haggis
1/2 cup suet
1 cup onion–finely chopped
1 cup carrot–finely chopped
1/3 cup shallot–finely minced
1 clove garlic–finely minced
1/4 cup scotch
1 cup (approx) broth from heart
1 tsp thyme
1/2 tsp salt
1/2 tsp white pepper
pinch freshly grated nutmeg
1 cup oats–toasted and ground in mortar and pestle or blender
1 cup suet
Heat 1/2 cup suet over medium heat in large skillet. Add onion, carrot, shallot and garlic. Cook slowly until the vegetables are very soft. Stir in the chopped heart and let cook about 3 minutes. add thyme, salt, pepper and nutmeg. pour in the scotch and allow to reduce down (be careful it may flame up) Add 1 cup of broth and stir until all the bits are scraped up from the bottom. Remove from heat and allow to cool for 10-15 minutes. Add oats and suet and form into 3 cylinders about 2″ in diameter. Wrap each cylinder in plastic wrap securely and refrigerate overnight (or freeze for later use).
it is traditional to stuff into a sheep’s stomach and boil directly, however unable to obtain a sheep’s stomach, i opted for the more pedestrian approach. you can certainly “mock” the stomach by making a very large ball with the mixture. you may also stuff into sausage casing if you have on hand
to prepare haggis to serve
keep the haggis wrapped in the plastic wrap, while wrapping in a layer of foil. you may also put in a ziploc bag. place in a pot of boiling water and allow to cook for 30-45 minutes (if using cylindrical method….one large portion will take about 3 hours).
remove from water, unwrap and serve while hot. you may also refrigerate until cool, then slice and fry in a bit of oil for a nice treat.
