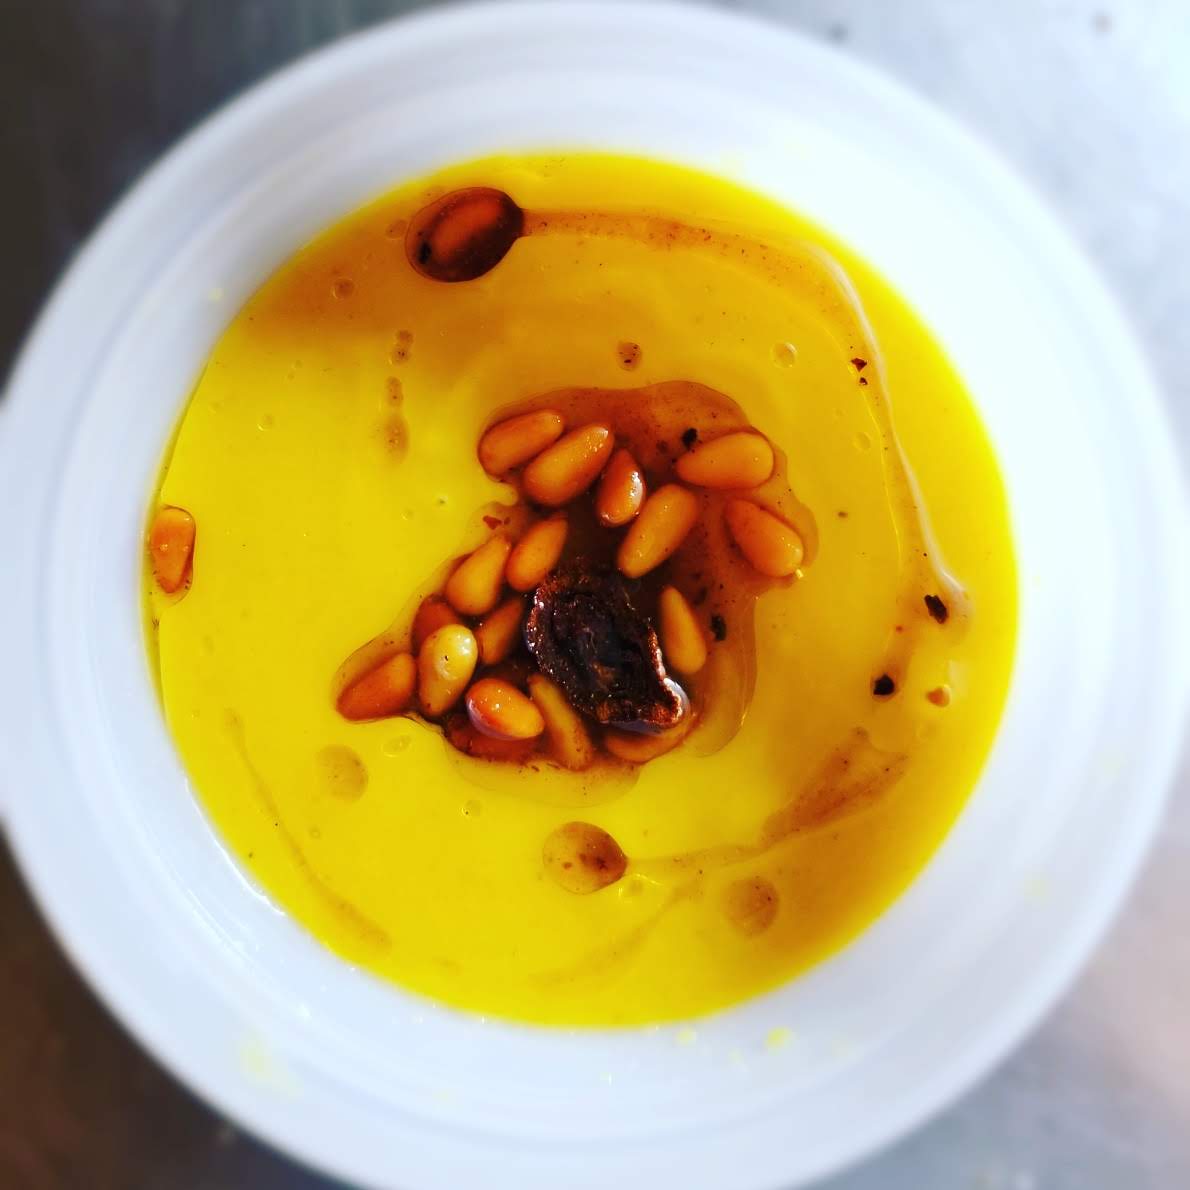
Squash Soup
On October 5, 2019 by Christy LarsenEvery year we grow pumpkins and squash in our gardens. It is always a bit of a
This past year we had good success with the Boston Marrow Squash. It is big and orange like a pumpkin, but it is not round and begging to be carved for
The Boston Marrow was once a very popular variety which was sold commercially. Its flesh is a bit dry and sweet. I believe it is in the
Our root cellar is not quite finished, so we have been storing our squash and pumpkins on the back porch. I do not recommend this. It is actually a horrible idea. My hope is that I will get through them all before the hand of time takes them away from me (or even worse, those dreaded squirrels).
I wish I had an actual recipe for you…but I never measure and I use what I have on hand. Hopefully, you will feel inspired to do the same.
Here is how it went:
Peel and cut about your squash (or pumpkin) into 1/2″ size cubes–about 3 cups…but as many cups as you would like. I like to match the number of cups of squash to cups of stock (or water). For every 3 cups of squash, finely dice 1/4 of an onion and 1 garlic clove.
In a stockpot, put enough olive oil to just coat the bottom. Toss in the onion and garlic and slowly cook until they are soft. If you see them starting to brown, add a bit of stock or water (an ounce or two) to stop the cooking. Stir in 2-3 Tbs curry powder, 1/2 tsp ground cumin & 1/2 tsp paprika. Let the paste get a bit cooked. Add to this the squash and give it a nice stir. Add your stock/broth/water to cover the squash. Grate 1/4 of an apple into the mixture (more if you’d like a bit more sweetness). Cook until everything is soft.
Remove from heat and run the mixture through a blender or use an emersion stick to fully puree the mixture. At this
Rinse your stockpot and then put it back on the stove and pour your puree back in. Turn the heat on low. This is where you start futzing. Add a tsp or so of Braggs, a little black pepper, additional curry powder if you think it needs it. Salt if it needs it. If it is too thick, add more stock/water…if it is too runny, let it cook a bit to reduce.
To Top: put some olive oil in a small saucepan…maybe 1/4 cup. Toss in a tsp of curry powder, a pinch of red pepper flakes a handful of dried onions, or fresh onions, or onion powder and a handful of pignoli nuts. Cook until hot and the flavors are melded.
To serve: Put the soup in a bowl and top with your delicious curry pignoli oil. Ta Da!
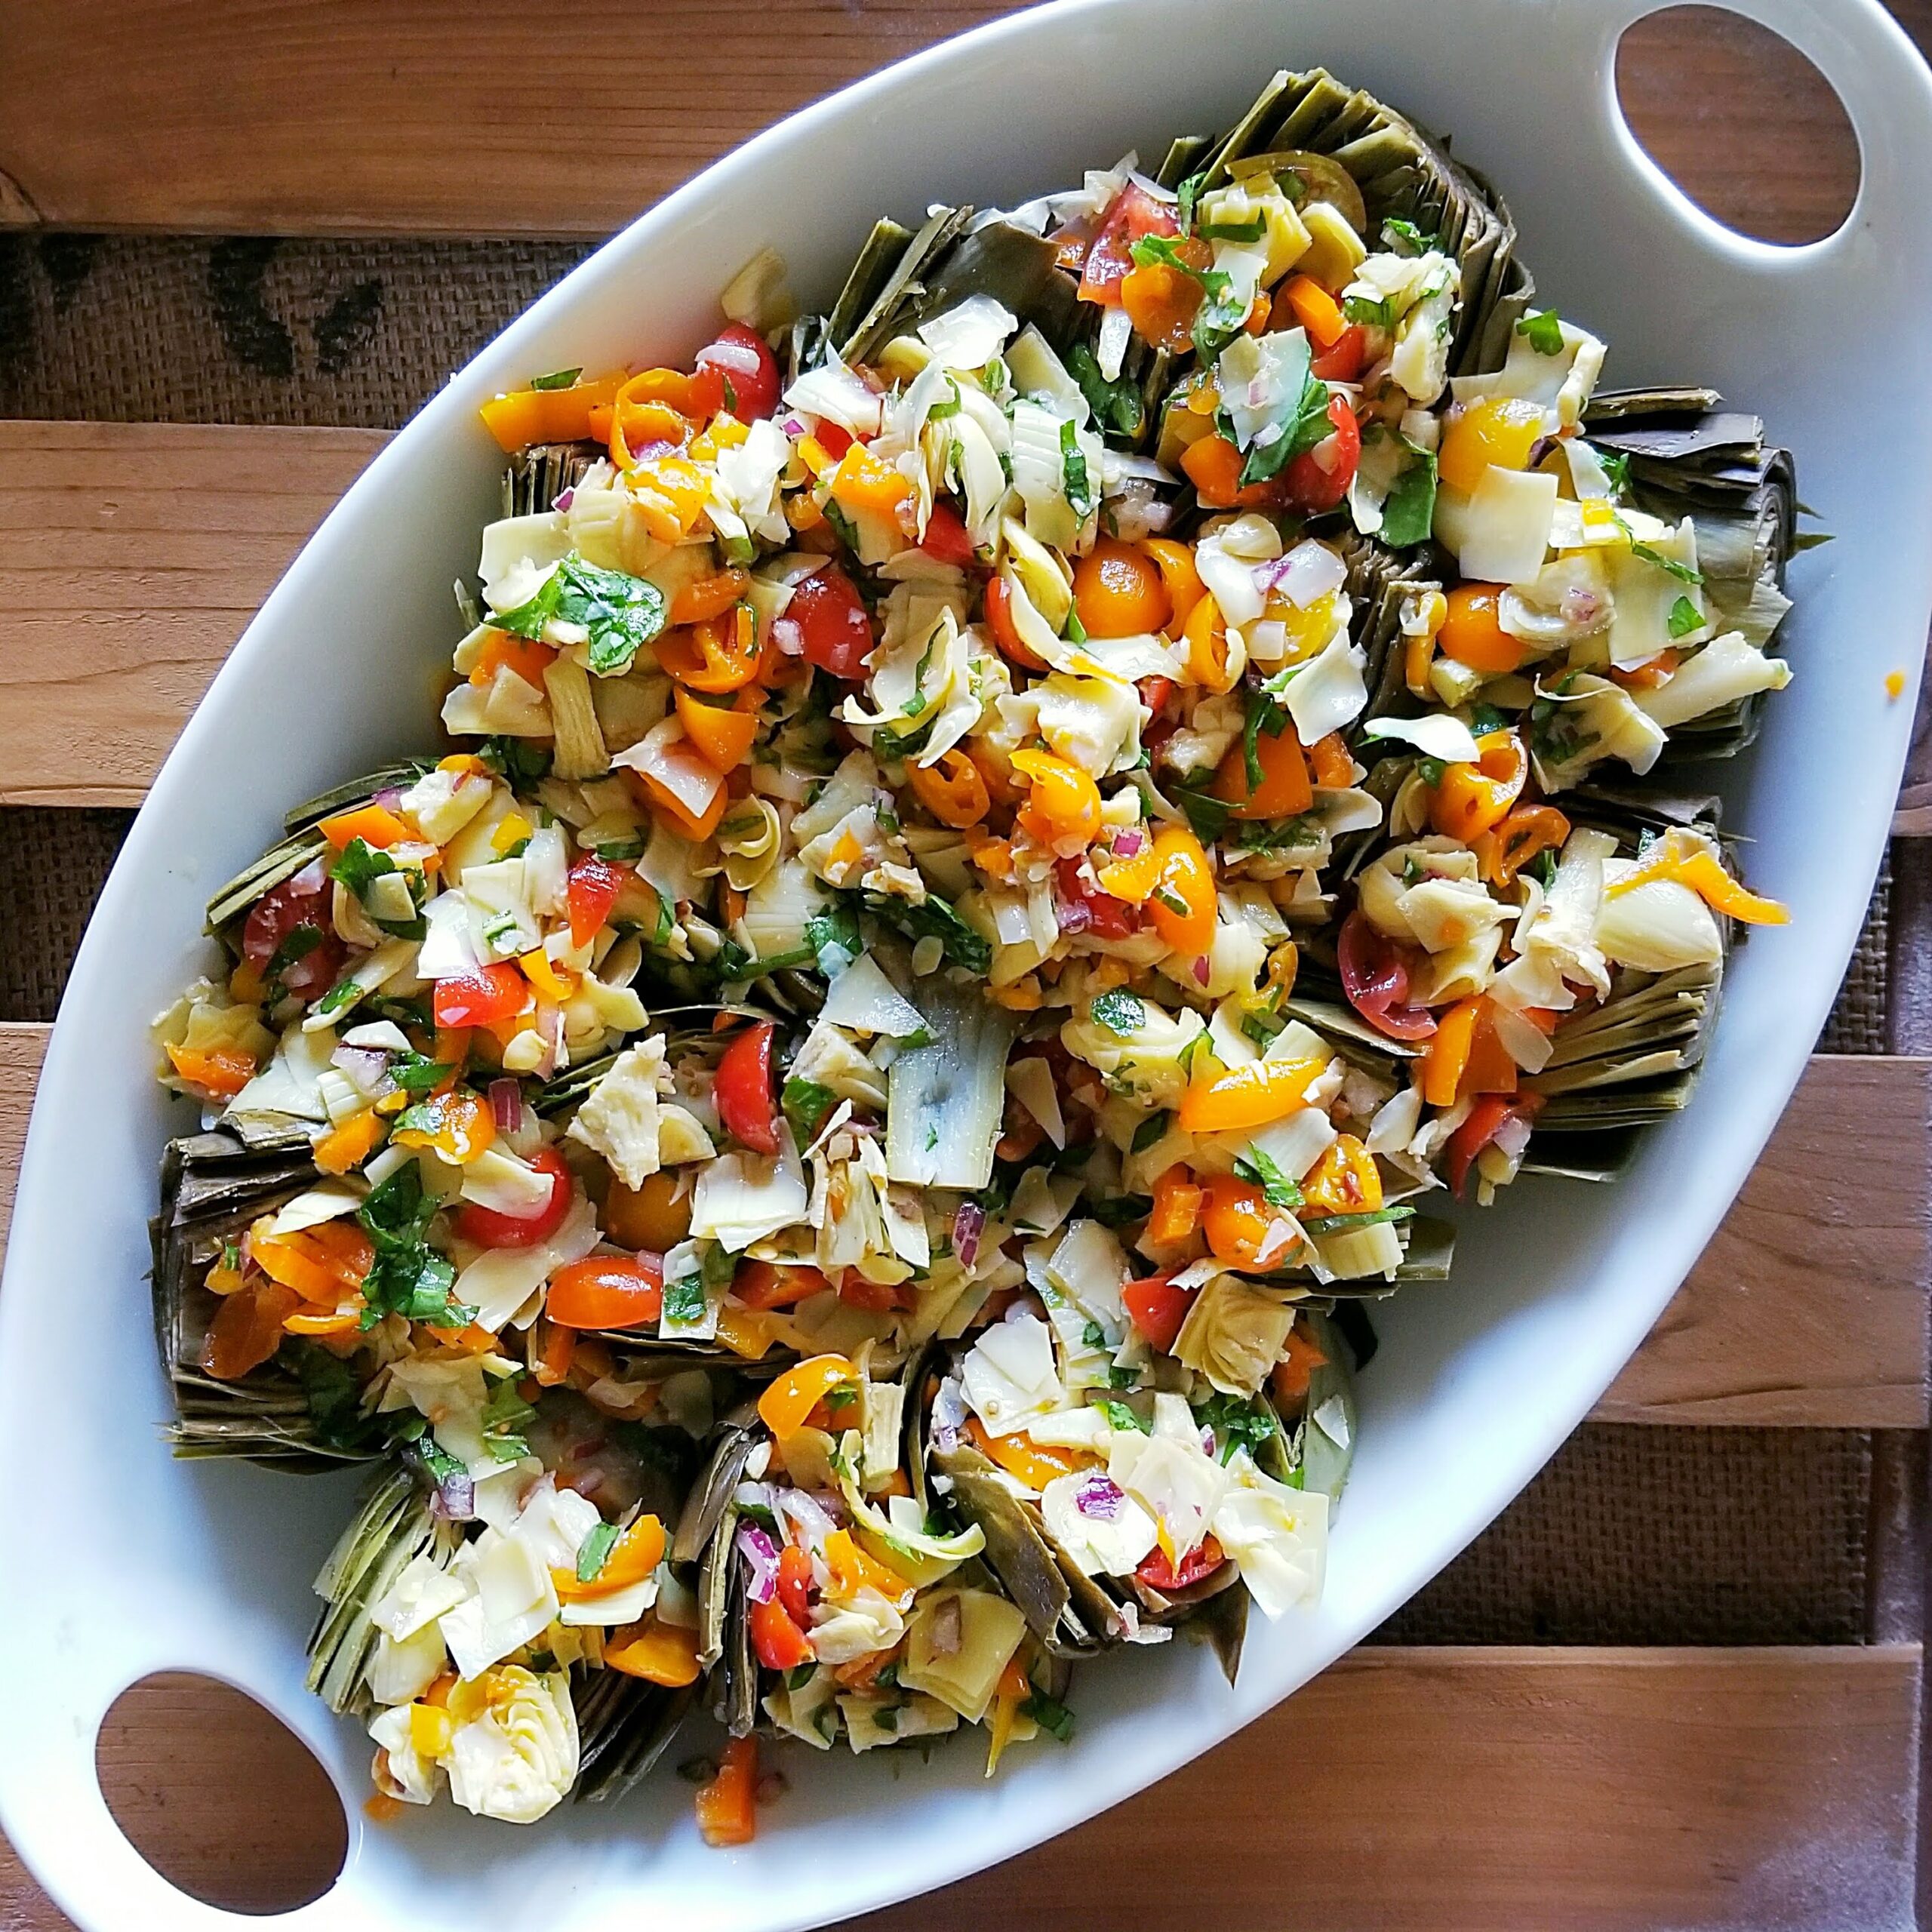
Artichoke Stuffed Artichokes
On April 9, 2018 by Christy LarsenWhen it starts to warm up, and spring is in full swing, we dine alfresco. Our tiny house doesn’t have a dining room, and our “table for two” is never large enough for the number of people eating on any given day. So we take it outside.
Eating outside is wonderful but has some drawbacks; like keeping hot things hot. This is why I shift my cooking to things that are best served at ambient temperature. Unless we have cocktails prior to dinner; because if we have cocktails, then no one really notices that the steak is a bit cold.
One of my favorite dishes is this artichoke stuffed artichoke salad. It is very simple, and is a wonderful way to use up those half-full jars of pickled and marinated veggies in your fridge.
-Wash and trim artichokes and place them in either a steamer or a pan/pot of water with a lemon or two squeezed in it. Don’t fully immerse the artichokes, but use enough water that it won’t evaporate completely before the artichokes are cooked. Place on medium heat and cook covered until you can easily pull a leaf off. Remove from heat, drain and let cool.
-Cut the artichoke in half and use a spoon to remove and discard the choke {the part that has those hairy bits}. Lay the artichoke halves on a platter face up {or alternatively, you can brush with oil and char on the grill, then place on a platter}. Dress with a bit of your favorite vinegar and olive oil. Set aside
-In a large bowl combine your salad ingredients. I like to use, canned artichoke hearts, tomatoes, roasted peppers,red onion, celery, olives, fresh bell peppers, and any cooked rice or barley or grain I have in the fridge. You can use virtually anything you have hanging in the fridge or pantry. Toss together with oil, vinegar, salt and pepper and place a generous scoop into each artichoke half.
-Serve cold or room temperature
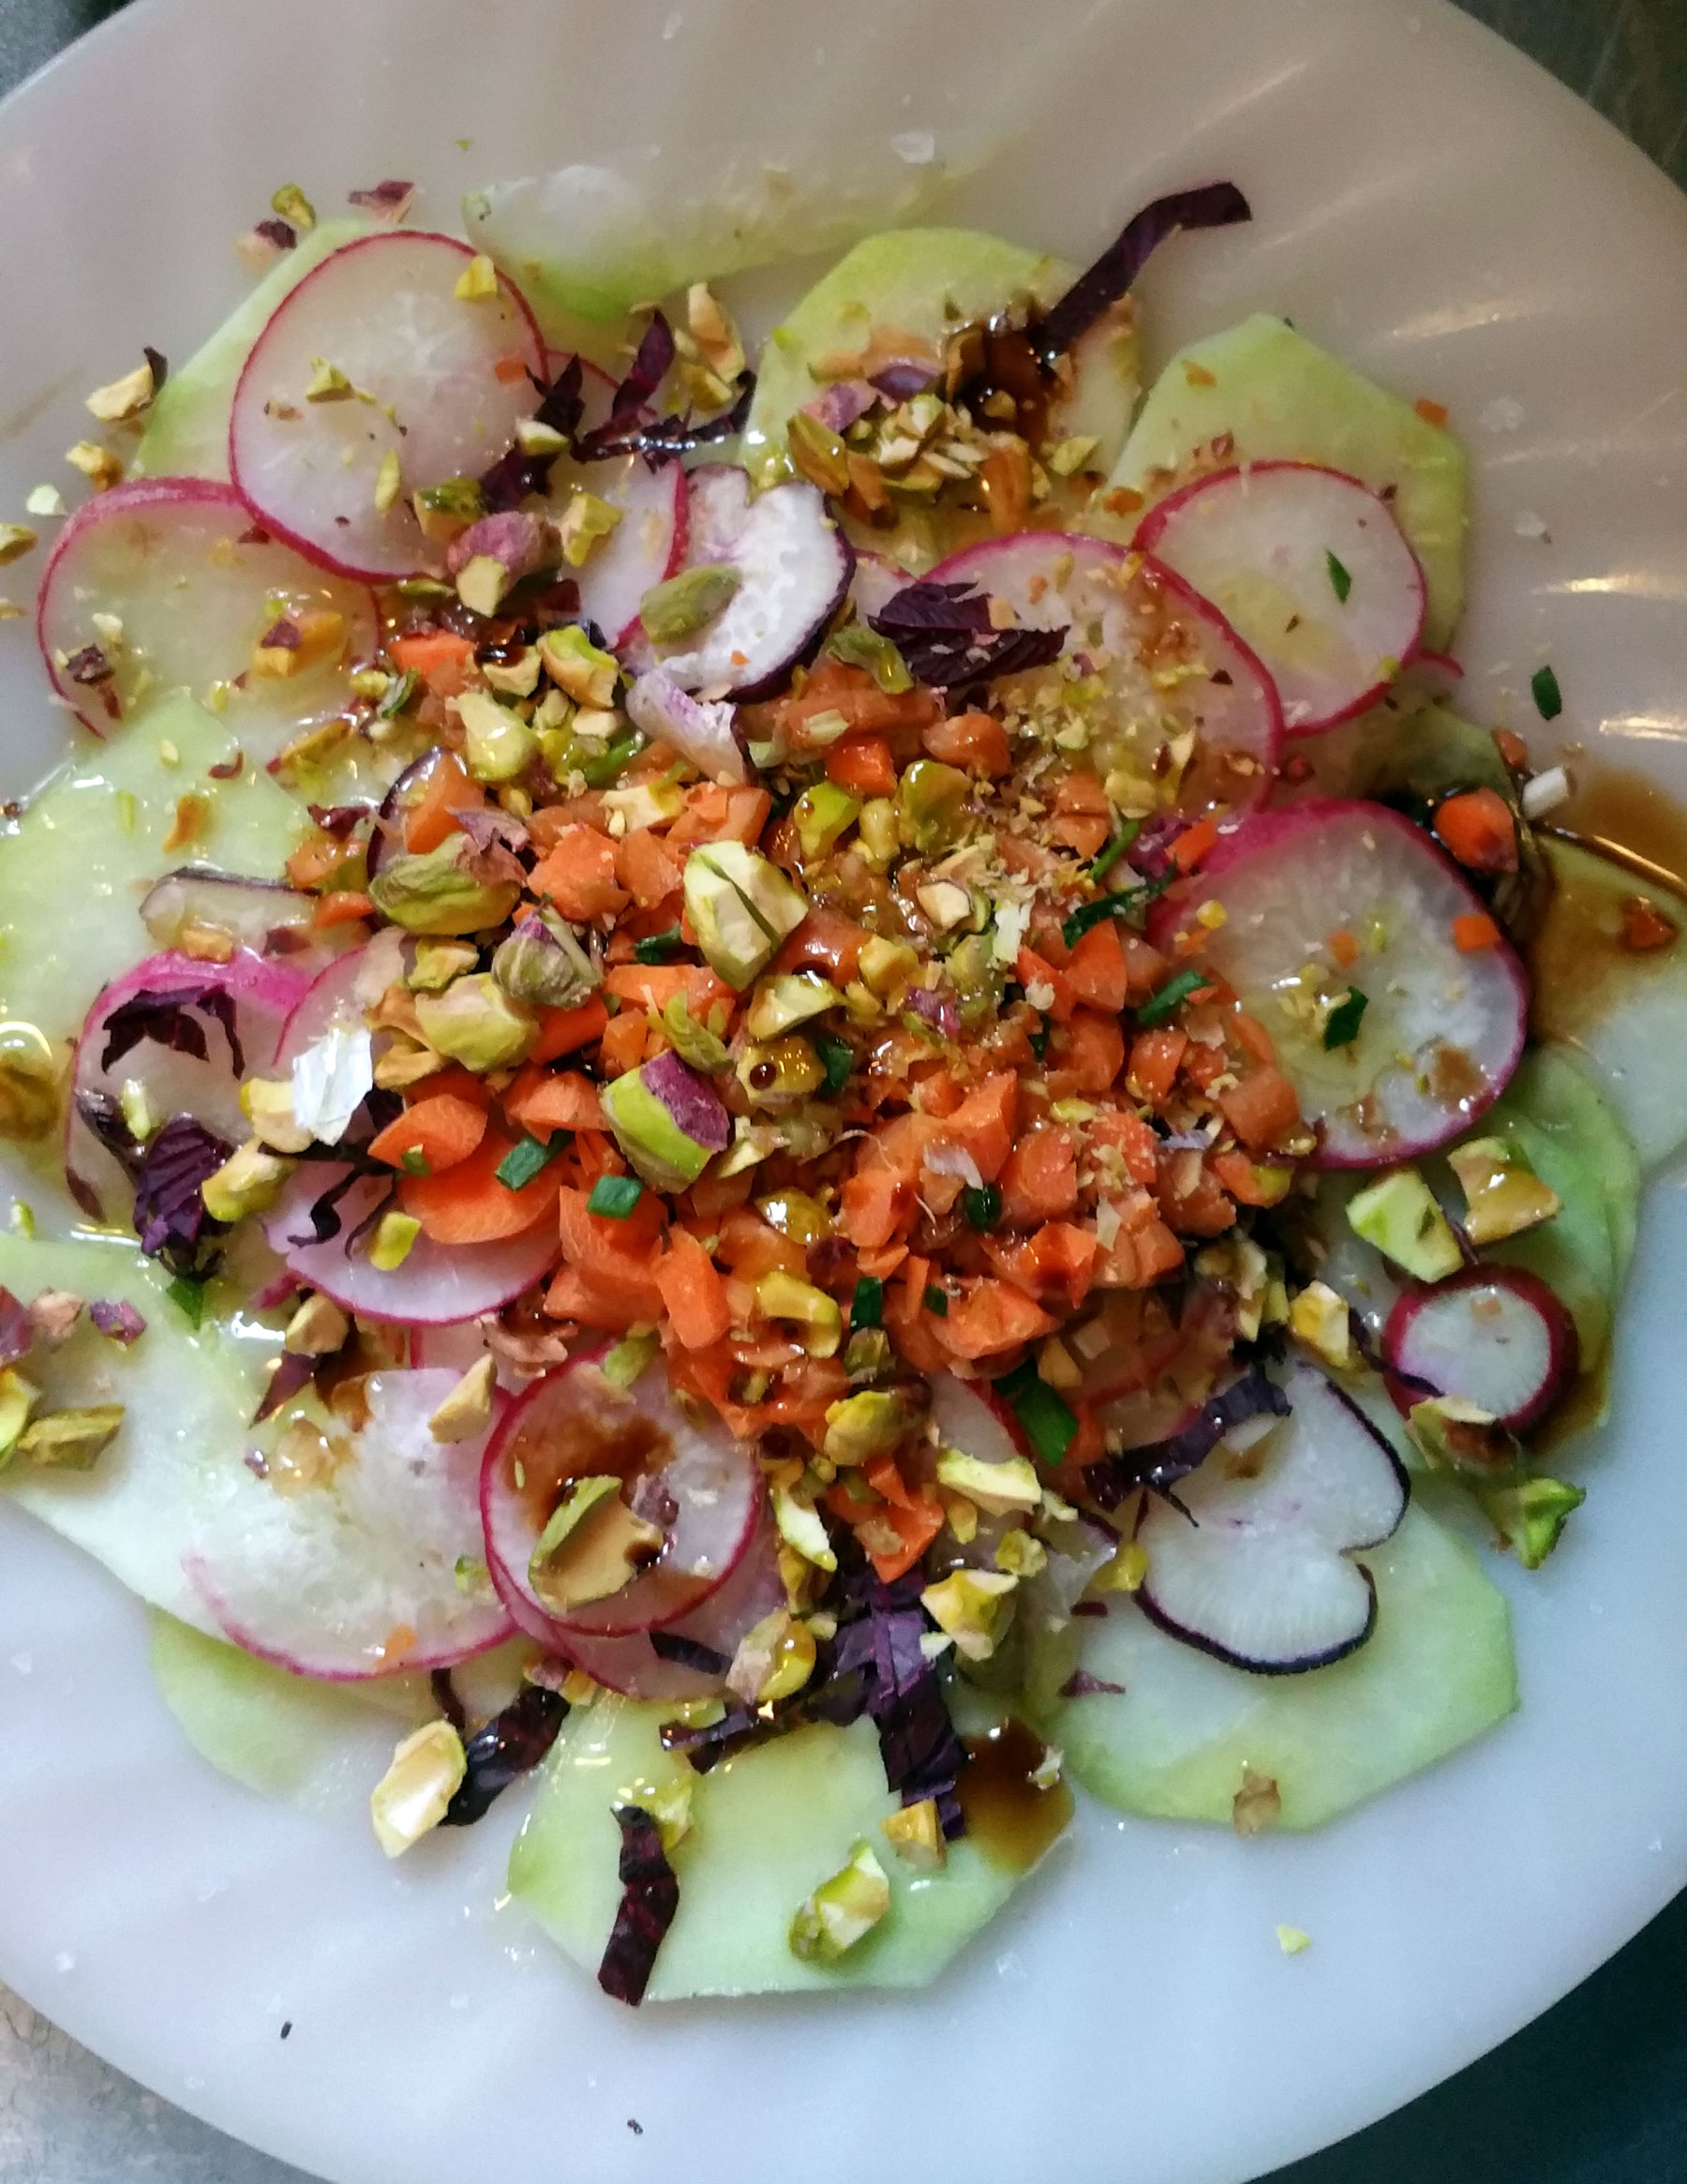
Kohlrabi Crunch Salad
On May 15, 2015 by sixtyacrebakerWe have a lot of kohlrabi in our garden this spring. I am trying to remember to replant each time I pull one from its bed. I think kohlrabi looks like it tastes bad. Let me finish… It doesn’t look tasty. It looks other-worldly and not in a good way. To me, that is. To me, it looks like eating it could be punishment. Which is exactly why, we are taught not to “judge a book by its cover” Kohlrabi just might be one of the most versatile and delicious vegetables in the garden. Raw, it tastes a bit like a tender stem of broccoli. It doesn’t have a bite to it at all, it is quite sweet. I like to slice it very thin with a knife…I only pull the mandolin out for big jobs…and pair with other tasty treats from the garden. For this composed salad, I went with goodies that are just beginning to pop up in my spring garden. The secret is to use what you have on hand…but stick with the single texture of crisp. This salad is meant to be eaten chilled.
Kohlrabi Crunch Salad
2 servings
1 kholrabi bulb; peeled and thinly sliced
3-4 radish; thinly sliced
1 small carrot; finely diced
1 green onion, finely diced
4-5 tender amaranth leaves (i know that these are not easily accessible. substitute fresh mint, fresh basil, or any colorful and flavorful tender lettuce leaves); tear or chiffonade
10-12 pistachio nuts; crudely chopped
sea salt
black pepper
olive oil
aged balsamic vinegar (can substitute regular or any sweet vinegar you may have on hand)
Arrange kohlrabi and radish on platter. Mix the carrot and green onion together and place on top of the kohlrabi/radish layers. Sprinkle amaranth (or chosen herb) around salad. Do the same with pistachio nuts. Sprinkle a bit of sea salt on top. Cover and chill until ready to serve. Just before serving. Drizzle with a mild to medium spiced olive oil and then add your sweet vinegar sparingly. Finish with a bit more sea salt
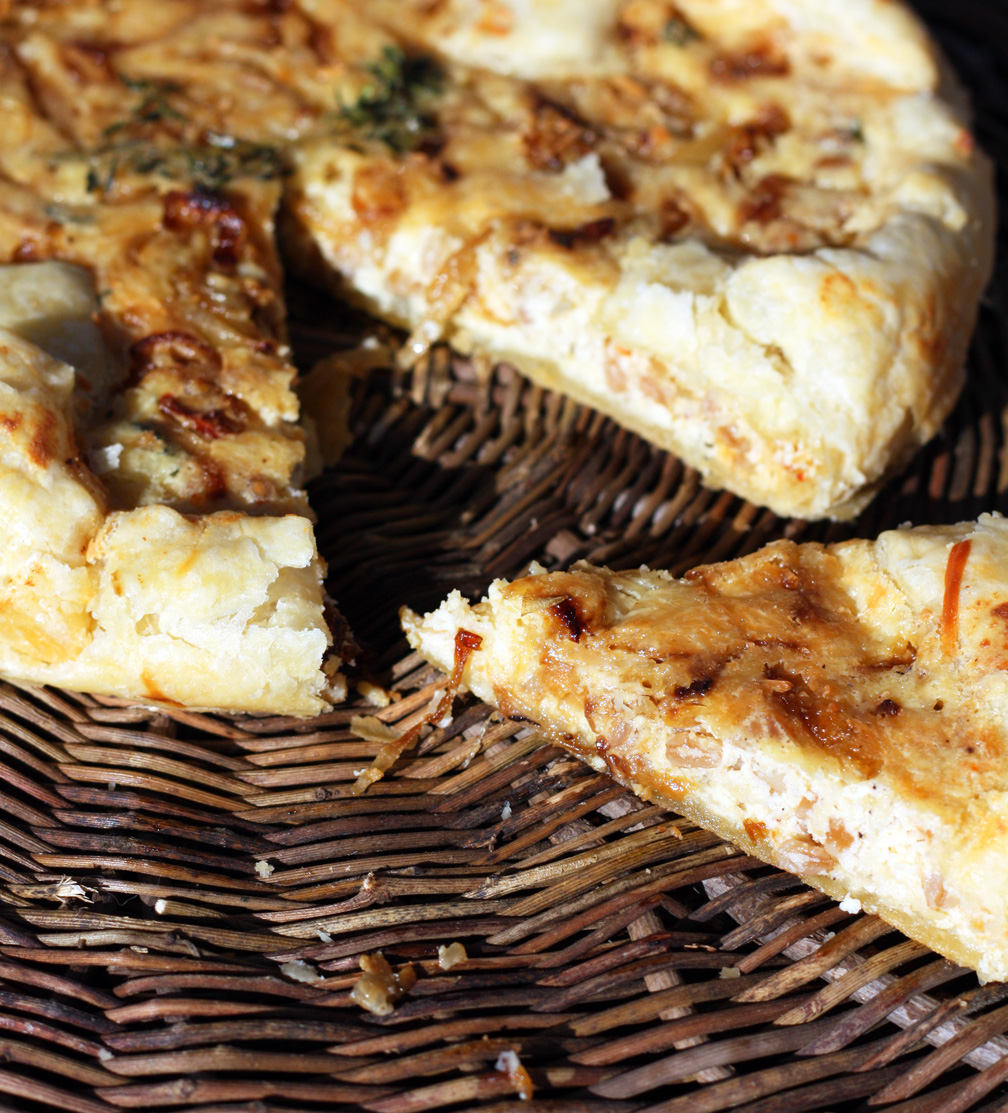
Farro Crostata
On April 6, 2013 by sixtyacrebakerAs spring arrives so does my realization that i have been tucking into thick suppers of roasts and shanks, for months. With the promise of long days and evenings of light, my desires change. I begin to crave hearty vegetarian suppers. When i was offered the opportunity to try Tuscan Fields Organic Farro, I jumped at the chance. I enjoy the meaty texture and nutty flavor of farro, using it mostly in soups and summer salads. However, for this recipe, I took inspiration from a classic and favorite Italian Easter Pie.
Substituting savory elements, for sugar and fruits, this farro pie is lovely as a simple supper. Eat it by itself or paired with a leafy salad.
Farro Crostata
1/2 cup onion–thinly sliced
1/4 cup onion–finely chopped
1 clove garlic–finely chopped
1/2 tsp fresh or 1/4 tsp dried thyme
1/2 cup organic farro alle verdure by Tuscan Fields -cooked
1/2 cup ricotta cheese
2 extra large eggs
1/2 cup grated parmesan (+more for topping)
generous pinch kosher salt
1/4 tsp freshly ground black pepper
1/4 cup cream
1/8 tsp freshly grated nutmeg
olive oil
1 sheet puff pastry
Pour enough olive oil in the bottom of a skillet to just cover the bottom. Toss in thinly sliced onions and over low heat, slowly caramelize. If you find that they are starting to cook to quickly, add a couple of splashed of hot water to slow down the cooking. Once fully caramelized (about 20 minutes), remove from pan and reserve. Meanwhile, whisk together the farro, ricotta, eggs, parmesan, salt pepper, and nutmeg in a large bowl. Using the same skillet in which you caramelized the onions, without washing, add a tiny bit of olive oil (1 tsp) and over low heat, saute the chopped onion, garlic and thyme just until the onion becomes translucent–keep from browning. Pour in the cream, use a spoon to scrape up the bits from the bottom of the pan. Allow the cream to come to a simmer, then slowly stir into the farro and ricotta mixture. Place your puff pastry on a cookie sheet or in a pie tin. It is not necessary to shape it into a circle, if it is square. Gently spoon the farro mixture into the center of the pastry, allowing it to naturally move towards the edges. Allow for at least 2″ from the mixture to the edge of the pastry. scatter the caramelized onions on top and sprinkle with additional parmesan cheese. Fold the pastry ends towards the center, overlapping itself and the farro mixture as necessary to keep the contents within the confines of the pastry. Alternatively, you can line a pastry tin with puff pastry and simply fill with the farro custard. Bake in a preheated 350F oven for 30-40 minutes. After 25 minutes keep a watchful eye that the custard is not “souffleing”–you do not want to over cook this, as it will dry it out and it will taste a bit eggy. This crostata is meant to be creamy. Serve warm or room temperature.
*i received several samples of Farro from Tuscan Fields, free of charge, to utilize in recipe experimentation.
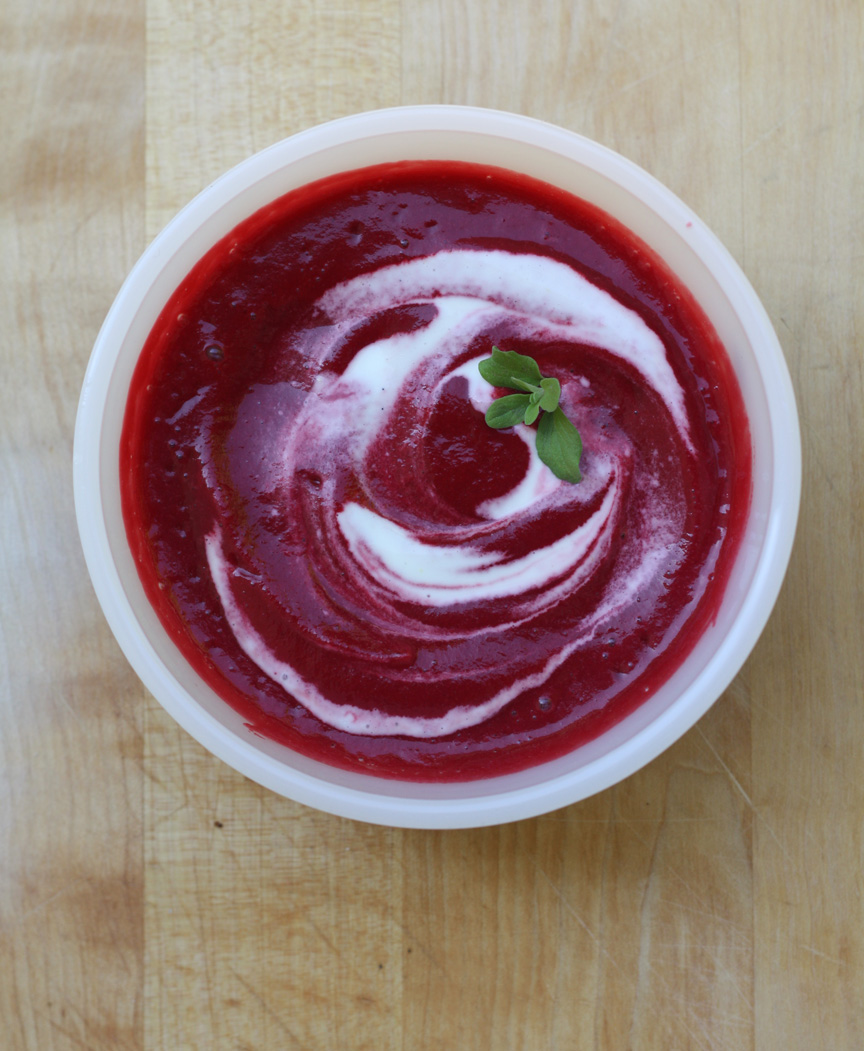
Roasted Beet Soup
On January 19, 2013 by sixtyacrebakerI love borscht. Really i do. Especially on chilly nights when stick to your ribs is a necessity. Sometimes, however, I like my beet soup to be rich and creamy without the meatiness of a borscht. That is when I make this. It is vegetarian vegan if you don’t add the creme fraiche & butter. Light in heft, but not in flavor.
Roasted Beet Soup
1 lb beets-peeled
olive oil
2 leeks–white and light green only–cleaned and cut in half
2 cloves garlic–peeled
2 sprigs fresh thyme
1 bay leaf
4 cups vegetable broth (or water)
juice of 1/2 lemon + 1 tsp finely grated zest
knob of butter (optional)
1/4 tsp white pepper to taste (or more to taste)
salt to taste
serve with creme fraiche
Preheat the oven to 350F. Fill a roasting pan with the beets, leeks and whole garlic cloves. Cover lightly in olive oil and a bit of kosher salt. Toss to make sure the vegetables are all lightly coated in the oil. Roast until fork tender (about 1 hour). Allow the vegetables to cool slightly and then cut into medium size pieces (1 1/2-2″). Toss the vegetables (beets, leeks, garlic), along with any pan juices into a stock pot. Add bay leaf, thyme, lemon juice, lemon zest and cover with broth. Gently simmer for 25-30 minutes or until the vegetables are very tender. Remove the bay leaf and the thyme stalk. Toss in butter (if using) working in batches, whirl the soup in a blender or food processor, until smooth. If it becomes too thick, add a bit more broth (or water). Pour into clean stockpot as your batches reach your desired consistency. If you wish for smooth and silky soup, push the blended soup through a fine sieve. Add pepper and taste for seasoning. Serve hot with a dollop of creme fraiche stirred through.
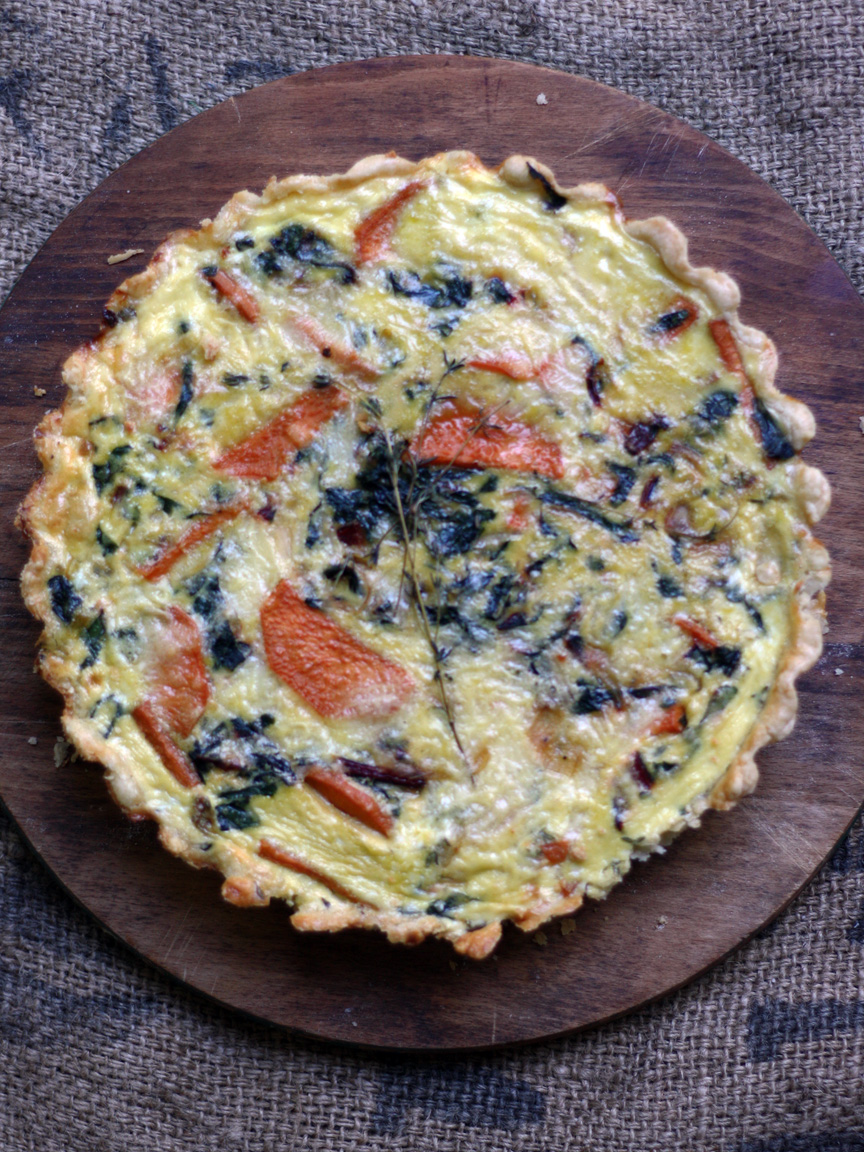
Sweet Potato and Swiss Chard Tart
On October 21, 2012 by sixtyacrebakerI was able to pick up swiss chard, for a song, at this week’s market. Now, creating meals around this favorite green, has been my charge. This morning I was longing for the buttery crust of pie with the wholesome chew
of comfort. I threw together this tart in a jiff, simply using larder staples.
Sweet Potato and Swiss Chard Tart
1 pie crust–press in to an 8-9″ tart pan
1 medium sweet potato–1/4″ slice and halved
1/2 onion–halved and thinly sliced
2 cloves garlic–finely chopped
1 Tbs (about) olive oil
1 bunch swiss chard–ribs removed and chopped into thin ribbons
generous pinch salt and pepper
generous pinch freshly ground nutmeg (or small pinch of dried)
6 large eggs
1/4 cup plain yogurt
2 Tbs grated parmesan
2 stems thyme–stems removed (or 1/4 tsp dried)
1/2 cup grated cheese (asiago,white cheddar, provolone, or jack)
Preheat oven to 375F. Blind bake the crust for about 20 minutes. When you remove the weights, you will fill with the custard and place back in the oven to continue baking. Heat a large skillet over low heat. Pour in enough olive oil to just coat the bottom of the pan. Toss in the potatoes and onions. Cook until the potato and onions begin to soften. You are not frying for color, you are softening the vegetables. Toss in the garlic and swiss chard and continue on low-stirring occasionally) until the chard is droopy and has cast off some moisture. Do not let the garlic burn. Season with salt and pepper and nutmeg. Pour into the par-baked crust and spread evenly to cover the entire bottom. Gently whisk the eggs, yogurt, thyme and parmesan together in a bowl. You want to incorporate the yogurt (eliminating large lumps) without incorporating too much air. Pour over the vegetables. Reduce oven heat to 350F and place the tart on a sheet pan and then in oven. Bake for approximately 30 minutes, or until the eggs do not jiggle when you gently tap the pan, and the crust is golden brown.
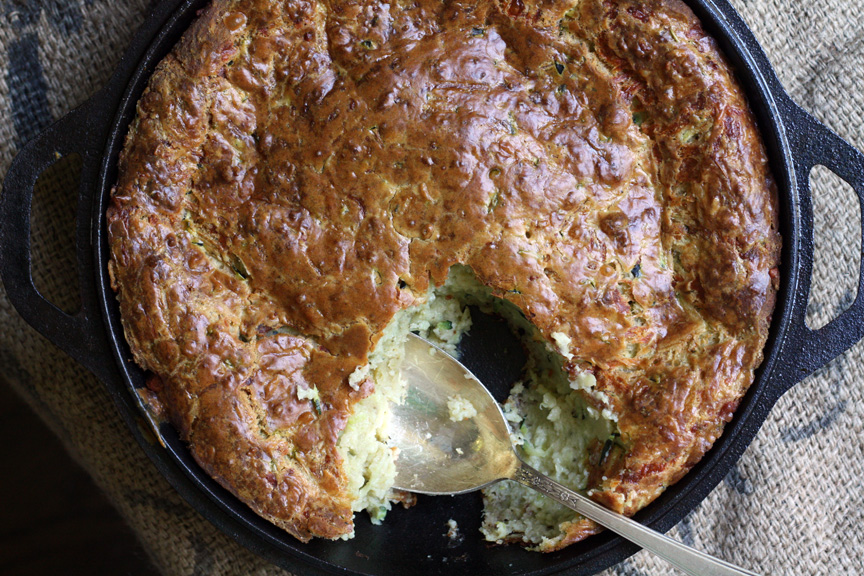
Zucchini-Chevre Spoon Bread
On October 4, 2012 by sixtyacrebakerA few days back; Mike, fresh from visiting our long neglected garden presented me with an enormous zucchini. Confession I sorta only grow zucchini for flowers. Occasionally, a few squash survive. When they do grow this large, I use them for bread. Sometimes sweet, sometimes savory. This spoon bread is a great side dish. It also rocks, scooped warm and soft, as a bed for caramelized onions, sunny side up eggs and crispy bacon. Best.Breakfast.Ever.
Zucchini Chevre Spoon Bread
4 large eggs
6 oz olive oil
1 tsp kosher salt
1/2 cup chevre
1/2 tsp freshly grated pepper
1 Tbs honey
1/2 tsp garlic powder
1 tsp fresh or 1/2 tsp dried thyme
3/4 tsp baking soda
1/2 tsp baking powder
2 cups all purpose flour
1 lb (about 3 cups) grated zucchini
1 cup grated cheese (mix of asiago, parmesan and provolone)*
*use your favorite flavorful cheese…if you use a salty cheese, modify your salt to 1/2 tsp
Whisk together the flour, baking powder and baking soda in a bowl, set aside. In a mixer fitted with paddle attachment, beat the eggs and olive oil until pale (about 5 minutes). Add the salt, chevre, pepper, honey garlic powder and thyme. Mix for about another minute at as high speed as you can without splashing. STIR in the flour until fully incorporated, then stir in the zucchini and cheese. Bake at 375F in an 9″ buttered cake tin or cast iron skillet. Bake for about 45-50 minutes. This is a spoon bread, so it will be soft, but should not be jiggly. It will set as it cools as well. Serve warm.
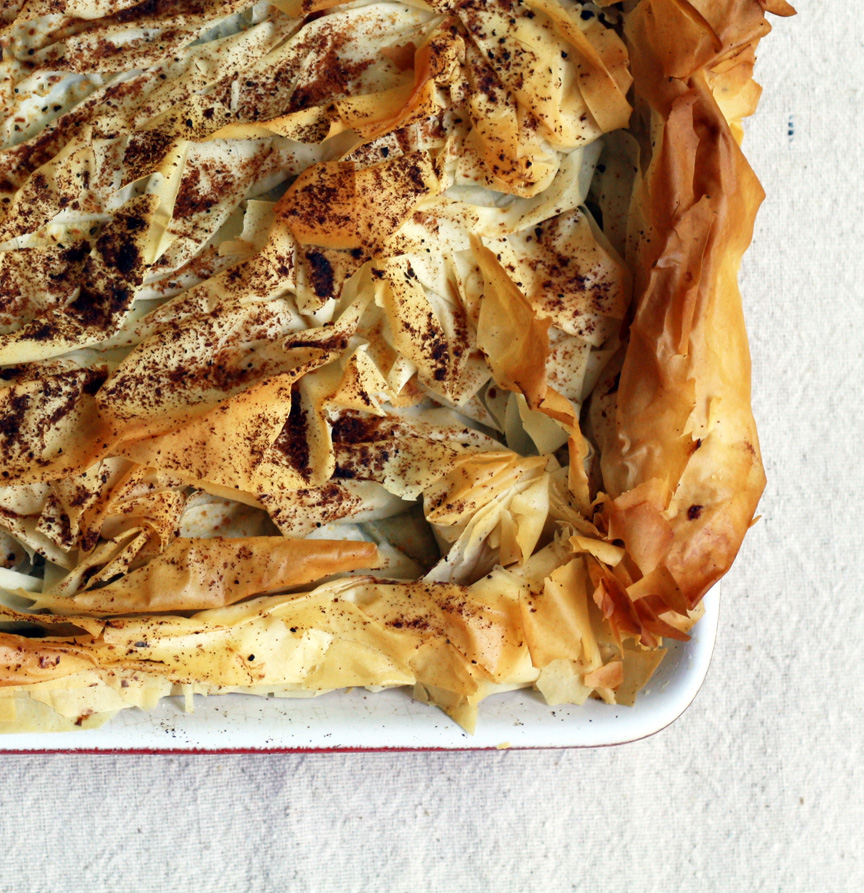
Chard & Ricotta Pie
On July 29, 2012 by sixtyacrebakerWhen we are up at the cabin, I don’t always have a full larder. I do however, have a garden and a few cheats in the freezer. This invariably leads to simple and creative dinners. I was able to whip this up in a snap. Mostly because, our garden overflows with chard.
Chard and Ricotta Pie
10 sheets filo dough
olive oil
grated parmesan
1 garlic clove–finely chopped
1/2 medium onion–finely chopped
2 Tbs olive oil
1 bunch (about 12 large leaves/4 cups chopped)–chopped–discarding stems
1 cup ricotta cheese
1/4 cup grated parmesan
2 eggs
1 tsp lemon juice
1/4 tsp red pepper flakes
1/4 tsp freshly grated parmesan
a few turns of the pepper-mill
Use an 8×10 pan. Layer the filo by brushing each sheet with olive oil, and a light sprinkle of parmesan cheese. The bottom layer should be 6 sheets. Trim the ends and set aside. In a large skillet, heat the olive oil on low–toss in the garlic and onion. cook just until the onions begin to sweat and turn translucent. Do not allow the garlic to brown. Toss in the chard and allow to wilt, giving a good stir to evenly cook. After about 5 minutes, toss in about 1/4 cup of water and cover. Allow the chard to get nice and soft. allow to cool slightly. strain off the liquid and place in a bowl. add the ricotta, parmesan, lemon juice, red pepper flakes, and pepper.
evenly spread into the prepared filo crust. Take the remaining 4 leaves of filo one by one and scrunch them in a loose accordion. Place on top of the spinach layer, making sure to cover the entire top of the pie. Drizzle with olive oil and sprinkle a bit more cheese.
Bake at 375F for about 30-35 minutes. You will look for the filo to be nice and crispy. Serve warm or room temperature. This is very easy to crisp up in the oven for a “next-day” treat!
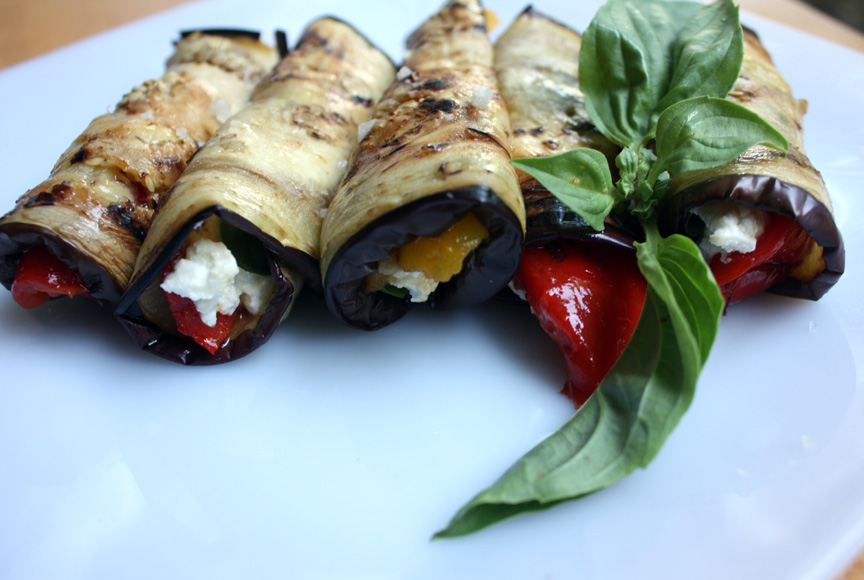
Eggplant Involtini
On July 7, 2012 by sixtyacrebakerWith the sun low and a slight breeze cooling the warm air, summer evenings are ripe for a picnic. We like to hitch the dogs, grab a well worn blanket, load a basket of tidbits and head out to: our garden, the beach, a park, a concert, or sometimes just the porch. A favorite tidbit, this time of year are these.
Eggplant Involtini
eggplant
roasted peppers
fresh basil leaves
soft goat cheese
2 cloves garlic-peeled and smashed
1/2 cup olive oil
salt & pepper
Place the olive oil smashed garlic in a small saucepan and heat to warm. this process is to simply infuse the garlic flavor into the oil. Set aside and allow to infuse for an hour. Remove the garlic and store extra oil in the refrigerator. Slice the eggplant into slices no thicker than 1/4″. Layer slices between paper towels and let dry out for several hours or overnight. Heat a large skillet over medium heat. In batches, place the eggplant in the skillet. do not use oil, you will be dry frying. Turn when soft and brown and brown the second side. Remove from heat and place on plate and allow to cool to room temperature. Once cool, take a slice of eggplant and brush the top with the garlic oil to coat, but not saturate. Place a piece of roasted pepper across the middle, add a generous dollop of goat cheese. Give a quick sprinkle of salt and pepper, and top with a basil leaf. Roll overlapping the eggplant ends and place closure side down. brush a bit more olive oil over the top. Serve cold or room temperature.
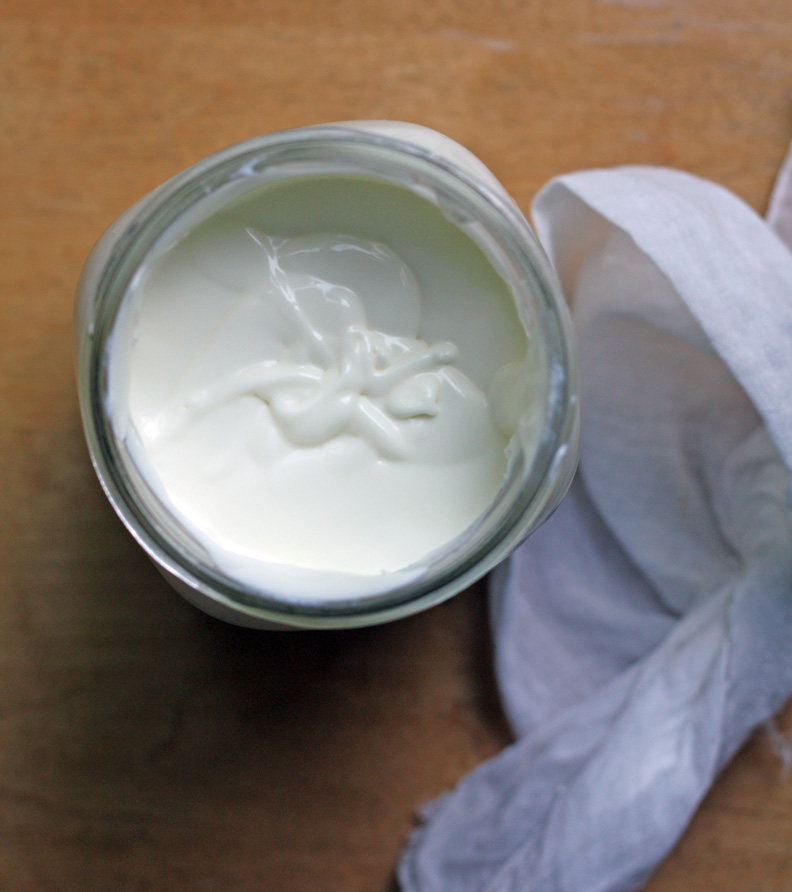
Creme Fraiche
On April 30, 2012 by sixtyacrebakerNo story. No fancy words. Just a simple plea. make.your.own. and use.it.liberally.
Creme Fraiche
3 cups heavy cream–room temperature
6 Tbs plain greek yogurt–room temperature
Stir the yogurt into the heavy cream. Put into a glass jar and cover with a bit of cheesecloth (to keep out bugs and dust, but allow for airflow). Let sit draft free at room temperature for at least 12 hours and up to 36 hours. The longer you leave it out, the more tangy it will become. Give it a good stir, it will thicken right before your eyes. Tightly cover and pop in the fridge.
enjoy where you would otherwise enjoy cream or sour cream
mix with a bit of brown sugar and pour over berries
stir into warm soup
create a calvados cream sauce for roast pork
pour over warm peas, carrots
or
cold beets
just for starters….
